HEATING / AIR CONDITIONING AIR CONDITIONING UNIT REASSEMBLY
PROCEDURE

 87150B
1.INSTALL HEATER RADIATOR ASSEMBLY
Install the heater radiator assembly.
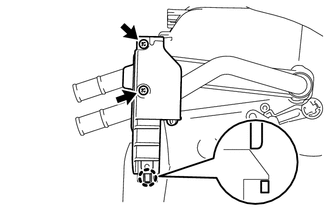
Engage the claw and install the plate cover.
Install the 2 claws.
for RHD:
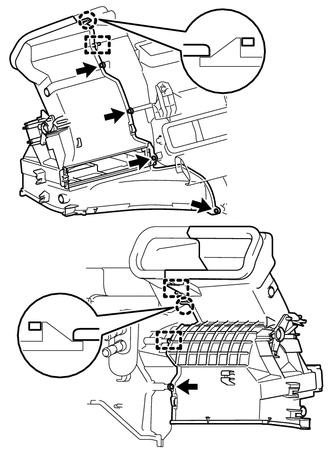
Engage the 2 claws and 3 guides and install the heater cover.
Install the 5 screws.
88625
2.INSTALL NO. 1 COOLER THERMISTOR
88501
3.INSTALL NO. 1 COOLER EVAPORATOR SUB-ASSEMBLY
- HINT:
-
If a new No. 1 cooler evaporator sub-assembly is installed, add compressor oil to the No. 1 cooler evaporator sub-assembly as follows.
- Capacity:
Add 40 cc (1.35 fl. oz.)
- Compressor oil:
ND-OIL 8 or equivalent.
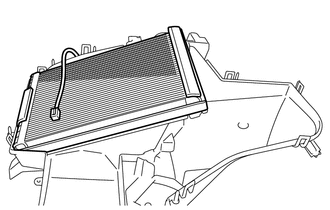
Install the No. 1 cooler evaporator sub-assembly with the No. 1 cooler thermistor.
for LHD:
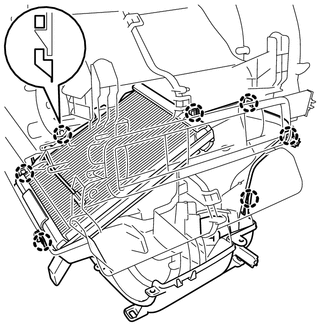
Engage the 7 claws and install the lower heater case.
for RHD:
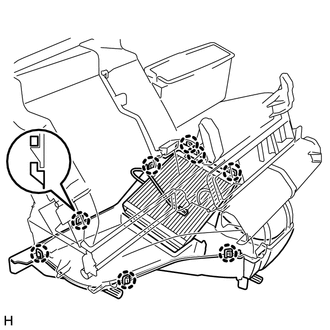
Engage the 8 claws and install the lower heater case.
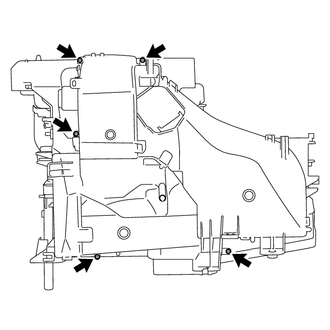
Install the 5 screws.
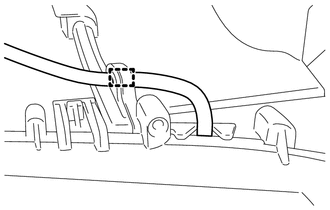
Engage the clamp.
88515
4.INSTALL NO. 1 EXPANSION VALVE
Apply sufficient compressor oil to 2 new O-rings and fitting surfaces of a No. 1 expansion valve.
- Compressor oil:
ND-OIL 8 or equivalent
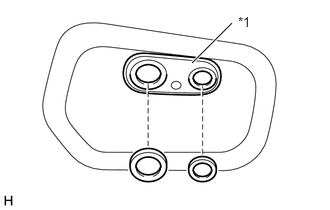
| *1 | No. 1 Cooler Evaporator Sub-assembly |
Install the 2 O-rings onto the No. 1 cooler evaporator sub-assembly.
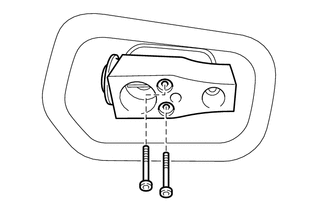
Using a 4 mm hexagon wrench, install the No. 1 expansion valve with the 2 hexagon bolts.
- Torque:
- 3.5 N*m (36 kgf*cm, 31 in.*lbf)
82210K
5.INSTALL AIR CONDITIONING HARNESS ASSEMBLY (for Automatic Air Conditioning System)
for LHD:
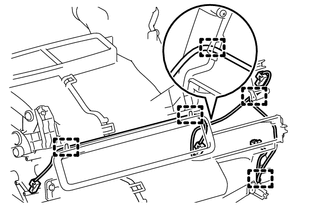
Engage the 5 guides and install the air conditioning harness assembly.
for RHD:
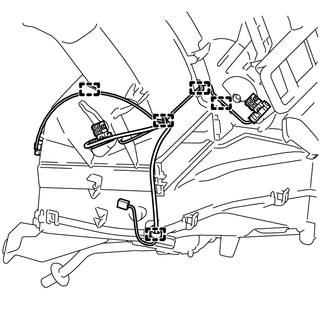
Engage the 5 guides and install the air conditioning harness assembly.
88897U
6.INSTALL ASPIRATOR PIPE (for Automatic Air Conditioning System)
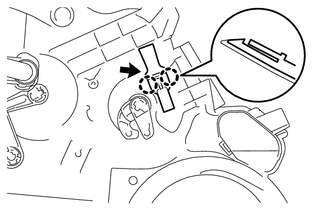
Engage the 2 claws and install the aspirator pipe.
88669E
7.INSTALL AIR HOSE (for Automatic Air Conditioning System)
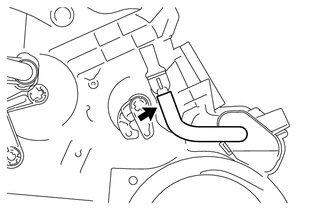
Install the air hose.
87106H
8.INSTALL AIR MIX DAMPER SERVO SUB-ASSEMBLY (for Automatic Air Conditioning System)
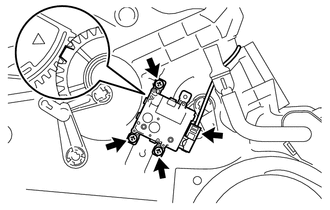
| *a | Reference position |
Align the reference position, and then install the air mix damper servo sub-assembly with the 3 screws.
Connect the connector.
87106J
9.INSTALL MODE DAMPER SERVO SUB-ASSEMBLY (for Automatic Air Conditioning System)
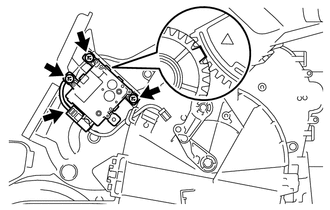
| *a | Reference position |
Align the reference position, and then install the mode damper servo sub-assembly with the 3 screws.
Connect the connector.
87106N
10.INSTALL RECIRCULATION DAMPER SERVO SUB-ASSEMBLY (for Automatic Air Conditioning System)
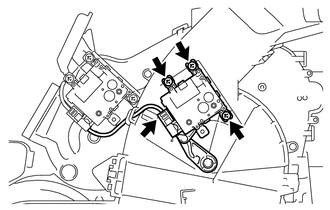
| *a | Reference position |
Align the reference position, and then install the recirculation damper servo sub-assembly with the 3 screws.
Connect the connector.
88539
11.INSTALL NO. 1 COOLER UNIT DRAIN HOSE
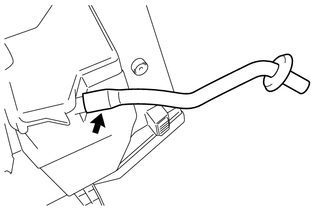
Install the No. 1 cooler unit drain hose.
87139D
12.INSTALL AIR REFINER ELEMENT
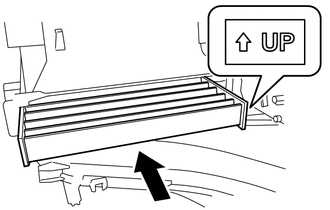
Install the air refiner element.
- NOTICE:
-
Install the air refiner element with its UP marks oriented in the correct direction.
88548B
13.INSTALL AIR FILTER CASE
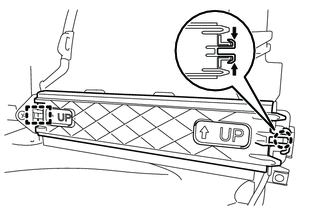
Engage the claw and guide to install the air filter case.
- NOTICE:
-
Install the air filter case with its UP mark oriented in the correct direction.
87103B
14.INSTALL BLOWER MOTOR WITH FAN SUB-ASSEMBLY
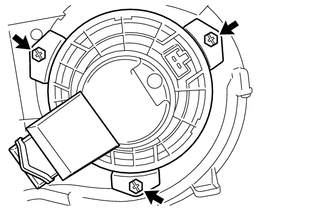
Install the blower motor with fan sub-assembly with the 3 screws.