1NZ-FE FUEL FUEL TANK(for TMT Made) REMOVAL
PROCEDURE

 1. PRECAUTION
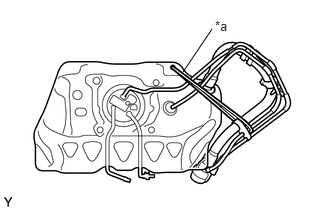
| *a | Cord |
When removing and storing the fuel tank assembly, arrange the inlet hose as shown in the illustration, and secure the fuel tank assembly using a cord or similar.
- NOTICE:
-
Depending on the arrangement of the inlet hose during storage, the inlet hose and rear suspension may interfere and cause fuel leakage.
77020A
2.REMOVE FUEL SUCTION TUBE WITH PUMP AND GAUGE ASSEMBLY
3.DRAIN FUEL
77310A
4.REMOVE FUEL TANK CAP ASSEMBLY
5.REMOVE REAR WHEEL LH
58910C
6.REMOVE REAR CONSOLE BOX ASSEMBLY (w/ Console Box Lid)
58910C
7.REMOVE REAR CONSOLE BOX ASSEMBLY (w/o Console Box Lid)
57533B
8.REMOVE FRONT FLOOR CENTER BRACE
17410
9.REMOVE FRONT EXHAUST PIPE ASSEMBLY
58156
10.REMOVE NO. 4 FRONT FLOOR HEAT INSULATOR
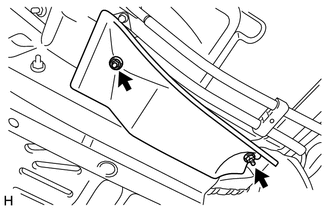
Remove the 2 nuts and No. 4 front floor heat insulator from the vehicle.
77641A
11.REMOVE NO. 1 FUEL TANK PROTECTOR
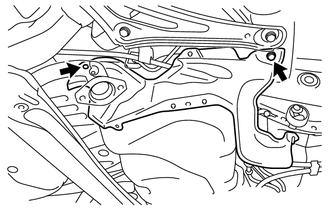
Remove the bolt, clip and No. 1 fuel tank protector from the vehicle.
46420
12.SEPARATE NO. 2 PARKING BRAKE CABLE ASSEMBLY
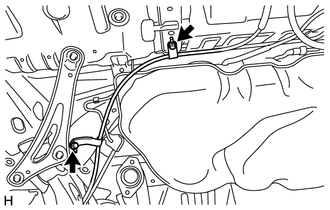
Remove the 2 bolts to separate the No. 2 parking brake cable assembly from the vehicle.
77028F
13.DISCONNECT NO. 2 FUEL EMISSION TUBE SUB-ASSEMBLY
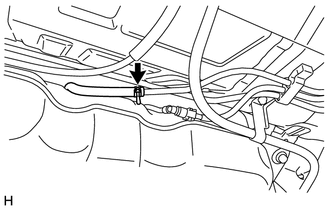
Loosen the hose clip and disconnect the No. 2 fuel emission tube sub-assembly from the fuel tank to canister tube.
77209F
14.DISCONNECT FUEL TANK MAIN TUBE SUB-ASSEMBLY
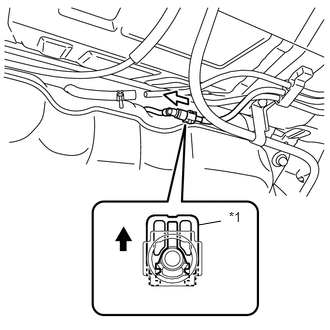
| *1 | Retainer |

|
Pull |

|
Pull Out |
Pull the tabs of the fuel tank main tube sub-assembly retainer, and pull out the fuel tube connector from the fuel main tube.
- NOTICE:
- ·
If the fuel tube connector and fuel pipe are stuck together, push in and pull out the fuel tube connector while squeezing the fuel main tube to release the connection, and then disconnect the fuel tube connector.
·Clean away any dirt or foreign matter from the fuel tube connector before performing the operation.
·The fuel tube connector and fuel main tube are sealed by O-ring, so be careful to prevent damage to and foreign matter sticking to the contact surfaces.
·Do not use any tools.
·After disconnecting the fuel tube connector, check that there is no foreign matter on the seal surface of the fuel main tube.
·After disconnecting the fuel tank main tube sub-assembly, protect the contact surfaces by covering them with a plastic bag.
·Do not bend or twist the tubes.
77100
15.REMOVE FUEL TANK ASSEMBLY
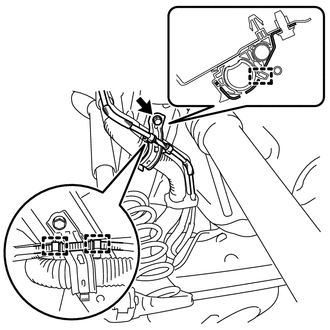
Disengage the 2 clamps to separate the No. 6 fuel tank breather tube.
Remove the bolt to separate the fuel tank filler pipe flange plate from the vehicle.
Disengage the clamp to remove the fuel tank filler pipe flange plate from the No. 3 fuel tank filler pipe support.
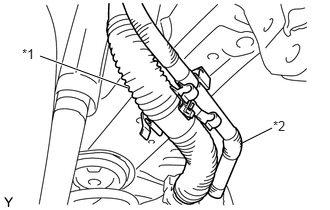
| *1 | Fuel Tank Filler Pipe Sub-assembly |
| *2 | No. 1 Fuel Tank Breather Tube |
Separate the fuel tank filler pipe sub-assembly and No. 1 fuel tank breather tube from the No. 3 fuel tank filler pipe support.
Using an engine lifter, support the fuel tank assembly.
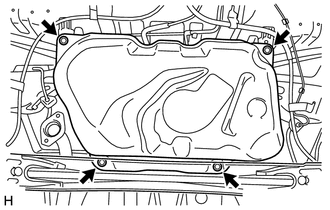
Remove the 4 bolts and fuel tank assembly from the vehicle.
- NOTICE:
-
Make sure that the fuel tank assembly does not fall.
77209F
16.REMOVE FUEL TANK MAIN TUBE SUB-ASSEMBLY
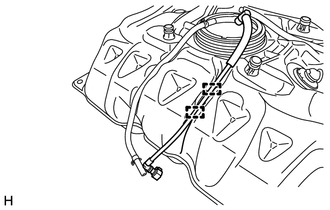
Disengage the 2 clamps to remove the fuel tank main tube sub-assembly from the fuel tank assembly.
77028F
17.REMOVE NO. 2 FUEL EMISSION TUBE SUB-ASSEMBLY
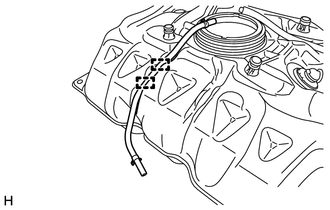
Disengage the 2 clamps to remove the No. 2 fuel emission tube sub-assembly from the fuel tank assembly.
77701W
18.REMOVE NO. 1 CANISTER OUTLET HOSE SUB-ASSEMBLY
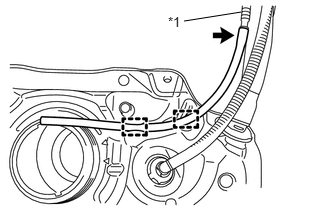
| *1 | No. 6 Fuel Tank Breather Tube |
Disengage the 2 clamps to remove the No. 1 canister outlet hose sub-assembly from the fuel tank assembly.
Disconnect the No. 1 canister outlet hose sub-assembly from the No. 6 fuel tank breather tube.
77217C
19.REMOVE NO. 2 FUEL TANK FILLER PIPE SUPPORT
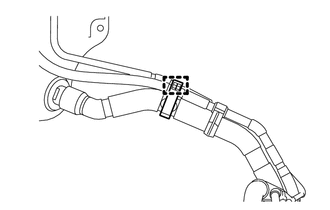
Disengage the clamp to remove the No. 2 fuel tank filler pipe support from the fuel tank filler pipe assembly.
77216A
20.REMOVE NO. 1 FUEL TANK FILLER PIPE SUPPORT
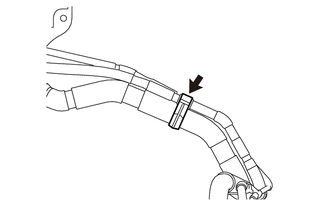
Remove the No. 1 fuel tank filler pipe support from the fuel tank filler pipe assembly.
77218A
21.REMOVE NO. 3 FUEL TANK FILLER PIPE SUPPORT
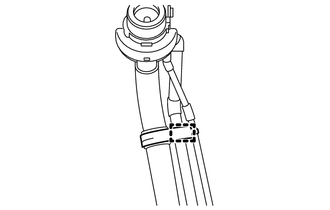
Disengage the clamp to remove the No. 3 fuel tank filler pipe support from the fuel tank filler pipe assembly.