DOOR / HATCH BACK DOOR ADJUSTMENT
CAUTION / NOTICE / HINT
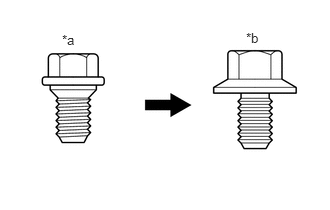
| *a | Centering Bolt |
| *b | Standard Bolt |
- HINT:
- ·
Centering bolts are used to mount the door hinge to the door. The door cannot be adjusted with the centering bolts installed. Substitute the centering bolts with standard bolts when making adjustments.
·Specified torque for standard bolts is shown in the standard bolt chart.
Click hereGeneral>SPECIFICATIONS>STANDARD BOLT>SPECIFIED TORQUE FOR STANDARD BOLTS
PROCEDURE

 67005
1.INSPECT BACK DOOR PANEL SUB-ASSEMBLY
Check that the clearance measurements are within the standard ranges.
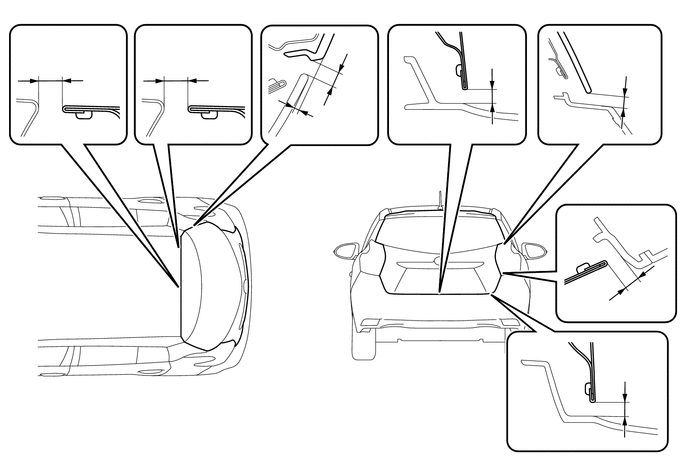
- Standard Clearance:
Area Measurement Area Measurement A 6.0 to 9.0 mm (0.236 to 0.354 in.) B 6.0 to 9.0 mm (0.236 to 0.354 in.) C 3.8 to 7.8 mm (0.150 to 0.307 in.) D 0 to 4.0 mm (0 to 0.157 in.) E 4.0 to 8.0 mm (0.157 to 0.315 in.) F 4.5 to 8.5 mm (0.177 to 0.335 in.) G 4.0 to 7.4 mm (0.157 to 0.291 in.) H 4.0 to 8.0 mm (0.157 to 0.315 in.)
64330
2.REMOVE PACKAGE TRAY TRIM PANEL ASSEMBLY
64711E
3.REMOVE LUGGAGE COMPARTMENT FLOOR MAT
58410B
4.REMOVE DECK BOARD ASSEMBLY
64772
5.REMOVE SPARE WHEEL COVER PAD
64773B
6.REMOVE NO. 2 SPARE WHEEL COVER PAD
64716D
7.REMOVE DECK TRIM REAR COVER
67005
8.ADJUST BACK DOOR PANEL SUB-ASSEMBLY
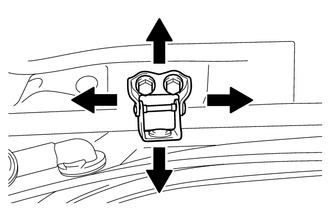
Adjust the door position.
Horizontally and vertically adjust the door by loosening the 4 back door side hinge bolts.
Tighten the 4 back door side hinge bolts after the adjustment.
- Torque:
- 19 N*m (194 kgf*cm, 14 ft.*lbf)
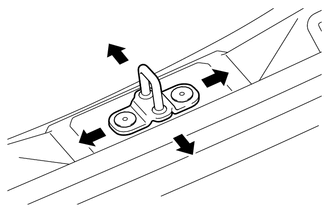
Adjust the striker position.
Using a T40 "TORX" socket wrench, slightly loosen the 2 striker mounting screws.
Using a plastic hammer, hit the striker to adjust its position.
Using a T40 "TORX" socket wrench, tighten the 2 striker mounting screws after the adjustment.
- Torque:
- 23 N*m (235 kgf*cm, 17 ft.*lbf)
64716D
9.INSTALL DECK TRIM REAR COVER
64773B
10.INSTALL NO. 2 SPARE WHEEL COVER PAD
64772
11.INSTALL SPARE WHEEL COVER PAD
58410B
12.INSTALL DECK BOARD ASSEMBLY
64711E
13.INSTALL LUGGAGE COMPARTMENT FLOOR MAT
64330
14.INSTALL PACKAGE TRAY TRIM PANEL ASSEMBLY