1NR-FE ENGINE MECHANICAL CYLINDER HEAD INSPECTION
PROCEDURE

 1.INSPECT CYLINDER HEAD FOR FLATNESS
Using a precision straightedge and feeler gauge, check the surfaces which contact the cylinder block sub-assembly and manifolds for warpage.
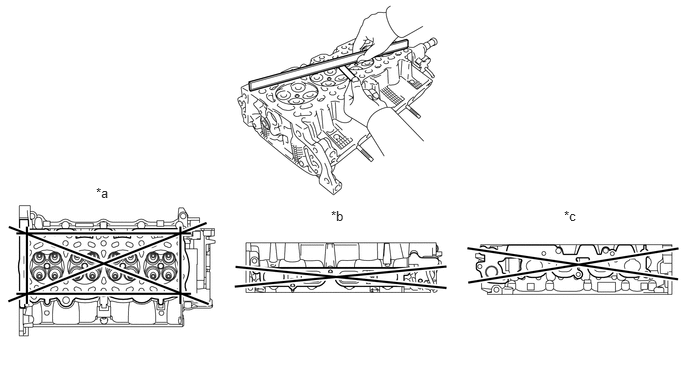
| *a | Cylinder Block Side | *b | Intake Manifold Side |
| *c | Exhaust Manifold Side | - | - |
- Maximum Warpage:
Item Specified Condition Cylinder block side 0.05 mm (0.00197 in.) Intake manifold side 0.10 mm (0.00394 in.) Exhaust manifold side 0.10 mm (0.00394 in.)
If the warpage is greater than the maximum, replace the cylinder head sub-assembly.
2.INSPECT CYLINDER HEAD FOR CRACKS
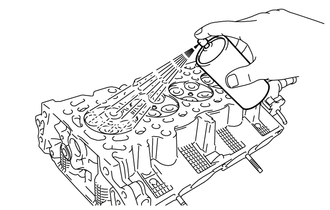
Using a dye penetrant, check the intake ports, exhaust ports and cylinder head sub-assembly surface for cracks.
If cracked, replace the cylinder head sub-assembly.
3.INSPECT VALVE SEATS
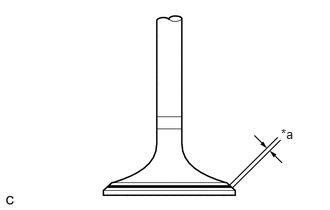
| *a | Width |
Apply a light coat of Prussian blue to the valve face.
Lightly press the valve face against the valve seat.
Check the valve face and valve seat according to the following procedure:
If Prussian blue appears 360° around the valve face, the valve face is concentric. If not, replace the valve.
If Prussian blue appears 360° around the valve seat, the guide and valve face are concentric. If not, resurface the valve seat.
Check that the valve seat contact is in the middle of the valve face with the valve seat width between 1.0 and 1.4 mm (Intake side (0.0394 and 0.0551 in.)).
Check that the valve seat contact is in the middle of the valve face with the valve seat width between 1.0 and 1.4 mm (Exhaust side (0.0394 and 0.0551 in.)).
4.INSPECT CAMSHAFT THRUST CLEARANCE
Install the camshafts.
Click hereEngine / Hybrid System>1NR-FE ENGINE MECHANICAL>CAMSHAFT>INSTALLATION
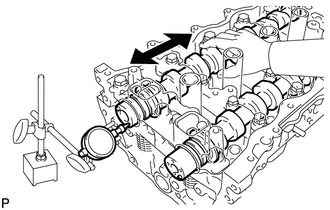
Using a dial indicator, measure the camshaft thrust clearance while moving the camshaft back and forth.
- Standard Thrust Clearance:
Item Specified Condition Camshaft 0.06 to 0.20 mm (0.00237 to 0.00787 in.) No. 2 Camshaft
- Maximum Thrust Clearance:
Item Specified Condition Camshaft 0.215 mm (0.00846 in.) No. 2 Camshaft
If the camshaft thrust clearance is greater than the maximum, replace the camshaft housing sub-assembly. If the thrust surface is damaged, replace the camshaft or No. 2 camshaft.
Remove the camshafts.
Click hereEngine / Hybrid System>1NR-FE ENGINE MECHANICAL>CAMSHAFT>REMOVAL
5.INSPECT CAMSHAFT OIL CLEARANCE
Clean the camshaft bearing caps and camshaft journals.
Place the camshafts on the camshaft housing sub-assembly.
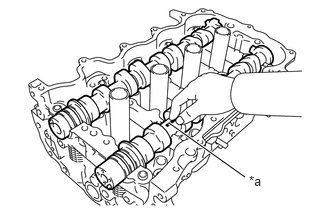
| *a | Plastigage |
Lay a strip of Plastigage across each camshaft journal.
Install the camshaft bearing caps.
Click hereEngine / Hybrid System>1NR-FE ENGINE MECHANICAL>CAMSHAFT>INSTALLATION
- NOTICE:
-
Do not turn the camshafts.
Remove the camshaft bearing caps.
Click hereEngine / Hybrid System>1NR-FE ENGINE MECHANICAL>CAMSHAFT>REMOVAL
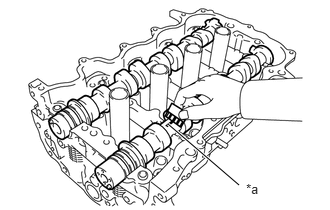
| *a | Plastigage |
Measure the Plastigage at its widest point.
- Standard Oil Clearance:
Item Specified Condition No. 1 Camshaft journal 0.030 to 0.067 mm (0.00119 to 0.00263 in.) Other camshaft journals
- Maximum Oil Clearance:
Item Specified Condition No. 1 Camshaft journal 0.08 mm (0.00315 in.) Other camshaft journals
- NOTICE:
-
Completely remove the Plastigage after the inspection.
If the camshaft oil clearance is greater than the maximum, replace the camshaft or No. 2 camshaft. If necessary, replace the camshaft housing sub-assembly.
6.INSPECT OUTER COMPRESSION SPRING
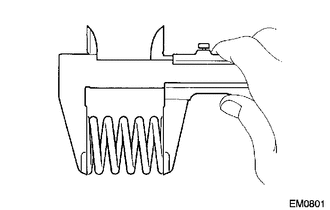
Using a vernier caliper, measure the free length of the outer compression spring.
- Standard free length:
57.13 mm (2.2492 in.)
If the free length is not as specified, replace the outer compression spring.
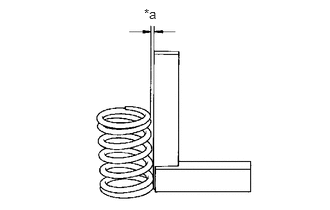
| *a | Deviation |
Using a steel square, measure the deviation of the outer compression spring.
- Maximum deviation:
1.0 mm (0.0394 in.)
If the deviation is greater than the maximum, replace the outer compression spring.
13711
7.INSPECT INTAKE VALVE
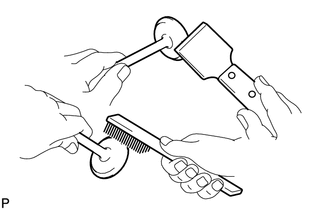
Using a gasket scraper, scrape off any carbon on the intake valve head.
Using a wire brush, thoroughly clean the intake valve.
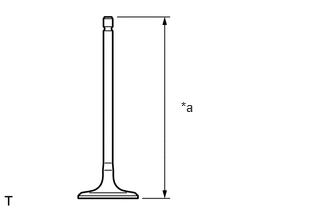
| *a | Overall Length |
Using a vernier caliper, measure the overall length of the intake valve.
- Standard overall length:
103.35 mm (4.0689 in.)
- Minimum overall length:
102.85 mm (4.0492 in.)
If the overall length is less than the minimum, replace the intake valve.
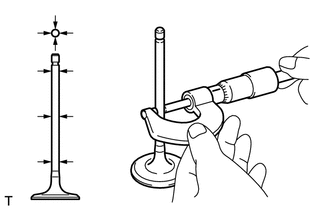
Using a micrometer, measure the diameter of the intake valve stem.
- Standard valve stem diameter:
5.470 to 5.485 mm (0.21536 to 0.21594 in.)
If the valve stem diameter is not as specified, inspect the valve guide bush oil clearance.
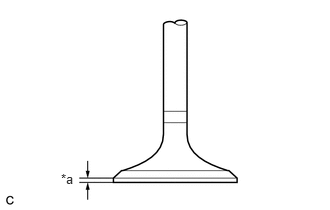
| *a | Margin Thickness |
Using a vernier caliper, measure the intake valve head margin thickness.
- Standard margin thickness:
1.0 mm (0.0394 in.)
- Minimum margin thickness:
0.5 mm (0.0197 in.)
If the margin thickness is less than the minimum, replace the intake valve.
13715
8.INSPECT EXHAUST VALVE
Using a gasket scraper, scrape off any carbon on the exhaust valve head.
Using a wire brush, thoroughly clean the exhaust valve.
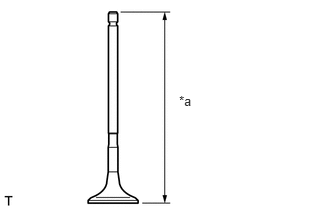
| *a | Overall Length |
Using a vernier caliper, measure the overall length of the exhaust valve.
- Standard overall length:
104.5 mm (4.1142 in.)
- Minimum overall length:
104.0 mm (4.0945 in.)
If the overall length is less than the minimum, replace the exhaust valve.
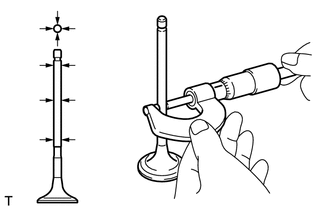
Using a micrometer, measure the diameter of the exhaust valve stem.
- Standard valve stem diameter:
5.465 to 5.480 mm (0.21516 to 0.21574 in.)
If the valve stem diameter is not as specified, inspect the valve guide bush oil clearance.
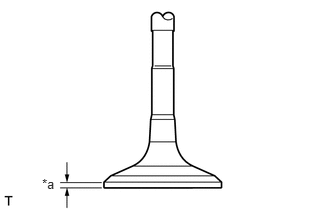
| *a | Margin Thickness |
Using a vernier caliper, measure the exhaust valve head margin thickness.
- Standard margin thickness:
1.15 mm (0.0453 in.)
- Minimum margin thickness:
0.65 mm (0.0256 in.)
If the margin thickness is less than the minimum, replace the exhaust valve.
9.INSPECT VALVE GUIDE BUSH OIL CLEARANCE
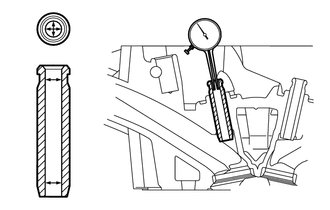
Using a caliper gauge, measure the inside diameter of the valve guide bush.
- Standard bushing inside diameter:
5.51 to 5.53 mm (0.2170 to 0.2177 in.)
Subtract the valve stem diameter measurement from the valve guide bush inside diameter measurement.
- Standard Oil Clearance:
Item Specified Condition Intake 0.025 to 0.060 mm (0.00099 to 0.00236 in.) Exhaust 0.030 to 0.065 mm (0.00119 to 0.00255 in.)
- Maximum Oil Clearance:
Item Specified Condition Intake 0.080 mm (0.00315 in.) Exhaust 0.085 mm (0.00335 in.)
If the oil clearance is greater than the maximum, replace the valve and valve guide bush.