2NR-FE ENGINE MECHANICAL CYLINDER BLOCK DISASSEMBLY
PROCEDURE

 1.INSPECT CONNECTING ROD THRUST CLEARANCE
2.INSPECT CONNECTING ROD OIL CLEARANCE
3.REMOVE PISTON WITH PIN SUB-ASSEMBLY WITH CONNECTING ROD SUB-ASSEMBLY
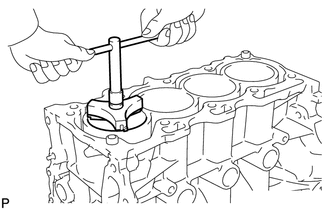
Using a ridge reamer, remove all the carbon from the top of the cylinder.
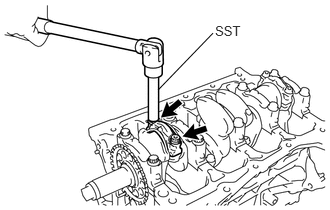
Using SST, uniformly loosen the 2 connecting rod bolts.
- SST
- 09205-16010
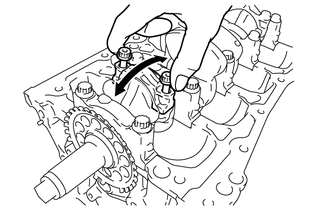
Using the 2 removed connecting rod bolts, remove the connecting rod cap and connecting rod bearing (lower) by wiggling the connecting rod cap back and forth.
- HINT:
-
Keep the connecting rod bearing (lower) inserted in the connecting rod cap.
Push the piston with pin sub-assembly with connecting rod and connecting rod bearing (upper) through the top of the cylinder block sub-assembly.
- NOTICE:
-
Do not disassemble the piston, piston pin and connecting rod. If the piston pin is removed, the piston, piston pin and connecting rod cannot be reused.
- HINT:
- ·
Keep each connecting rod bearing, connecting rod and connecting rod cap as a set.
·Arrange the removed parts in the correct order.
13041
4.REMOVE CONNECTING ROD BEARING
Remove the connecting rod bearings from the connecting rod caps and connecting rods.
- HINT:
-
Arrange the removed parts in the correct order.
13011
5.REMOVE PISTON RING SET
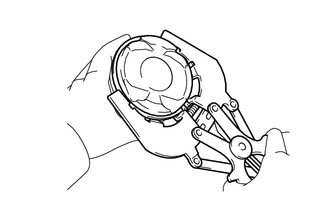
Using a piston ring expander, remove the No. 1 compression ring and No. 2 compression ring.
Remove the 2 side rails and expander spacer by hand.
- HINT:
-
Arrange the removed parts in the correct order.
6.INSPECT CRANKSHAFT THRUST CLEARANCE
7.INSPECT CRANKSHAFT OIL CLEARANCE
13411
8.REMOVE CRANKSHAFT
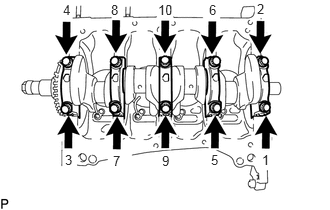
Uniformly loosen and remove the 10 crankshaft bearing cap set bolts in the sequence shown in the illustration.
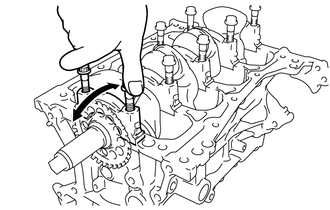
Using the 2 removed crankshaft bearing cap set bolts, remove the 5 crankshaft bearing caps with 5 crankshaft bearings (lower).
- NOTICE:
-
Insert the crankshaft bearing cap set bolts into the crankshaft bearing caps in turn. Ease the crankshaft bearing cap out by gently pulling it up while wiggling it back and forth, as shown in the illustration. Be careful not to damage the contact surfaces of the crankshaft bearing cap and cylinder block sub-assembly.
- HINT:
- ·
Keep each crankshaft bearing (lower) and crankshaft bearing cap as a set.
·Arrange the crankshaft bearing caps in the correct order.
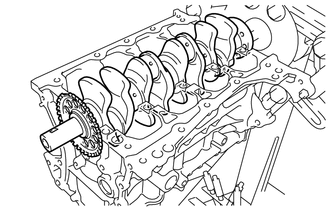
Remove the crankshaft from the cylinder block sub-assembly.
11791
9.REMOVE UPPER CRANKSHAFT THRUST WASHER
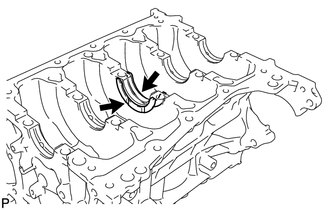
Remove the 2 upper crankshaft thrust washers from the cylinder block sub-assembly.
11711
10.REMOVE CRANKSHAFT BEARING
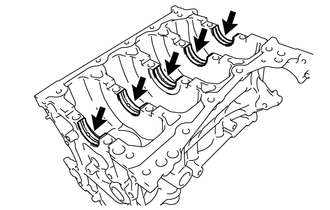
Remove the 5 crankshaft bearings (upper) from the cylinder block sub-assembly.
- HINT:
-
Arrange the removed parts in the correct order.
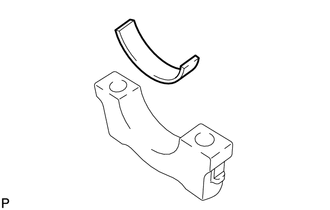
Remove the 5 crankshaft bearings (lower) from the 5 crankshaft bearing caps.
- HINT:
-
Arrange the removed parts in the correct order.
15708
11.REMOVE NO. 1 OIL NOZZLE SUB-ASSEMBLY
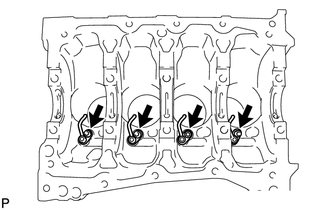
Using a 5 mm socket hexagon wrench, remove the 4 bolts and 4 No. 1 oil nozzle sub-assemblies from the cylinder block sub-assembly.
11401
12.CLEAN CYLINDER BLOCK SUB-ASSEMBLY
- NOTICE:
-
If the cylinder is washed at high temperature, the cylinder liner will stick out beyond the cylinder block sub-assembly. Always wash the cylinder block sub-assembly at a temperature of 45°C (113°F) or less.