INTERIOR PANELS / TRIM UPPER INSTRUMENT PANEL REASSEMBLY
PROCEDURE

 55349C
1.INSTALL INSTRUMENT PANEL CUSHION
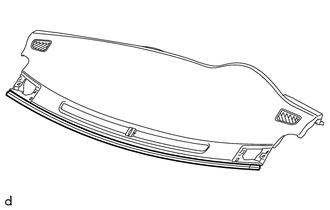
Remove the release paper from a new instrument panel cushion.
Install the instrument panel cushion.
55355
2.INSTALL NO. 1 INSTRUMENT PANEL CUSHION
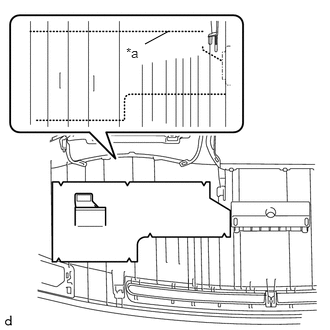
| *a | Marking |
Align the markings on the upper instrument panel sub-assembly with the new No. 1 instrument panel cushion and install the new No. 1 instrument panel cushion using hot-melt glue.
73960A
3.INSTALL INSTRUMENT PANEL PASSENGER AIRBAG ASSEMBLY
55660
4.INSTALL NO. 2 INSTRUMENT PANEL REGISTER ASSEMBLY
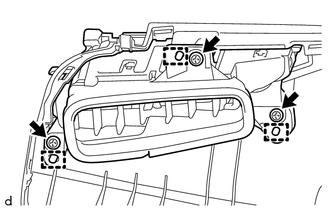
Engage the 3 guides to install the No. 2 instrument panel register assembly.
Install the 3 screws <B>.
55650
5.INSTALL NO. 1 INSTRUMENT PANEL REGISTER ASSEMBLY
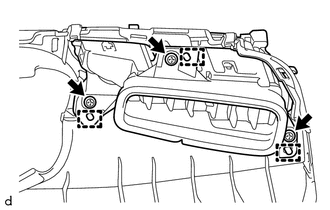
Engage the 3 guides to install the No. 1 instrument panel register assembly.
Install the 3 screws <B>.
55085
6.INSTALL NO. 2 HEATER TO REGISTER DUCT SUB-ASSEMBLY
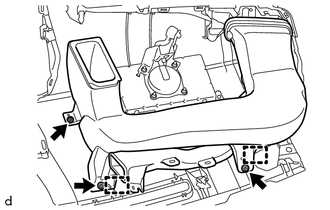
Engage the 2 guides to install the No. 2 heater to register duct sub-assembly.
Install the 3 screws <B>.
82142
7.INSTALL NO. 2 INSTRUMENT PANEL WIRE (w/ Wire Harness)
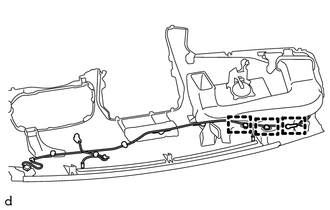
Engage the 3 clamps to install the No. 2 instrument panel wire.
55084E
8.INSTALL NO. 1 HEATER TO REGISTER DUCT SUB-ASSEMBLY
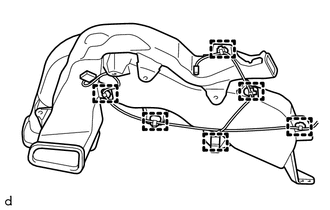
w/ Wire Harness:
Engage the 6 clamps.
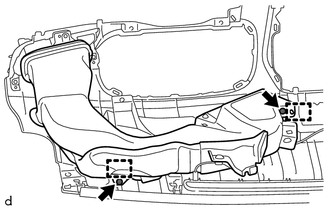
Engage the 2 guides to install the No. 1 heater to register duct sub-assembly.
Install the 2 screws <B>.
55950G
9.INSTALL DEFROSTER NOZZLE ASSEMBLY
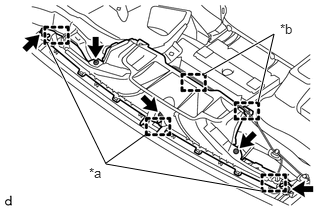
| *a | Guide |
| *b | Clamp |
Engage the 3 guides to install the defroster nozzle assembly.
Install the 5 screws <B>.
Engage the 2 clamps.
89120A
10.INSTALL AUTOMATIC LIGHT CONTROL SENSOR (w/ Automatic Light Control System)
88625H
11.INSTALL COOLER (SOLAR SENSOR) THERMISTOR (for Automatic Air Conditioning System)