INTERIOR PANELS / TRIM ROOF HEADLINING(for Hatchback) REASSEMBLY
PROCEDURE

 82171
1.INSTALL NO. 1 ROOF WIRE
Align the positioning tape of the No. 1 roof wire with the protrusion of the roof headlining and wrap new adhesive tape around them as shown in the part of the illustration labeled A.
Align the No. 1 roof wire positioning tape with the markings of the roof headlining.
Install the No. 1 roof wire onto the roof headlining with 13 new adhesive tapes.
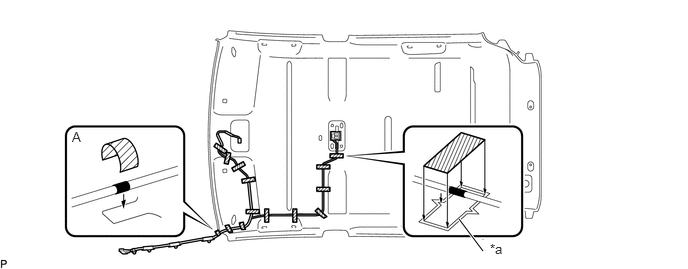
| *a | Marking | - | - |

|
Adhesive Tape | 
|
Positioning Tape |
86101J
2.INSTALL NO. 2 ANTENNA CORD SUB-ASSEMBLY
63342
3.INSTALL NO. 2 ROOF SILENCER PAD
Align the markings on the roof headlining with the No. 2 roof silencer pad to install the No. 2 roof silencer pads using hot-melt glue as shown in the illustration.
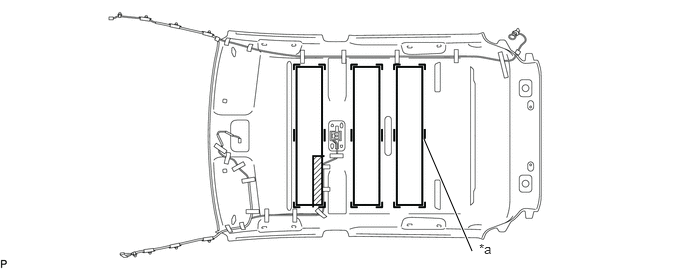
| *a | Marking | - | - |
|
|
Hot-melt NG Area | - | - |
- NOTICE:
-
Securely attach the No. 2 roof silencer pad before the hot-melt glue cools.
63341
4.INSTALL NO. 1 ROOF SILENCER PAD
Align the markings on the roof headlining with the No. 1 roof silencer pad and install the No. 1 roof silencer pad using hot-melt glue as shown in the illustration.
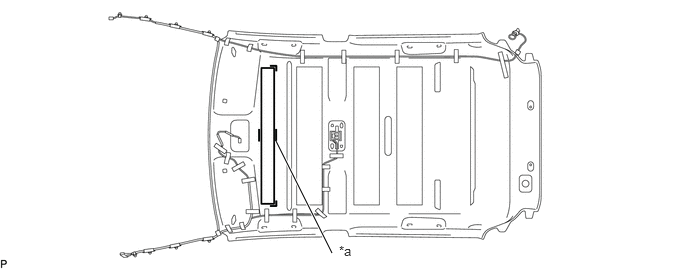
| *a | Marking | - | - |
- NOTICE:
-
Securely attach the No. 1 roof silencer pad before the hot-melt glue cools.