DOOR / HATCH LUGGAGE COMPARTMENT DOOR(for TMT Made) ADJUSTMENT
CAUTION / NOTICE / HINT
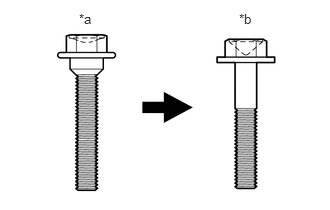
| *a | Centering Bolt |
| *b | Standard Bolt |
- HINT:
- ·
Centering bolts are used to mount the door hinge to the door. The door cannot be adjusted with the centering bolts installed. Substitute the centering bolts with standard bolts when making adjustments.
·Specified torque for standard bolts is shown in the standard bolt chart.
Click hereGeneral>SPECIFICATIONS>STANDARD BOLT>SPECIFIED TORQUE FOR STANDARD BOLTS
PROCEDURE

 64401
1.INSPECT LUGGAGE COMPARTMENT DOOR PANEL SUB-ASSEMBLY
Check that the clearance measurements are within the standard ranges.
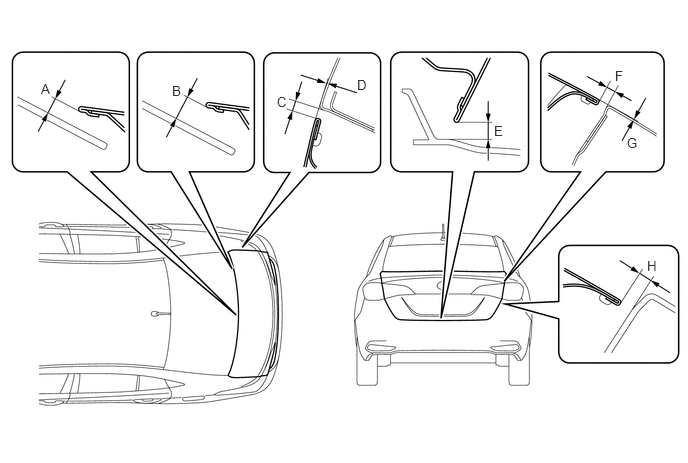
- Standard Clearance:
Area Measurement Area Measurement A 8.8 mm (0.346 in.) B 11.1 mm (0.437 in.) C 2.3 to 5.3 mm (0.091 to 0.209 in.) D -1.5 to 1.5 mm (-0.060 to 0.059 in.) E 5.0 to 9.0 mm (0.197 to 0.354 in.) F 2.8 to 5.8 mm (0.110 to 0.228 in.) G -1.5 to 1.5 mm (-0.060 to 0.059 in.) H 3.5 to 7.5 mm (0.138 to 0.295 in.)
64711
2.REMOVE LUGGAGE COMPARTMENT FLOOR MAT
64770
3.REMOVE SPARE WHEEL COVER ASSEMBLY
64772
4.REMOVE SPARE WHEEL COVER PAD
64773B
5.REMOVE NO. 2 SPARE WHEEL COVER PAD
- HINT:
-
Use the same procedure as for the spare wheel cover pad.
58387
6.REMOVE REAR FLOOR FINISH PLATE
64401
7.ADJUST LUGGAGE COMPARTMENT DOOR PANEL SUB-ASSEMBLY
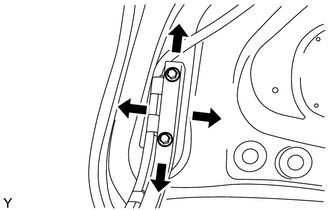
Adjust the door position.
Horizontally and vertically adjust the door by loosening the 4 luggage compartment door side hinge bolts.
Tighten the 4 luggage compartment door side hinge bolts after the adjustment.
- Torque:
- 8.0 N*m (82 kgf*cm, 71 in.*lbf)
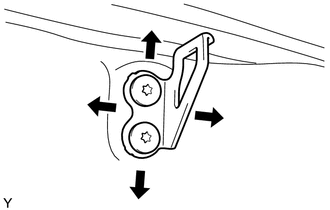
Adjust the striker position.
Using a T40 "TORX" socket wrench, slightly loosen the 2 striker mounting screws.
Using a plastic-faced hammer, hit the striker to adjust its position.
Using a T40 "TORX" socket wrench, tighten the 2 striker mounting screws after the adjustment.
- Torque:
- 23 N*m (235 kgf*cm, 17 ft.*lbf)
58387
8.INSTALL REAR FLOOR FINISH PLATE
64772
9.INSTALL SPARE WHEEL COVER PAD
64773B
10.INSTALL NO. 2 SPARE WHEEL COVER PAD
- HINT:
-
Use the same procedure as for the spare wheel cover pad.
64770
11.INSTALL SPARE WHEEL COVER ASSEMBLY
64711
12.INSTALL LUGGAGE COMPARTMENT FLOOR MAT