STEERING GEAR / LINKAGE STEERING GEAR REMOVAL
CAUTION / NOTICE / HINT
The necessary procedures (adjustment, calibration, initialization, or registration) that must be performed after parts are removed, installed, or replaced during the front suspension crossmember sub-assembly removal/installation are shown below.
| Replacement Part or Procedure | Necessary Procedure | Effect/Inoperative when not Performed | Link |
|---|---|---|---|
| Wheel alignment adjustment | for HV Model:
1.
Perform "Reset Memory" 2.
Perform calibration |
·
DTCs are stored ·
ABS warning light illuminates ·
Brake system warning light (yellow indicator) ·
Slip indicator light illuminates ·
VSC disabled or malfunctions |
( ) |
| for Gasoline Model:
Calibration |
·
DTCs are stored ·
ABS warning light illuminates ·
Slip indicator light illuminates ·
VSC disabled or malfunctions |
()
|
|
| Suspension, tires, etc.
(The vehicle height changes because of suspension or tire replacement.) |
·
Ultrasonic sensor detection angle ·
Ultrasonic sensor detection angle registration |
Parking support brake system | ()
|
| Rear television camera assembly optical axis (Back camera position setting) | Parking assist monitor system | ()
|
PROCEDURE

 51201
1.REMOVE FRONT SUSPENSION CROSSMEMBER SUB-ASSEMBLY
45253
2.REMOVE STEERING COLUMN HOLE COVER
Remove the steering column hole cover from the steering link assembly.
3.REMOVE STEERING LINK ASSEMBLY
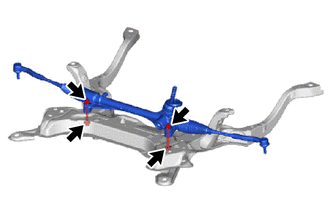
Remove the 2 bolts, 2 nuts and steering link assembly from the front suspension crossmember sub-assembly.
- NOTICE:
-
Because the nut has its own stopper, do not turn the nut. Loosen the bolt with the nut secured.
4.SECURE STEERING LINK ASSEMBLY
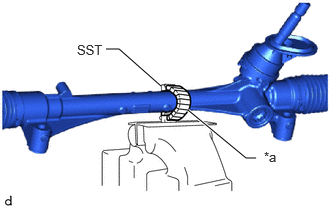
| *a | Protective Tape |
Using SST, secure the steering link assembly in a vise.
- SST
- 09612-00012
- HINT:
-
Wrap SST with protective tape before use.
45047
5.REMOVE TIE ROD END SUB-ASSEMBLY LH
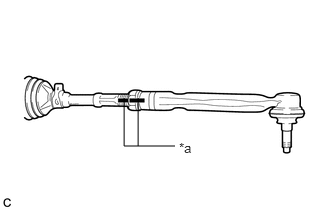
| *a | Matchmark |
Put matchmarks on the tie rod end sub-assembly LH and steering gear assembly.
Remove the tie rod end sub-assembly LH and lock nut.
45046
6.REMOVE TIE ROD END SUB-ASSEMBLY RH
- HINT:
-
Perform the same procedure as for the LH side.