STEERING GEAR / LINKAGE STEERING GEAR INSTALLATION
PROCEDURE

 45047
1.INSTALL TIE ROD END SUB-ASSEMBLY LH
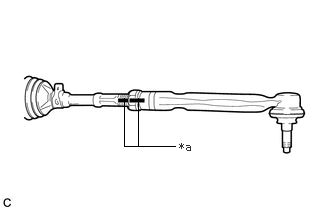
| *a | Matchmark |
Install the lock nut and tie rod end sub-assembly LH to the steering gear assembly until the matchmarks are aligned.
- HINT:
-
After adjusting the toe-in, tighten the lock nut.
45046
2.INSTALL TIE ROD END SUB-ASSEMBLY RH
- HINT:
-
Perform the same procedure as for the LH side.
3.INSTALL STEERING LINK ASSEMBLY
Install the steering link assembly to the front suspension crossmember sub-assembly with the 2 bolts and 2 new nuts.
- Torque:
- 86 N*m (877 kgf*cm, 63 ft.*lbf)
- NOTICE:
- ·
Because the nut has its own stopper, do not turn the nut. Tighten the bolt with the nut secured.
·Make sure to tighten the bolts starting from the left side of the vehicle.
45253
4.INSTALL STEERING COLUMN HOLE COVER
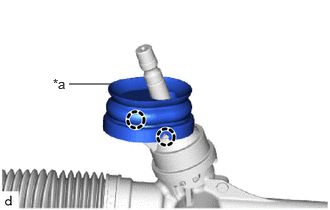
| *a | Seal Portions |
Align the protrusion of the steering link assembly with the hole of the steering column hole cover, and install the steering column hole cover to the steering link assembly.
- HINT:
- ·
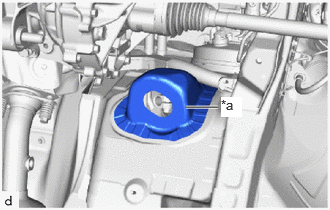 1.938,1.115 2.271,1.115 true 2.302,1.01 2.521,1.219 0.219,0.208 10 true *a
*a Dash Panel
Check that there is no foreign matter adhering to the seal portions of the steering column hole cover or dash panel.
·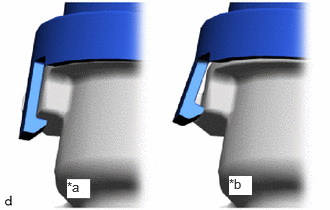 0.698,1.865 0.938,2.063 0.24,0.198 10 true *a 2.385,1.833 2.625,2.031 0.24,0.198 10 true *b
*a OK *b NG
After installing the steering column hole cover, check that the claws of the steering column hole cover base are not disengaged.
51201
5.INSTALL FRONT SUSPENSION CROSSMEMBER SUB-ASSEMBLY
6.INSPECT AND ADJUST FRONT WHEEL ALIGNMENT
45047
7.FULLY TIGHTEN TIE ROD END SUB-ASSEMBLY LH
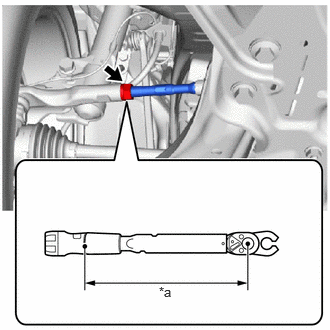
| *a | Torque Wrench Fulcrum Length |
Using a union nut wrench, tighten the tie rod end sub-assembly lock nuts.
- Torque:
- Specified Tightening Torque : 74.5 N*m (760 kgf*cm, 55 ft.*lbf)
- NOTICE:
-
Make sure that the boots are not twisted.
- HINT:
- ·
Calculate the torque wrench reading when changing the fulcrum length of the torque wrench.
Click hereGeneral>INTRODUCTION>REPAIR INSTRUCTION>PRECAUTION
·When using a union nut wrench (fulcrum length of 30 mm (1.1811 in.)) + torque wrench (fulcrum length of 255 mm (10.0394 in.)): 66.7 N*m (680 kgf*cm, 49 ft.*lbf)
45046
8.FULLY TIGHTEN TIE ROD END SUB-ASSEMBLY RH
- HINT:
-
Perform the same procedure as for the LH side.
9.PERFORM INITIALIZATION
| Parking support brake system | ( ) |
| Parking assist monitor system | ()
|