BRAKE CONTROL / DYNAMIC CONTROL SYSTEMS ELECTRONICALLY CONTROLLED BRAKE SYSTEM(for HV Model TMMF Made) UTILITY
DESCRIPTION
If any of the parts listed in the following table are replaced or adjusted, it is necessary to perform the specified operation.
- NOTICE:
-
Learning cannot be performed again until the values stored during the previous learning (brake pedal stroke sensor assembly zero point, system information, and yaw rate and acceleration sensor zero point) have been cleared. After replacing parts, clear the previous values before performing learning.
| Parts to be Replaced / Operation | Necessary Operation |
|---|---|
·
Electric brake booster (brake booster with master cylinder assembly) ·
Skid control ECU (brake actuator assembly) |
1.
Bleed air. 2.
Perform "Reset Memory". 3.
Perform "Calibration". |
·
Brake pedal stroke sensor assembly* ·
Brake pedal* ·
Yaw rate and acceleration sensor (airbag sensor assembly)* |
1.
Perform "Reset Memory". 2.
Perform "Calibration". |
·
Brake pedal stroke sensor assembly adjustment ·
Wheel alignment adjustment |
1.
Perform "Reset Memory". 2.
Perform "Calibration". |
*: Even when not replacing the part, it is necessary to perform the specified necessary procedures after installation.
UTILITY ITEMS
| Utility Items | Main Purpose | Link |
|---|---|---|
| All Readiness | Confirm if DTC judgment has been completed. | Refer to utility |
| Calibration | Enter Dealer Mode (Calibration) and perform brake pedal stroke sensor assembly zero point calibration, system information memorization, and yaw rate and acceleration sensor zero point calibration. | Refer to utility |
| Inspection Mode | Enter Inspection Mode which prohibits operation of VSC and TRC. | Refer to utility |
| Signal Check | Enter Dealer Mode (Signal Check) and perform a signal inspection of the electronically controlled brake system. | ( ) |
| Vehicle Control History (RoB) | View vehicle control history. | ()
|
| ECB* Utility
- Motor Deactivate |
Prohibit operation of the pump motor in the brake booster with accumulator pump assembly. | - |
| Reset Memory | Clear the following values:
·
Brake pedal stroke sensor assembly zero point ·
System information ·
Yaw rate and acceleration sensor zero point |
Refer to utility |
CALIBRATION
- NOTICE:
- ·
When replacing the brake pedal stroke sensor assembly, brake pedal, electric brake booster (brake booster with master cylinder assembly), skid control ECU (brake actuator assembly) or yaw rate and acceleration sensor (airbag sensor assembly), perform "Calibration".
·When "Bleeding" is performed after replacing the electric brake booster (brake booster with master cylinder assembly) or skid control ECU (brake actuator assembly), brake pedal stroke sensor assembly zero point calibration, system information memorization, and yaw rate and acceleration sensor zero point calibration will be performed automatically.
·When reinstalling the yaw rate sensor, perform "Calibration" after performing "Reset Memory".
·Make sure to perform the yaw rate and acceleration sensor zero point calibration on a flat surface (gradient of 0.2° or less) and ensure that the doors are not opened or closed and the vehicle is not moved or shaken. Also, to avoid vibration due to engine idle, do not turn the ignition switch to ON (READY).
·When performing the yaw rate and acceleration sensor zero point calibration, make sure the tire pressure is as specified and the vehicle is in full contact with the ground (not completely or partially lifted up).
- HINT:
-
When entering Dealer Mode (Calibration), the skid control ECU (brake actuator assembly) communicates with the forward recognition camera to judge whether the vehicle is equipped with the pre-collision system. Therefore, do not exit Dealer Mode (Calibration) within 5 seconds of entering Dealer Mode (Calibration) (w/ Pre-collision System).
To ensure that calibration completes correctly, confirm the following items before performing "Calibration":
The auxiliary battery voltage is 11 to 15.5 V when the ignition switch is turned to ON (READY).
The brake booster with master cylinder assembly and brake actuator assembly are not hot.
- HINT:
-
If the temperature of the brake booster with master cylinder assembly or brake actuator assembly is excessively high, wait until it cools down before performing "Calibration".
Clear the brake pedal stroke sensor assembly zero point, system information, and yaw rate and acceleration sensor zero point.
Turn the ignition switch off.
Check that the steering wheel is centered.
Check that the shift lever is in P.
Turn the ignition switch to ON.
Turn the GTS on.
Using the GTS, clear the brake pedal stroke sensor assembly zero point, system information, and yaw rate and acceleration sensor zero point.
- Chassis > Brake > Utility
-
Tester Display Reset Memory - 50005 435 4560
- NOTICE:
-
When performing "Reset Memory", each warning light or indicator light illuminates or flashes, and a DTC indicating that learning is incomplete and/or vehicle control history is stored.
Turn the ignition switch off.
- NOTICE:
-
If the ignition switch is turned to ON for more than 15 seconds with the shift lever in P after the zero point of the yaw rate and acceleration sensor has been cleared, only the zero point of the yaw rate sensor will be stored. If the vehicle is driven under these conditions, the skid control ECU (brake actuator assembly) will store the zero point calibration for the acceleration sensor as not being completed. The skid control ECU (brake actuator assembly) will then also indicate this as a malfunction of the VSC system using the indicator light.
Perform acceleration sensor zero point calibration and store system information memorization.
- HINT:
- ·
Acceleration sensor zero point calibration and store system information memorization are automatically performed immediately after Dealer Mode (Calibration) is entered.
·If store system information memorization has not yet been performed, the slip indicator light will remain on and DTC C124A00 will be stored.
·If acceleration sensor zero point calibration is not successful, the slip indicator light will remain on and DTC C051D54 will be stored.
Turn the ignition switch off.
Apply the parking brake.
Check that the shift lever is in P.
Check that the steering wheel is centered.
Switch the skid control ECU (brake actuator assembly) to calibration using the GTS.
- Chassis > Brake > Utility
-
Tester Display Calibration - 50005 435 4554
Using the GTS, perform "Calibration" and enter Dealer Mode (Calibration).
Confirm that the ABS warning light and slip indicator light indicate the Dealer Mode pattern (blinking at 0.25 second intervals).
- HINT:
- ·
After "Calibration" has successfully completed, the ABS warning light and slip indicator light indicate the Dealer Mode pattern (blinking at 0.25 second intervals).
·The slip indicator light may illuminate for approximately 7 seconds before learning successfully completes.
·When entering Dealer Mode (Calibration), if the parking brake is engaged, the parking brake indicator light (red) will illuminate, and if the parking brake is not engaged, the parking brake indicator light (red) will blink in the Dealer Mode pattern (blinking at 0.25 second intervals).
·After entering Dealer Mode (Calibration), maintain Dealer Mode (Calibration) condition for 5 seconds. If Dealer Mode (Calibration) is ended before 5 seconds elapse, enter Dealer Mode (Calibration) again, wait 5 seconds, and then check for DTCs again (w/ Pre-collision System).
Turn the ignition switch off.
Disconnect the GTS.
ALL READINESS
- HINT:
- ·
With "All Readiness", you can check whether or not the DTC judgment has been completed by using the GTS.
·You should check "All Readiness" after simulating malfunction symptoms or for validation after finishing repairs.
Turn the ignition switch off.
Connect the GTS to the DLC3.
Turn the ignition switch to ON
Turn the GTS on.
Clear the DTCs even if no DTCs are stored. Enter the following menus: Chassis / Brake Booster / Trouble Codes.
- Chassis > Brake Booster > Clear DTCs
- 50002 466
Clear the DTCs even if no DTCs are stored. Enter the following menus: Chassis / Brake / Trouble Codes.
- Chassis > Brake > Clear DTCs
- 50002 435
Press the clear button.
Turn the ignition switch off.
Turn the ignition switch to ON (READY).
Perform the DTC judgment driving pattern to run the DTC judgment.
Enter the following menus: Chassis / Brake Booster / Utility / All Readiness.
- Chassis > Brake Booster > Utility
-
Tester Display All Readiness - 50005 466 20
Enter the following menus: Chassis / Brake / Utility / All Readiness.
- Chassis > Brake > Utility
-
Tester Display All Readiness - 50005 435 20
Input the DTC to be confirmed.
Check the DTC judgment result.
| GTS Display | Description |
|---|---|
| Normal | ·
DTC judgment completed ·
System normal |
| Abnormal | ·
DTC judgment completed ·
System abnormal |
| Incomplete | ·
DTC judgment not completed ·
Perform the driving pattern |
| N/A | ·
Unable to perform DTC judgment ·
Number of DTCs which do not fulfill DTC preconditions has reached ECU memory limit ·
Perform the driving pattern |
If the judgment result shows Incomplete or N/A, perform the DTC confirmation driving pattern again.
INSPECTION MODE (WHEN USING GTS)
When testing with a 2-wheel drum tester such as speedometer tester, combination tester for the speedometer and brakes, or chassis dynamometer, or when jacking up the front wheels and turning the wheels, perform the following procedure to enter Inspection Mode and disable the TRC and VSC systems.
- CAUTION:
- ·
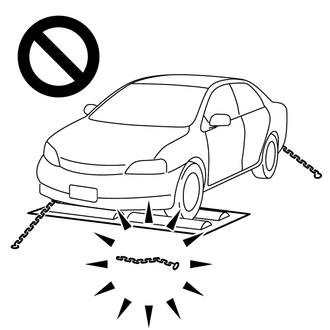
Do not use the drum tester with any of the lock chains disconnected.
·Using the drum tester with a lock chain disconnected could cause the vehicle to begin moving unexpectedly.
·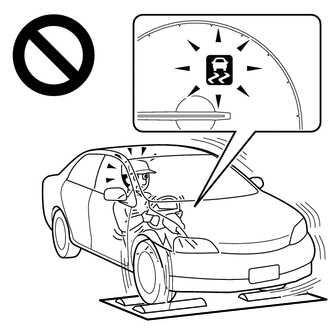
Do not use the drum tester while the TRC or VSC is able to operate.
·TRC or VSC operation could cause the vehicle to begin moving unexpectedly.
- HINT:
-
When the system is in Inspection Mode, TRC and VSC are disabled.
Activating Inspection Mode
- NOTICE:
- ·
Inspection Mode will be canceled when the ignition switch is turned off. Make sure to enter Inspection Mode again if the inspection is continued after the ignition switch is turned off.
·Never drive the vehicle while in Inspection Mode.
Turn the ignition switch off.
Enter the following menus: Chassis / Brake / Utility / Inspection Mode.
- Chassis > Brake > Utility
-
Tester Display Inspection Mode - 50005 435 4555
Check that the VSC OFF indicator light comes on and "Traction Control Turned Off" is displayed on the multi-information display (Confirm that the system has entered Inspection Mode).
- HINT:
-
When entering Inspection Mode, the parking brake indicator light (red) will blink in the Dealer Mode pattern (blinking at 0.25 second intervals).
End of Inspection Mode.
Turning the ignition switch off ends Inspection Mode.
- NOTICE:
-
If the ignition switch is turned to ON within 60 seconds of being turned off, the system will reenter Inspection Mode.
Confirm that the VSC OFF indicator light turns off and the "Traction Control Turned Off" on the multi-information display is cleared (Confirm that Inspection Mode is canceled).
INSPECTION MODE (WHEN NOT USING GTS)
When testing with a 2-wheel drum tester such as speedometer tester, combination tester for the speedometer and brakes, or chassis dynamometer, or when jacking up the front wheels and turning the wheels, perform the following procedure to enter Inspection Mode and disable the TRC and VSC systems.
- CAUTION:
- ·
Do not use the drum tester with any of the lock chains disconnected.
·Using the drum tester with a lock chain disconnected could cause the vehicle to begin moving unexpectedly.
·
Do not use the drum tester while the TRC or VSC is able to operate.
·TRC or VSC operation could cause the vehicle to begin moving unexpectedly.
- HINT:
-
When the system is in Inspection Mode, TRC and VSC are disabled.
Activating Inspection Mode
- NOTICE:
- ·
Inspection Mode will be canceled when the ignition switch is turned off. Make sure to enter Inspection Mode again if the inspection is continued after the ignition switch is turned off.
·Never drive the vehicle while in Inspection Mode.
Perform steps "D" to "H" within 30 seconds.
Ensure that the ignition switch is off and the engine is stopped (Step "A").
Apply the parking brake (Step "B").
Make sure that the shift lever is in P (Step "C").
Turn the ignition switch to ON (READY) (Step "D").
Depress and release the brake pedal twice (Step "E").
While holding the brake pedal down, release and apply the parking brake twice (Step "F").
With the parking brake applied, depress and release the brake pedal twice (Step "G").
Check that the VSC OFF indicator light comes on and "Traction Control Turned Off" is displayed on the multi-information display (Step "H").
- HINT:
- ·
If the VSC OFF indicator light does not come on and "Traction Control Turned Off" is not displayed on the multi-information display in step "H", repeat steps "A" to "H".
·When entering Inspection Mode, the parking brake indicator light (red) will blink in the Dealer Mode pattern (blinking at 0.25 second intervals).
End of Inspection Mode.
Turning the ignition switch off ends Inspection Mode.
- NOTICE:
-
If the ignition switch is turned to ON within 60 seconds of being turned off, the system will reenter Inspection Mode.
Confirm that the VSC OFF indicator light turns off and the "Traction Control Turned Off" on the multi-information display is cleared (Confirm that Inspection Mode is canceled).