SEAT FRONT SEAT ASSEMBLY(for 3 Door) INSTALLATION
CAUTION / NOTICE / HINT
- CAUTION:
-
Wear protective gloves. Sharp areas on the parts may injure your hands.
- HINT:
- ·
Use the same procedure for RHD and LHD vehicles.
·The procedure listed below is for RHD vehicles.
·Use the same procedure for the driver side and front passenger side.
·The procedure listed below is for the driver side.
PROCEDURE

 1.INSTALL FRONT SEAT ASSEMBLY
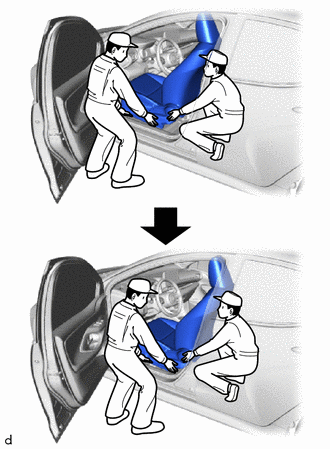
Place the front seat assembly in the cabin.
- NOTICE:
- ·
2 or more people are required when reinstalling the front seat assembly in to the vehicle.
·Protect the front seat leg.
·Be careful not to damage the front seat assembly, body exterior or body interior.
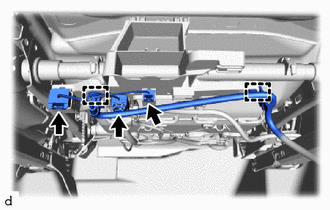
for Driver Side:
Engage the clamps.
Connect the connectors.
Connect the airbag connector.
- NOTICE:
-
When connecting any airbag connector, take care not to damage the airbag wire harness.
- HINT:
-
Refer to How to Connect or Disconnect Airbag Connector:
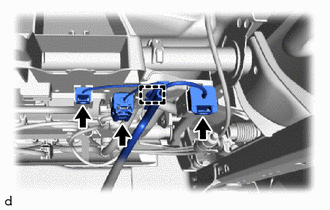
for Front Passenger Side:
Engage the clamp.
Connect the connectors.
Connect the airbag connector.
- NOTICE:
-
When connecting any airbag connector, take care not to damage the airbag wire harness.
- HINT:
-
Refer to How to Connect or Disconnect Airbag Connector:
Temporarily install the front seat assembly with the 4 bolts.
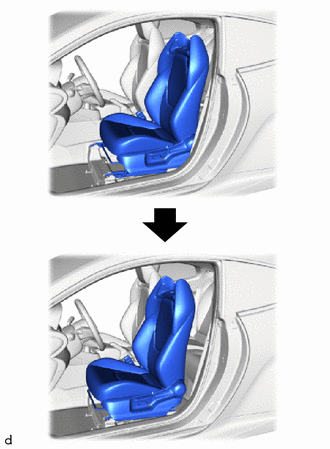
Operate the seat track adjusting handle to move the front seat assembly to the frontmost position.
- NOTICE:
-
Make sure to keep the seat track locked.
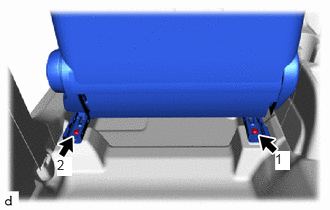
Using a T50 "TORX" socket wrench, tighten the 2 bolts on the rear side of the front seat assembly.
- Torque:
- 37 N*m (377 kgf*cm, 27 ft.*lbf)
- NOTICE:
-
Tighten the bolts in the order shown in the illustration.
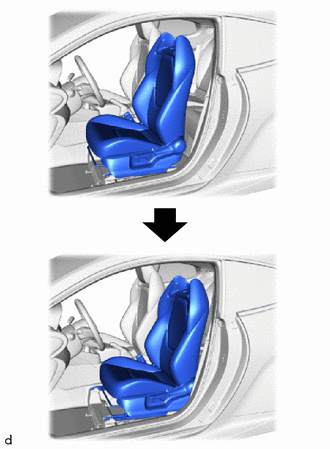
Operate the seat track adjusting handle to move the front seat assembly to the rearmost position.
- NOTICE:
-
Make sure to keep the seat track locked.
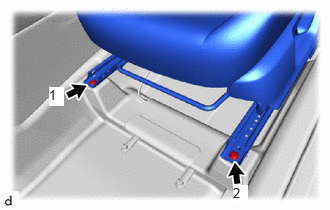
Using a T50 "TORX" socket wrench, tighten the 2 bolts on the front side of the front seat assembly.
- Torque:
- 37 N*m (377 kgf*cm, 27 ft.*lbf)
- NOTICE:
-
Tighten the bolts in the order shown in the illustration.
2.INSPECT SEAT SLIDE ADJUSTER LOCK
While performing a sliding operation of the front seat assembly, check that the left and right adjusters move together smoothly and lock simultaneously. If the seat adjusters do not lock simultaneously, loosen the front seat assembly installation bolts and adjust the adjuster position.
72158
3.INSTALL INNER SEAT TRACK BRACKET COVER
Operate the seat track adjusting handle and move the front seat assembly to the frontmost position.
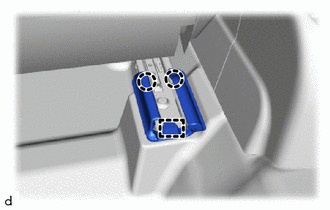
Engage the claws and guide to install the rear outer seat track bracket cover.
72138
4.INSTALL OUTER SEAT TRACK BRACKET COVER
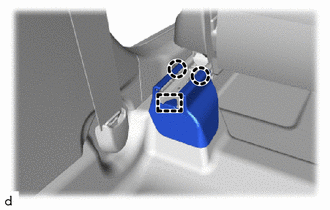
Engage the claws and guide to install the rear inner seat track bracket cover.
72128A
5.INSTALL FRONT INNER SEAT TRACK BRACKET COVER
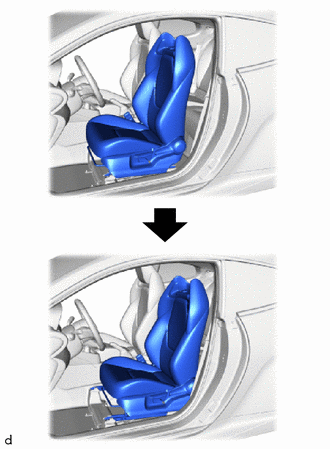
Operate the seat track adjusting handle and move the front seat assembly to the rearmost position.
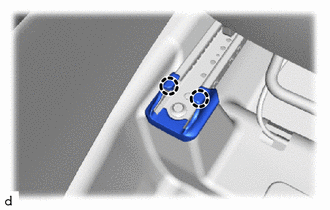
Engage the claws to install the front inner seat track bracket cover.
72124
6.INSTALL FRONT OUTER SEAT TRACK BRACKET COVER
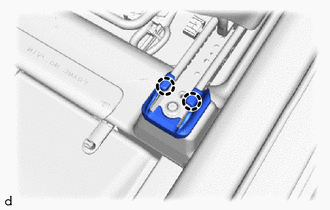
Engage the claws to install the front outer seat track bracket cover.
71910A
7.INSTALL FRONT SEAT HEADREST ASSEMBLY
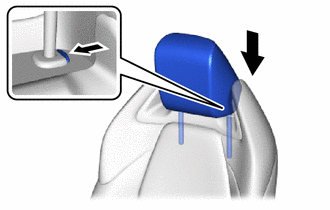
Install the front seat headrest assembly.
8.CONNECT CABLE TO NEGATIVE AUXILIARY BATTERY TERMINAL
for M15A-FKS:
Click hereGeneral>MAINTENANCE>M15A-FKS AUXILIARY BATTERY>INSTALLATION
for G16E-GTS:
Click hereGeneral>MAINTENANCE>G16E-GTS AUXILIARY BATTERY>INSTALLATION
9. INITIALIZATION AFTER RECONNECTING AUXILIARY BATTERY TERMINAL
Click hereGeneral>SETUP>WHEN DISCONNECTING OR RECONNECTING BATTERY TERMINAL>WORK PROCEDURE
- HINT:
-
When disconnecting and reconnecting the auxiliary battery, there is an automatic learning function that completes learning when the respective system is used.
-
Click hereGeneral>SETUP>WHEN DISCONNECTING OR RECONNECTING BATTERY TERMINAL>AUTOMATIC LEARNING CHART
10. PERFORM DIAGNOSTIC SYSTEM CHECK
11.INSPECT SRS WARNING LIGHT