ADJUSTMENT
Removal / installation · Vehicles built from Jan 2006
| 1. INSPECT AND ADJUST BRAKE PEDAL |

Remove the instrument panel under tray (Click here).
Inspect the brake pedal height.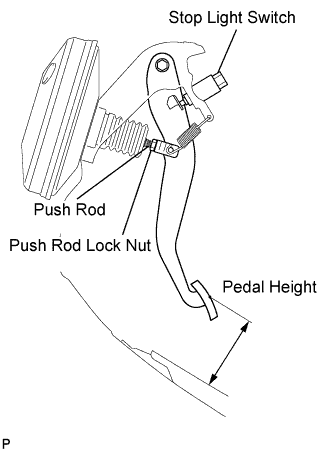

- Pedal height from floor:
- 107.3 to 117.3 mm (4.224 to 4.618 in.)
Adjust the brake pedal height.
Disconnect the connector from the stop light switch.
Turn the stop light switch counterclockwise, and remove the stop light switch.
Loosen the push rod lock nut.
Adjust the pedal height by turning the pedal push rod.
- Pedal height from floor:
- 107.3 to 117.3 mm (4.224 to 4.618 in.)
Tighten the push rod lock nut.
- Torque:
- 26 N*m{ 265 kgf*cm , 19 ft.*lbf }
Insert the stop light switch into the adjuster until it just touches the brake pedal.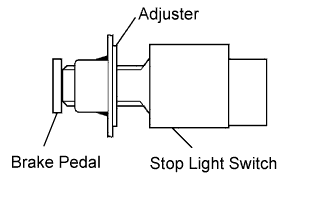
- NOTICE:
- Do not depress the brake pedal.
Make a quarter turn clockwise to install the stop light switch.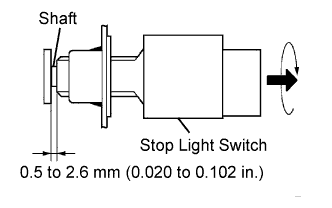
- NOTICE:
- Do not depress the brake pedal.
- HINT:
- The turning torque for installing the stop light switch:
- Torque:
- 1.5 N*m{ 15 kgf*cm , 13 in.*lbf } or less
Check the stop light switch clearance.
- Stop light switch clearance:
- 0.5 to 2.6 mm (0.020 to 0.102 in.)
Connect the connector to the stop light switch.
Inspect the brake pedal free play.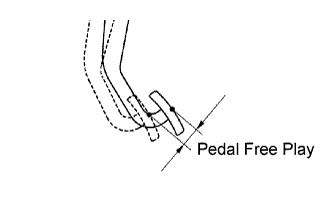
Stop the engine and depress the brake pedal several times until there is no vacuum left in the booster.
Push in the pedal until the beginning of the resistance is felt. Measure the distance as shown.
- Pedal free play:
- 1.0 to 6.0 mm (0.039 to 0.236 in.)
Inspect the brake pedal reserve distance.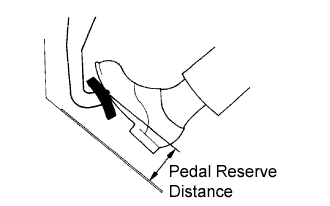
Release the parking brake lever. With the engine running, depress the pedal and measure the pedal reserve distance as shown.
- Pedal reserve distance from floor at 300 N (31 kgf, 67.4 lbf):
LHD
RHD
w/ ABS
More than 73 mm (2.87 in.)
More than 71 mm (2.80 in.)
w/o ABS
More than 70 mm (2.75 in.)
-
- HINT:
- Sound and resistance from the brake booster when the brake pedal is depressed without a vacuum does not indicate a problem.
Install the instrument panel under tray (Click here).