2005-2008 Yaris · Service Manual ENGINE

INSTALLATION

Removal / installation · Vehicles built from Jan 2006

Versions by build date: Aug 2005 – Dec 2005 from Jan 2006

NOTICE:
Always use "Torx" socket wrench E10 when installing the rear seat.


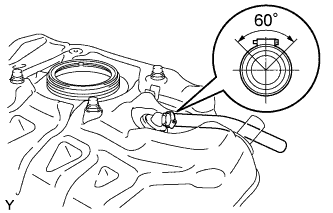
1. CONNECT FUEL TANK BREATHER TUBE

A118755E01
  1. Connect the fuel tank breather tube with the clamp.

  1. Tighten the clamp bolt.


2. INSTALL FUEL EMISSION TUBE NO.2

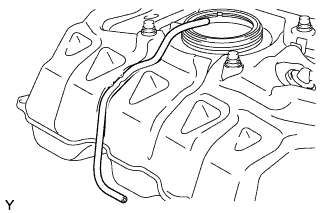
A118747
  1. Install fuel emission tube No. 2 onto the fuel tank.


3. INSTALL FUEL TANK MAIN TUBE SUB-ASSEMBLY

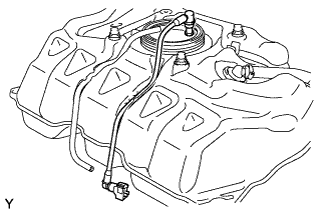
A125130
  1. Install the fuel tank main tube onto the fuel tank.


4. INSTALL FUEL TANK ASSEMBLY

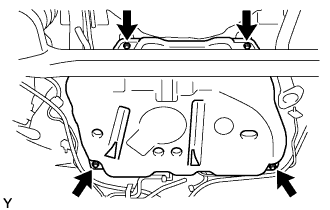
A105615
  1. Clean the bolt hole and remove any grease.

  1. Install the fuel tank with 4 new bolts.

    Torque:
    14 N*m{ 146 kgf*cm , 10 ft.*lbf }


5. CONNECT FUEL EMISSION TUBE NO. 2

A119220
  1. Connect fuel emission tube No. 2 with the clamp.


6. CONNECT FUEL TANK MAIN TUBE SUB-ASSEMBLY

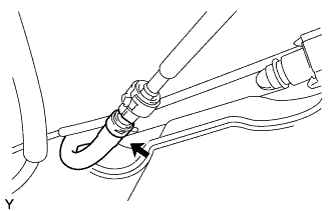
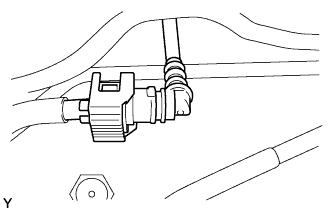
A109399
  1. Align the fuel tube connector with the pipe, push the fuel tube connector in until the retainer makes a click sound, then lock the cover of the connector.

    NOTICE:
    1. Check that there are no scratches or foreign matter on the disconnected parts of the fuel tube connector and pipe before performing this work.
    2. After connecting, pull the pipe and fuel tube connector to make sure that they are securely connected.


7. CONNECT FUEL TANK TO FILLER PIPE HOSE

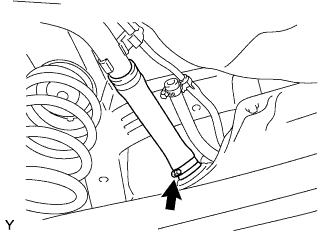
A118742
  1. Connect the fuel tank to filler pipe hose with the clamp.

  1. Tighten the clamp bolt.


8. CONNECT FUEL TANK BREATHER HOSE

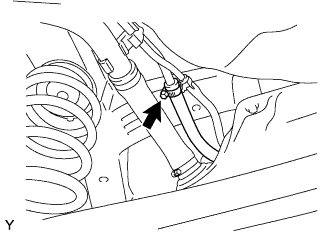
A118741
  1. Connect the fuel tank breather hose with the clamp.

  1. Tighten the clamp bolt.


9. INSTALL FUEL TANK COVER VENT CASE SUB-ASSEMBLY
  1. Install the fuel tank cover vent case with the bolt and clip

    Torque:
    5.4 N*m{ 55 kgf*cm , 48 in.*lbf }


10. INSTALL FRONT FLOOR HEAT INSULATOR NO. 4
  1. Install front floor heat insulator No. 4 with the 2 nuts.

    Torque:
    5.4 N*m{ 55 kgf*cm , 48 in.*lbf }


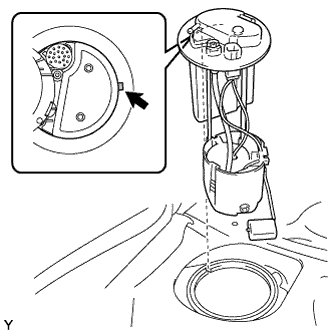
11. INSTALL FUEL SUCTION WITH PUMP AND GAUGE TUBE ASSEMBLY

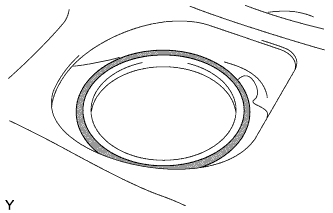
A118738
  1. Install a new fuel suction tube gasket onto the fuel tank.

  1. A118740
    Align the protrusion of the fuel pump with the cutout of the fuel tank and install the fuel suction with pump and gauge tube assembly.

    NOTICE:
    The arm of the sender gauge should not be bent.


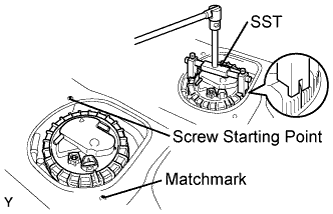
12. INSTALL FUEL PUMP GAUGE RETAINER

A119124E01
  1. Using SST, turn the retainer 540° clockwise from the screw starting point and align the claw of the retainer with the matchmark on the fuel tank.

    SST
    09808-14020   (09808-01410, 09808-01420, 09808-01430)

    NOTICE:
    Replace the fuel pump gauge retainer with a new one if not installed properly.
    Part No. 77144-52040

    HINT:
    1. Align the claws of the fuel pump gauge retainer and the tips of SST.
    2. At the point where the retainer is turned 90° from the start of the thread, push the retainer in from the opposite side to the start of the thread. Check that the thread of the retainer is properly engaged with that on the fuel tank.

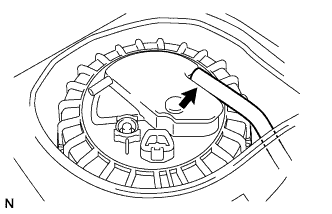
13. CONNECT CANISTER OUTLET HOSE SUB-ASSEMBLY NO. 1

A115477
  1. Connect the canister outlet hose.


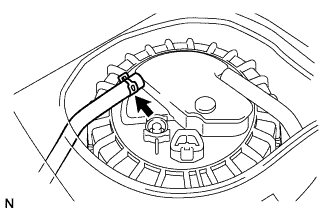
14. CONNECT FUEL EMISSION TUBE NO. 2

A115476
  1. Connect fuel emission tube No.2.


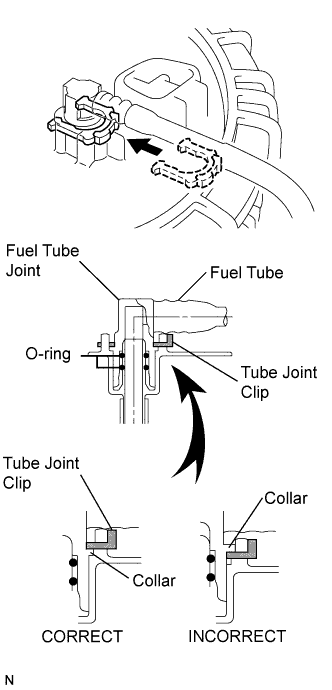
15. CONNECT FUEL TANK MAIN TUBE SUB-ASSEMBLY

A125126E01
  1. Insert the fuel tank main tube.

  1. Install the tube joint clip.

    NOTICE:
    1. Check that there are no scratches or foreign matter on the connecting parts.
    2. Check that the fuel tube joint is inserted securely.
    3. Check that the fuel tube joint clip is on the collar of the fuel tube joint.
    4. After installing the tube joint clips, check that the fuel tube joints have not been pulled off.
    5. Do not damage any clips. If a clip is damaged, replace it.


16. INSTALL REAR FLOOR SERVICE HOLE COVER

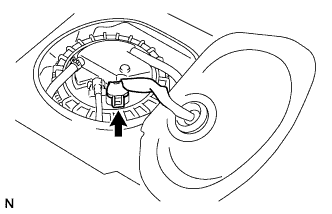
  1. A119173
    Connect the fuel pump connector.

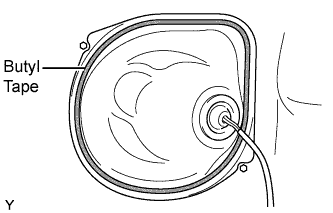
  1. A118729E01
    Install the rear floor service hole cover with new butyl tape.


17. INSTALL REAR SEAT CUSHION ASSEMBLY (for Sedan)

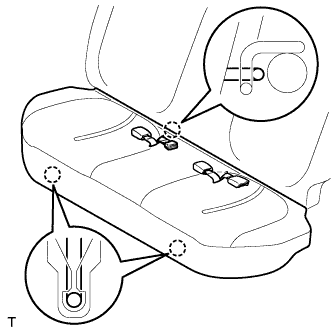
  1. B134923
    Pass the rear seat inner belt through the rear seat cushion slit.

  1. Engage the 3 hooks and install the rear seat cushion cover pad.

    NOTICE:
    Make sure that the 2 rear seat cushion lock hooks and the rear seat cushion frame are securely engaged.


18. INSTALL REAR SEAT ASSEMBLY (for Hatchback)

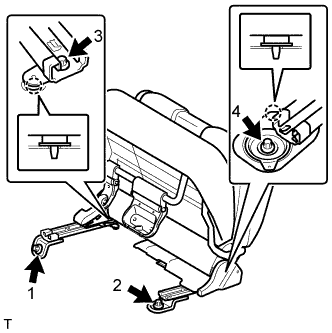
  1. B126922E01
    Insert the 2 location pins through the 2 body holes and install the rear seat.

  1. Using "Torx" socket wrench E10, install the 4 bolts in the sequence shown in the illustration.

    Torque:
    37 N*m{ 375 kgf*cm , 27 ft.*lbf }

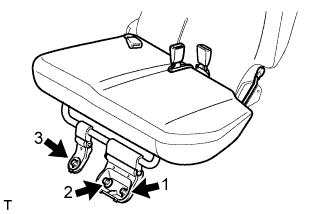
  1. B114740E01
    Install the rear seat cushion.

  1. Using "Torx" socket wrench E10, install the 3 bolts in the sequence shown in the illustration.

    Torque:
    37 N*m{ 375 kgf*cm , 27 ft.*lbf }


19. INSTALL REAR SEAT LEG COVER NO. 2 (for Hatchback)

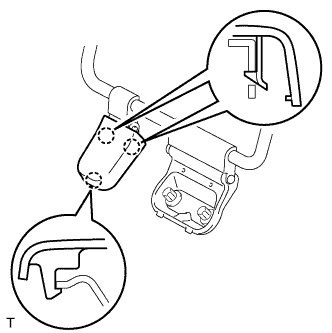
  1. B114739
    Engage the 3 claws and install the No. 2 rear seat leg cover.


20. INSTALL REAR SEAT LEG COVER NO. 1 (for Hatchback)

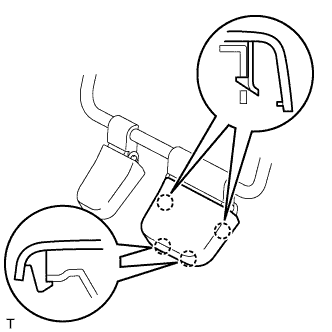
  1. B114738
    Engage the 4 claws and install the No. 1 rear seat leg cover.


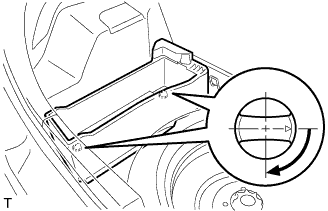
21. INSTALL DECK FLOOR BOX (w/ Deck Board)

  1. B106445
    Install the deck floor box and lock the 2 knobs.


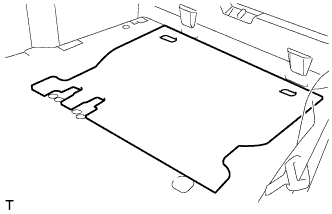
22. INSTALL SPARE WHEEL COVER ASSEMBLY (w/ Deck Board)

  1. B119913
    Install the spare wheel cover.


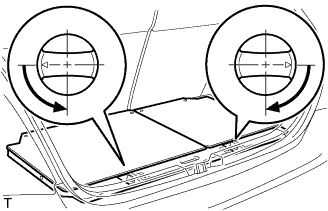
23. INSTALL DECK BOARD SUB-ASSEMBLY (w/ Deck Board)

  1. B106447
    Set the deck board and lock the 2 knobs.


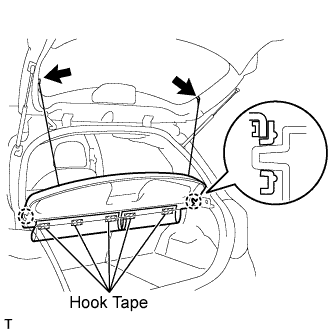
24. INSTALL PACKAGE TRAY TRIM PANEL ASSEMBLY (w/ Package Tray Trim)

  1. B114569E01
    Engage the 2 claws and install the package tray trim panel.

  1. Install the 5 pieces of hook tape.

  1. Install the 2 package tray trim suspenders.


25. ADD FUEL

26. CONNECT CABLE TO NEGATIVE BATTERY TERMINAL

Torque:
5.4 N*m{ 55 kgf*cm , 48 in.*lbf }


27. CHECK FOR FUEL LEAKAGE
  1. When using the intelligent tester.

    1. Connect the intelligent tester to the DLC3.

    2. Turn the ignition switch on (IG) and the intelligent tester main switch on.

      NOTICE:
      Do not start the engine.

    3. Select the Active Test mode on the intelligent tester.

      HINT:
      Refer to the intelligent tester operator's manual for further details.

  1. Check that there is no fuel leakage anywhere in the fuel system after doing maintenance.

← INSTALLATION (Aug 2005 – Dec 2005)PRECAUTION (Aug 2005 – Dec 2005) →