Home › ENGINE › 1NZ-FE FUEL › FUEL TANKREMOVAL
Removal / installation · Vehicles built from Jan 2006
Versions by build date: Aug 2005 – Dec 2005 from Jan 2006
NOTICE:
Always use "Torx" socket wrench E10 when removing the rear seat.
1.
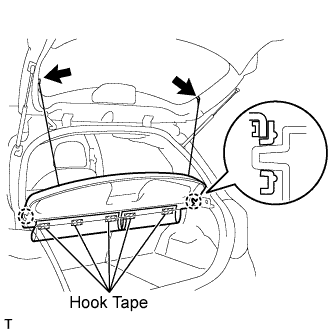
REMOVE PACKAGE TRAY TRIM PANEL ASSEMBLY (w/ Package Tray Trim)
Remove the 2 package tray trim suspenders. Remove the 5 pieces of hook tape.
Disengage the 2 claws and remove the package tray trim.
2.
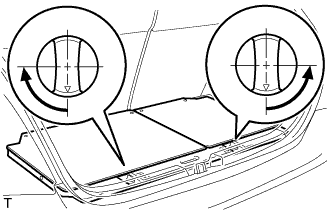
REMOVE DECK BOARD SUB-ASSEMBLY (w/ Deck Board)
Release the 2 knobs and remove the deck board.
3.
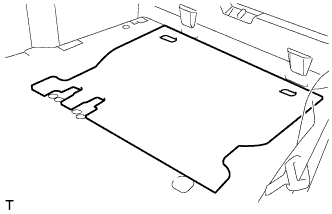
REMOVE SPARE WHEEL COVER ASSEMBLY (w/ Deck Board)
Remove the spare wheel cover.
4.
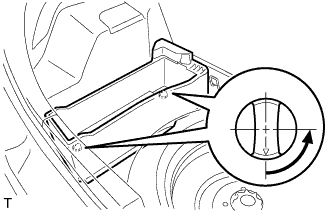
REMOVE DECK FLOOR BOX (w/ Deck Board)
Release the 2 knobs and remove the deck floor box.
5.
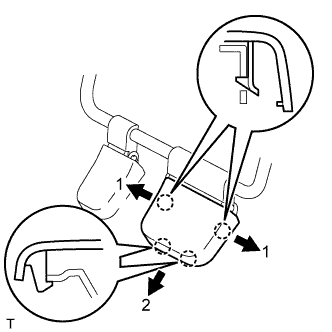
REMOVE REAR SEAT LEG COVER NO. 1 (for Hatchback)
Disengage the 4 claws in the sequence shown in the illustration and remove the No. 1 rear seat leg cover.
6.
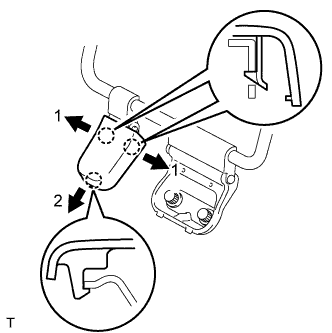
REMOVE REAR SEAT LEG COVER NO. 2 (for Hatchback)
Disengage the 3 claws in the sequence shown in the illustration and remove the No. 1 rear seat leg cover.
7.
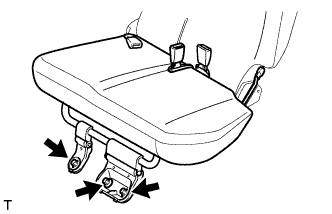
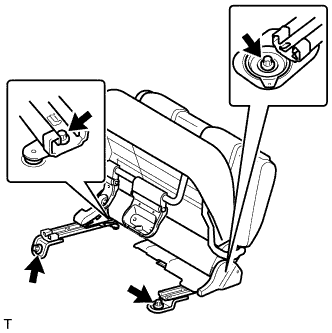
REMOVE REAR SEAT ASSEMBLY (for Hatchback)
Using "Torx" socket wrench E10, remove the 3 bolts and pull up the rear seat cushion.
Using "Torx" socket wrench E10, remove the 4 bolts and the rear seat.
8.
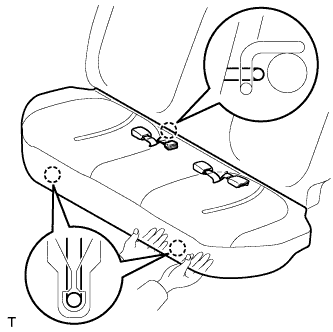
REMOVE REAR SEAT CUSHION ASSEMBLY (for Sedan)
Hold the front edge of the rear seat cushion cover pad and lift it up, as shown in the illustration, to disengage the 2 hooks.
NOTICE:
Hold the area around the hooks so as to avoid deforming the rear seat cushion frame.
Pass the rear seat inner belt through the slit in the rear seat cushion cover pad, disengage the hook between the rear seat cushion cover pad and the rear seatback, and remove the rear seat cushion cover pad.
9.
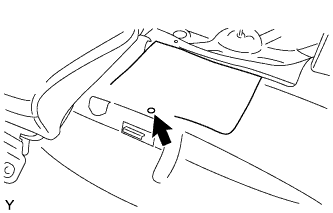
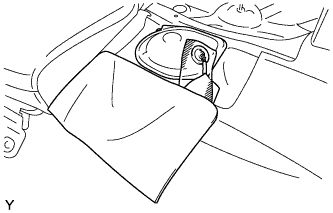
REMOVE REAR FLOOR SERVICE HOLE COVER
Remove the clip from the floor carpet.
Remove the rear floor service hole cover.
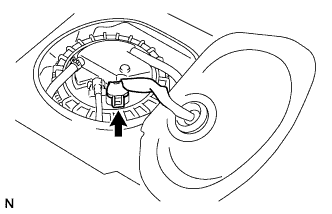
Disconnect the fuel pump connector.
10.
DISCHARGE FUEL SYSTEM PRESSURE
(Click here )
11.
DISCONNECT CABLE FROM NEGATIVE BATTERY TERMINAL
12.
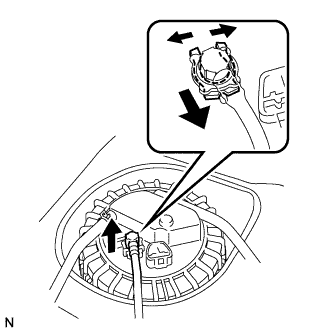
DISCONNECT FUEL TANK MAIN TUBE SUB-ASSEMBLY
Widen the tip of the tube joint clip and pull out the clip.
Pull out the fuel tank main tube to disconnect it.
NOTICE:
Keep the O-ring free of foreign matter, as it becomes contaminated easily.
Do not use any tools in this procedure.
Do not forcefully bend or twist the tube.
Put the tube in a plastic bag to prevent damage and contamination.
If the fuel suction plate and tube are stuck together, pinch the tube and turn it carefully to disconnect it.
Do not damage any clips. If a clip is damaged, replace it.
13.
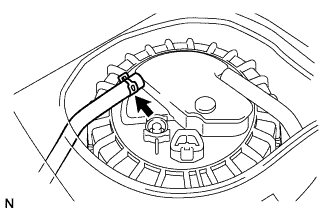
DISCONNECT FUEL EMISSION TUBE NO. 2
Loosen the clamp and disconnect fuel emission tube No. 2.
14.
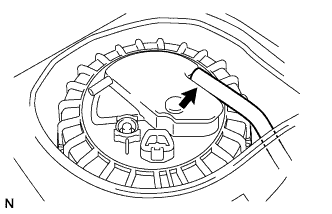
DISCONNECT CANISTER OUTLET HOSE SUB-ASSEMBLY NO. 1
Disconnect the canister outlet hose.
15.
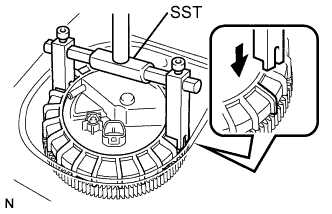
REMOVE FUEL PUMP GAUGE RETAINER
Using SST, remove the fuel pump gauge retainer.
SST
09808-14020
(09808-01410, 09808-01420, 09808-01430)
HINT:
Align the claws of the fuel pump gauge retainer and the tips of SST.
16.
REMOVE FUEL SUCTION WITH PUMP AND GAUGE TUBE ASSEMBLY
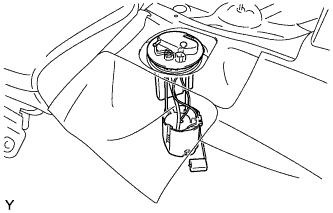
Remove the fuel suction with pump and gauge tube assembly.
NOTICE:
Do not bend the arm of the sender gauge.
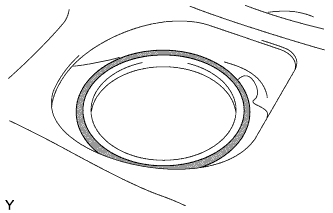
Remove the fuel suction tube gasket from the fuel tank.
18.
REMOVE FRONT FLOOR HEAT INSULATOR NO. 4
Remove the 2 nuts and remove the insulator.
19.
REMOVE FUEL TANK COVER VENT CASE SUB-ASSEMBLY
Remove the bolt and clip and remove the case.
20.
DISCONNECT FUEL TANK BREATHER HOSE
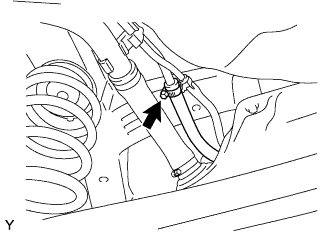
Loosen the clamp bolt and disconnect the fuel tank breather hose.
21.
DISCONNECT FUEL TANK TO FILLER PIPE HOSE
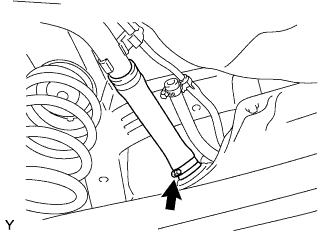
Loosen the clamp and disconnect the fuel tank to filler pipe hose.
22.
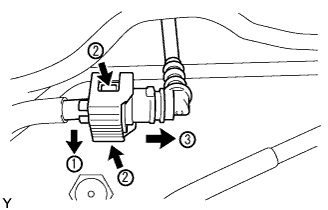
DISCONNECT FUEL TANK MAIN TUBE SUB-ASSEMBLY
Release the lock as shown in the illustration, then pull and remove the fuel tank main tube.
NOTICE:
Remove any dirt and foreign matter from the clip before performing this work.
Avoid any scratches or foreign matter on the parts when disconnecting, as the quick connector has the O-ring that seals the plug.
Perform this work by hand. Do not use any tools.
Do not forcibly bend, twist or turn the nylon tube.
Protect the disconnected parts by covering them with a plastic bag.
If the connector and pipe are stuck, disconnect the nylon tube by turning it by hand to release it.
23.
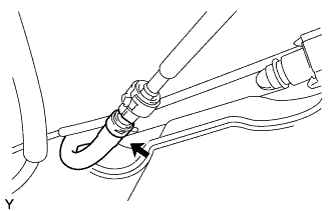
DISCONNECT FUEL EMISSION TUBE NO. 2
Loosen the clamp and disconnect fuel emission tube No. 2.
24.
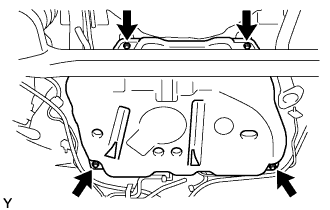
REMOVE FUEL TANK ASSEMBLY
Set the mission jack under the fuel tank.
Remove the 4 bolts and the fuel tank.
25.
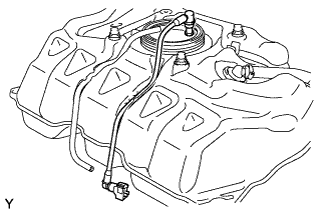
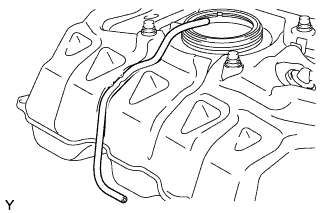
REMOVE FUEL TANK MAIN TUBE SUB-ASSEMBLY
Remove the fuel tank main tube from the fuel tank.
26.
REMOVE FUEL EMISSION TUBE NO.2
Remove fuel emission tube No. 2 from the fuel tank.
27.
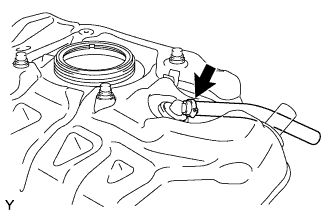
REMOVE FUEL TANK BREATHER TUBE
Loosen the clamp bolt and remove the fuel tank breather hose.