INSTALLATION
Removal / installation · Vehicles built from Nov 2005
| 1. INSTALL CLUTCH COVER ASSEMBLY |

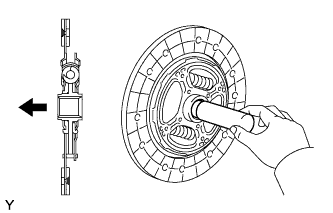  |
Insert SST into the clutch disc, then insert them into the flywheel.
- SST
- 09301-00131
- HINT:
- Insert the clutch disc in the correct orientation.
Align the matchmarks on the clutch cover and flywheel.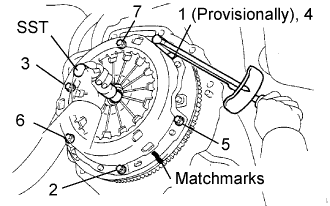
Following the procedures shown in the illustration, tighten the 6 bolts in the order starting with the bolt located near the knock pin on the top.
- Torque:
- 19 N*m{ 195 kgf*cm , 14 ft.*lbf }
- HINT:
- Following the order in the illustration, uniformly tighten the bolts.
- Move SST up and down, right and left gently after checking that the disc is in the center and tighten the bolts.
- Following the order in the illustration, uniformly tighten the bolts.
| 2. INSPECT AND ADJUST CLUTCH COVER ASSEMBLY |
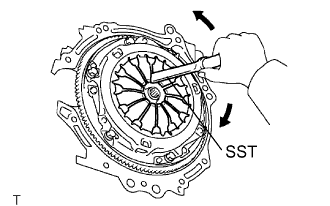 |
Using a dial indicator with roller instrument, check the diaphragm spring tip alignment.
- Maximum non-alignment:
- 0.5 mm (0.020 in.)
- SST
- 09333-00013
| 3. INSTALL CLUTCH RELEASE FORK LEVER SHAFT OIL SEAL |
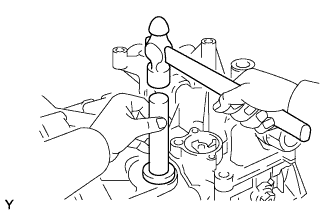 |
Using SST, drive in the oil seal until its surface is flush with the transaxle housing.
- SST
- 09950-60010
09950-70010
| 4. INSTALL CLUTCH RELEASE FORK |
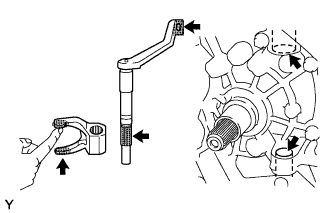 |
Apply release hub grease to the release fork, fork lever and fork lever bushings.
- Sealant:
- Toyota Genuine Release Hub Grease or Equivalent
Apply clutch spline grease to the clutch disc spline.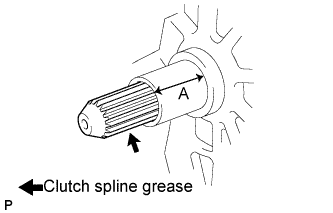
- Sealant:
- Toyota Genuine Clutch Spline Grease or Equivalent
- NOTICE:
- Do not apply grease to portion A shown in the illustration.
Install the fork lever and fork onto the transaxle housing.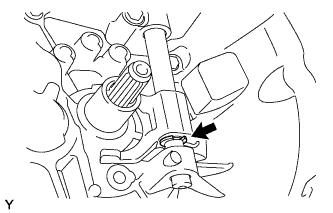
Install a new E-ring onto the fork lever.
Install the release bearing with the clip.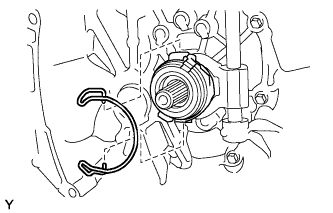
| 5. INSTALL SHIFT STROKE SENSOR |
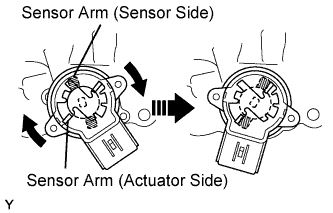 |
Apply MP grease to a new O-ring.
Install the new O-ring onto the stroke sensor.
Set the stroke senor so that the sensor side and the actuator side sensor arms are in the positions shown in the illustration.
Turn the stroke sensor clockwise and fix it with the 2 screws.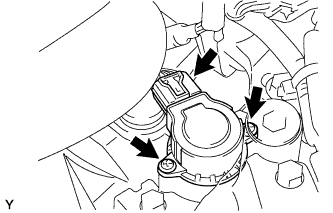
- Torque:
- 2.0 N*m{ 20 kgf*cm , 18 in.*lbf }
Connect the shift stroke sensor connector.
Install the wire harness bracket onto the transaxle with the bolt.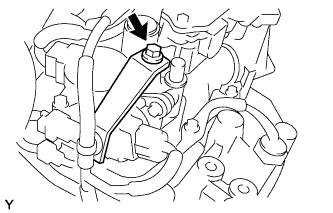
- Torque:
- 13 N*m{ 131 kgf*cm , 9.5 ft.*lbf }
| 6. INSTALL MULTI-MODE MANUAL TRANSAXLE ASSEMBLY |