INSTALLATION
Removal / installation · Vehicles built from Nov 2005
- NOTICE:
- Always use "Torx" socket wrench E10 when installing the rear seat.
| 1. INSTALL REAR SEAT ASSEMBLY |

Insert the 2 locating pins through the 2 body holes and install the rear seat.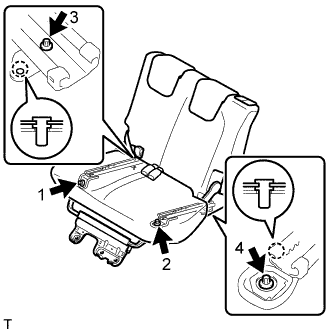

Using "Torx" socket wrench E10, install the 4 bolts in the sequence shown in the illustration.
- Torque:
- 37 N*m{ 375 kgf*cm , 27 ft.*lbf }
Install the rear seat cushion.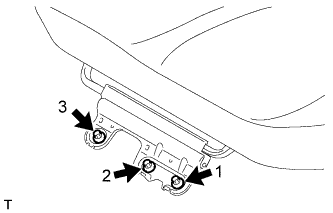
Using "Torx" socket wrench E10, install the 3 bolts in the sequence shown in the illustration.
- Torque:
- 37 N*m{ 375 kgf*cm , 27 ft.*lbf }
| 2. INSTALL NO. 2 REAR SEAT LEG COVER |
Engage the 6 claws and install the No. 2 rear seat leg cover.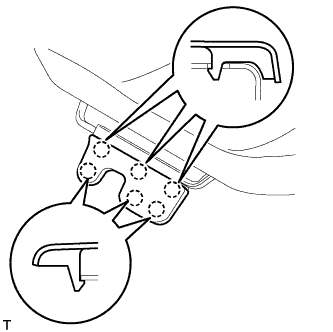
| 3. INSTALL DECK FLOOR BOX (w/ Deck Board) |
Install the deck floor box and lock the 2 knobs.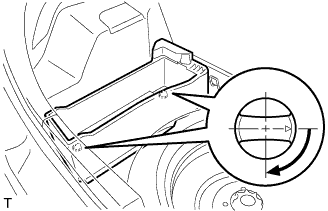
| 4. INSTALL SPARE WHEEL COVER ASSEMBLY (w/ Deck Board) |
Install the spare wheel cover.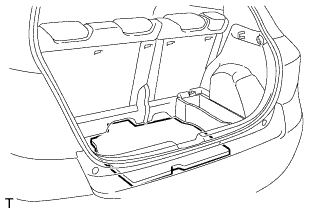
| 5. INSTALL DECK BOARD SUB-ASSEMBLY (w/ Deck Board) |
Set the deck board and lock the 2 knobs.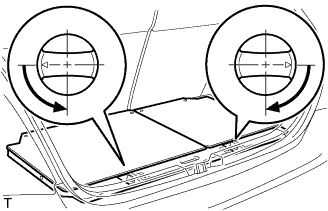
| 6. INSTALL REAR FLOOR CARPET ASSEMBLY (w/o Deck Board) |
Install the rear floor carpet.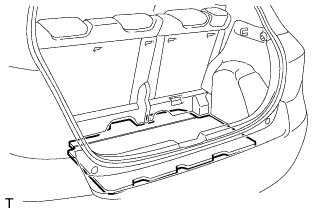
| 7. INSTALL PACKAGE TRAY TRIM PANEL ASSEMBLY (w/ Package Tray Trim) |
Engage the 2 claws and install the package tray trim panel.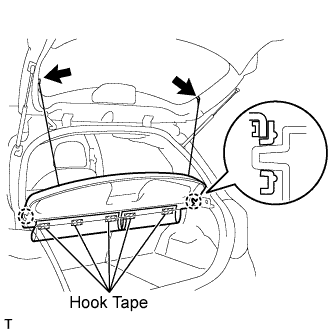
Install the 5 pieces of hook tape.
Install the 2 package tray trim suspenders.