REASSEMBLY
Removal / installation · Vehicles built from Aug 2005
| 1. INSTALL STARTER CLUTCH SUB-ASSEMBLY |

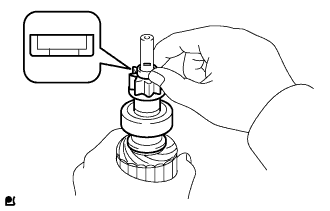  |
Apply grease to the bushing and spline of the starter clutch.
Place the starter clutch and inside stop collar on the armature.
Apply grease to the snap ring, and install it onto the armature shaft groove.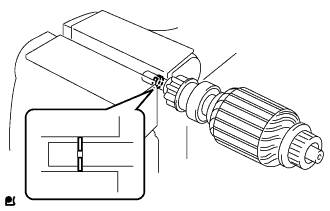
Using a vise, compress the snap ring.
Hold the starter clutch, tap the armature shaft and install the stop collar onto a new snap ring with a plastic-faced hammer.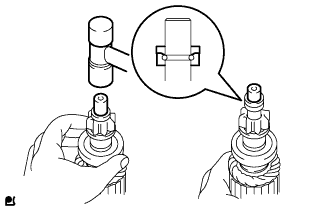
| 2. INSTALL STARTER ARMATURE ASSEMBLY |
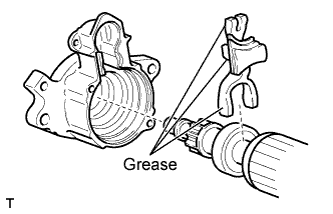 |
Apply grease to the drive lever that is in contact with the starter pivot part of the drive lever.
Install the drive lever onto the starter clutch.
Install the armature together with the drive lever onto the starter housing.
| 3. INSTALL STARTER YOKE ASSEMBLY |
Align the cutout of the starter yoke assembly with the protrusion of the starter lever.
Hold the starter drive housing in a vice between aluminum plates.
- NOTICE:
- Do not overtighten the vise.
Install the brush holder, and connect the 4 brushes into the brush holder.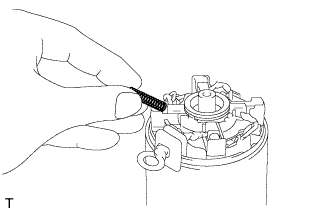
Install the 4 brush springs and plate.
- NOTICE:
- Check that positive (+) lead wires are not grounded.
Install the end cover with the 2 through bolts.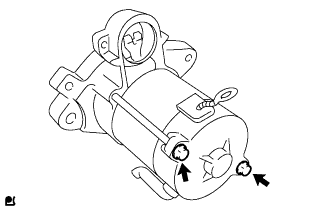
- Torque:
- 5.9 N*m{ 60 kgf*cm , 52 in.*lbf }
| 4. INSTALL MAGNET STARTER SWITCH ASSEMBLY |
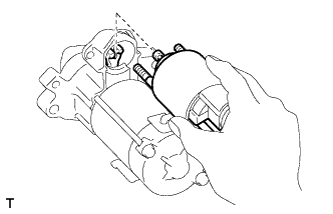 |
Hang the plunger of the magnetic switch onto the drive lever from the upper side.
Install the magnetic switch with the 2 nuts.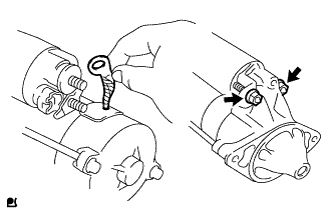
- Torque:
- 8.3 N*m{ 85 kgf*cm , 73 in.*lbf }
Connect the lead wire to the terminal, and install the nut.
- Torque:
- 9.8 N*m{ 100 kgf*cm , 87 in.*lbf }