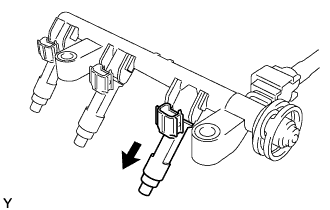
REMOVAL
Removal / installation · Vehicles built from Aug 2005
| 1. DISCHARGE FUEL SYSTEM PRESSURE |

| 2. DISCONNECT CABLE FROM NEGATIVE BATTERY TERMINAL |
| 3. REMOVE AIR CLEANER CAP SUB-ASSEMBLY |
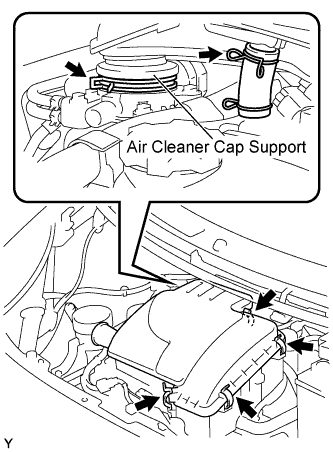  |
Remove the 4 clamps.
Remove the 2 clamps and remove the air cleaner cap.
| 4. REMOVE AIR CLEANER FILTER ELEMENT SUB-ASSEMBLY |
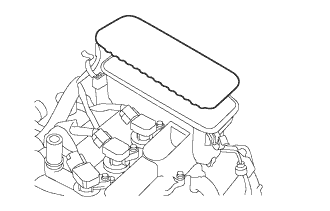 |
Remove the air cleaner filter element from the cylinder head cover.
| 5. SEPARATE FUEL TUBE SUB-ASSEMBLY |
Disconnect the fuel earth cable from the fuel heater hose.
Remove fuel pipe clamp No. 2 from the fuel tube connector.
Pinch the tube connector and then pull out the fuel pipe.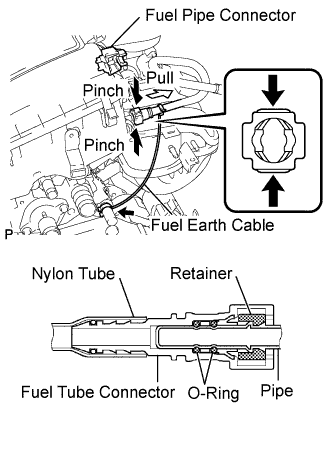
- NOTICE:
- Remove any dirt and foreign matter around the connector before performing this operation.
- Be careful of mud because the quick connector has O-rings which seal the pipe and connector that can be contaminated.
- Do not use any tools in this operation.
- Do not bend or twist the nylon tube. Protect the connector by covering it with a plastic bag.
- Push and pull the connector to release when the pipe and the connector are stuck and pull the connector out carefully.
- Remove any dirt and foreign matter around the connector before performing this operation.
| 6. REMOVE FUEL DELIVERY PIPE |
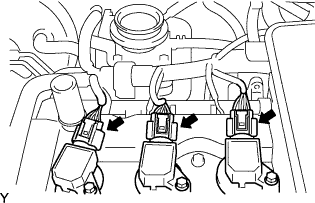 |
Disconnect the 3 ignition coil connectors.
Disconnect the 3 injector connectors.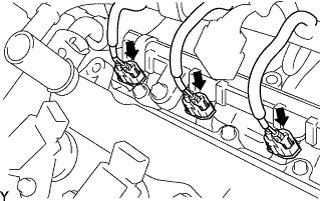
Disengage the 5 clamps, and separate the engine wire harness from the cylinder head cover.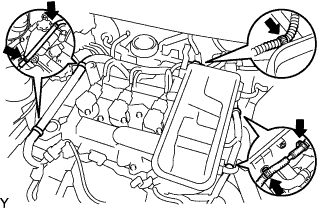
Remove the 2 bolts and delivery pipe together with the 3 injectors.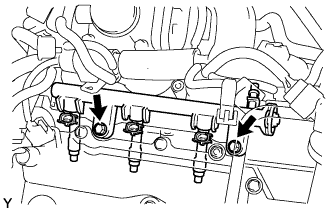
- NOTICE:
- Do not drop the injectors when removing the delivery pipe.
Remove the 3 injector vibration insulators from the cylinder head.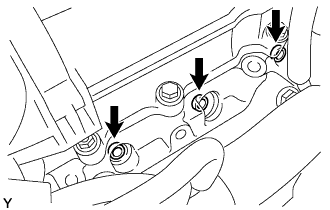
| 7. REMOVE FUEL INJECTOR ASSEMBLY |
Pull the 3 injectors out of the fuel delivery pipe.