DISASSEMBLY
Removal / installation · Vehicles built from Aug 2005
| 1. REMOVE TRANSMISSION CONTROL SHAFT LEVER |

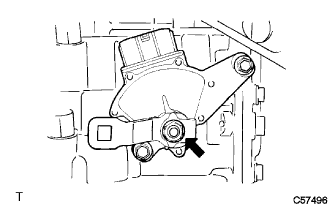  |
Remove the nut, washer and control lever.
| 2. REMOVE PARK/NEUTRAL POSITION SWITCH ASSEMBLY |
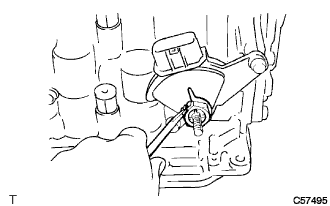 |
Using a screwdriver, release the lock washer.
Remove the 2 bolts and pull out the park/neutral position switch.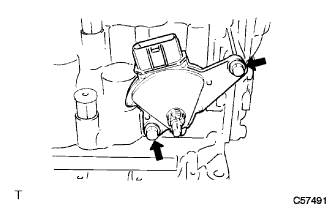
| 3. REMOVE TRANSMISSION REVOLUTION SENSOR |
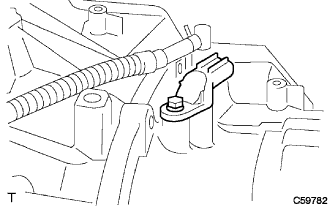 |
Remove the bolt and remove the transmission revolution sensor.
Remove the O-ring from the transmission revolution sensor.
| 4. REMOVE BREATHER PLUG HOSE |
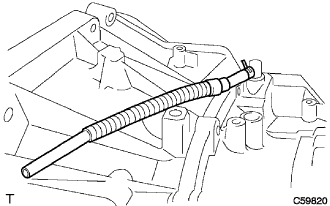 |
Remove the clip and the breather plug hose.
| 5. REMOVE OIL COOLER TUBE UNION |
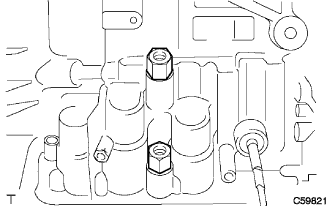 |
Remove the 2 unions.
Remove the 2 O-rings from the unions.
| 6. FIX AUTOMATIC TRANSAXLE ASSEMBLY |
Place the transaxle on wooden blocks.
| 7. REMOVE AUTOMATIC TRANSAXLE OIL PAN SUB-ASSEMBLY |
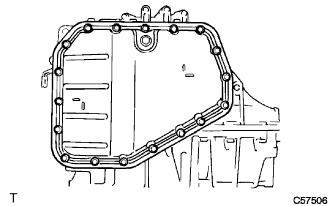 |
Remove the 18 bolts.
Remove the oil pan and the gasket.
Remove the drain plug and the gasket from the oil pan.
| 8. REMOVE VALVE BODY OIL STRAINER ASSEMBLY |
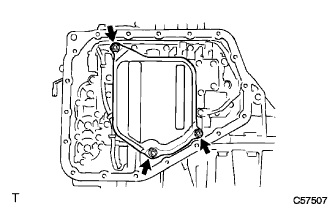 |
Remove the 3 bolts and the oil strainer.
Remove the gasket from the oil strainer.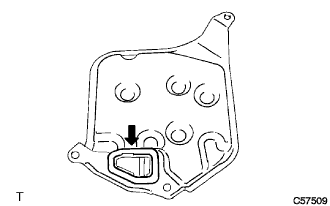
| 9. REMOVE TRANSMISSION VALVE BODY ASSEMBLY |
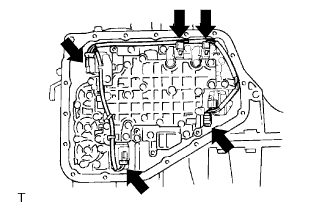 |
Disconnect the ATF temperature sensor from the clamp.
Disconnect the 5 connectors.
Support the valve body assembly and remove the 14 bolts.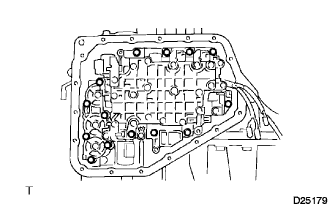
- NOTICE:
- Store the bolts so that they can be reinstalled in their original positions because they are of varying lengths.
Disconnect the manual valve control rod from the manual valve lever, then remove the valve body.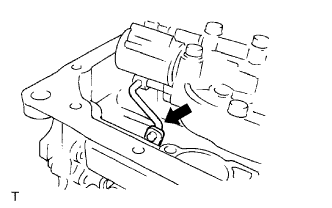
| 10. REMOVE TRANSMISSION WIRE |
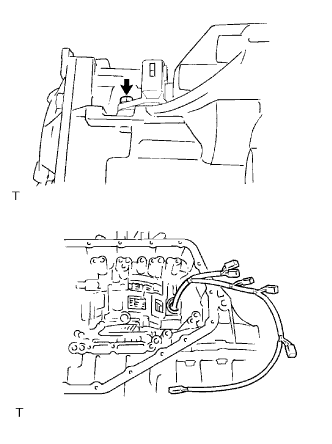 |
Remove the bolt.
Remove the transmission wire from the transaxle case.
Remove the O-ring from the transmission wire.
| 11. REMOVE GOVERNOR APPLY GASKET NO. 1 |
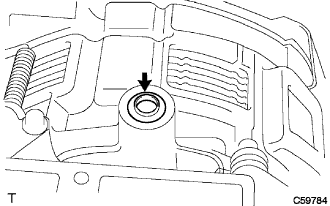 |
Using a screwdriver, remove governor apply gasket No. 1 from the transaxle case.
| 12. REMOVE CHECK BALL BODY |
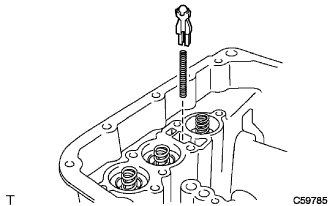 |
Remove the check ball body and the spring.
| 13. REMOVE C-2 ACCUMULATOR PISTON |
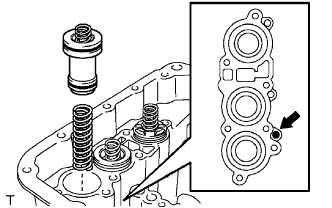 |
Apply compressed air (392 kPa, 4.0 kgf/cm2, 57 psi) to the oil hole and remove the C-2 accumulator piston and spring.
- NOTICE:
- Blowing the air may cause the piston to jump out.
When removing the piston, hold it by hand using a shop rag or piece of cloth.
- Do not splash ATF with the compressed air.
- Blowing the air may cause the piston to jump out.
| 14. REMOVE C-2 ACCUMULATOR SPRING SUB-ASSEMBLY |
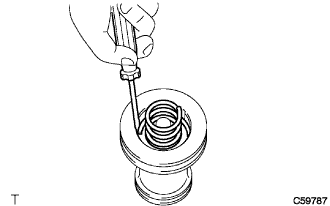 |
Using a screwdriver, remove the snap ring and remove the C-2 accumulator spring.
| 15. REMOVE C-1 ACCUMULATOR PISTON |
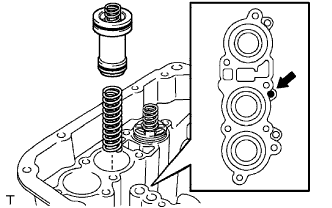 |
Apply compressed air (392 kPa, 4.0 kgf/cm2, 57 psi) to the oil hole and remove the C-1 accumulator piston and spring.
- NOTICE:
- Blowing off the air may cause the piston to jump out.
When removing the piston, hold it by hand using a shop rag or piece of cloth.
- Do not splash ATF with the compressed air.
- Blowing off the air may cause the piston to jump out.
| 16. REMOVE C-1 ACCUMULATOR SPRING SUB-ASSEMBLY |
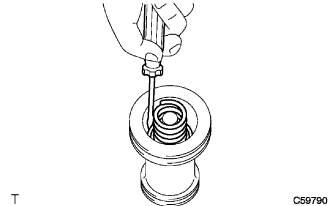 |
Using a screwdriver, remove the C-1 accumulator spring.
| 17. REMOVE PISTON B-1 ACCUMULATOR |
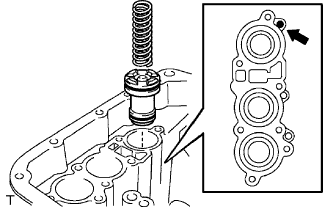 |
Remove B-1 accumulator piston compression spring No. 2.
Apply compressed air (392 kPa, 4.0 kgf/cm2, 57 psi) to the oil hole and remove the B-1 accumulator piston.
- NOTICE:
- Blowing the air may cause the piston to jump out.
When removing the piston, hold it by hand using a shop rag or piece of cloth.
- Do not splash ATF with the compressed air.
- Blowing the air may cause the piston to jump out.
| 18. REMOVE B-1 ACCUMULATOR PISTON COMPRESSION SPRING |
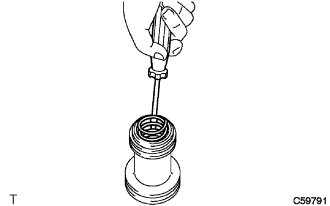 |
Using a screwdriver, remove the B-1 accumulator piston compression spring.
| 19. REMOVE TRANSAXLE HOUSING |
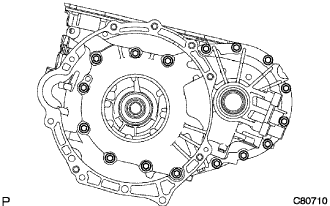 |
Remove the 16 bolts.
Tap around the circumference of the transaxle housing with a plastic hammer to remove the transaxle housing from the transaxle case.
- NOTICE:
- The differential gear assembly may be accidentally removed when the transaxle housing is removed.
| 20. INSPECT INPUT SHAFT END PLAY |
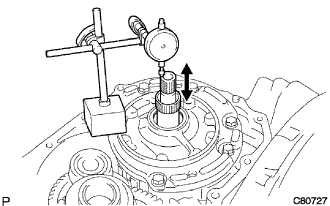 |
Using a dial indicator, measure the input shaft end play.
- End play:
- 0.3 to 0.9 mm (0.012 to 0.035 in.)
| 21. REMOVE OIL PUMP ASSEMBLY |
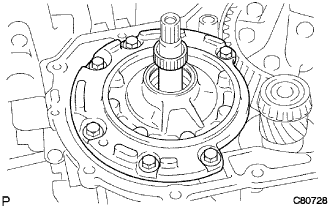 |
Remove the 6 bolts and the oil pump assembly from the transaxle case.
| 22. REMOVE INPUT SHAFT ASSEMBLY |
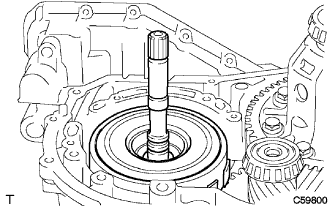 |
Remove the input shaft assembly from the transaxle case.
| 23. REMOVE STATOR SHAFT THRUST NEEDLE ROLLER BEARING |
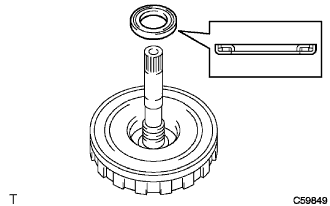 |
Remove the thrust needle roller bearing from the input shaft.
| 24. REMOVE PLANETARY GEAR FRONT THRUST NEEDLE ROLLER BEARING |
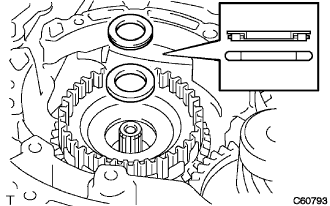 |
Remove the thrust needle roller bearing and the thrust bearing race from the direct clutch hub.
| 25. REMOVE DIRECT CLUTCH HUB |
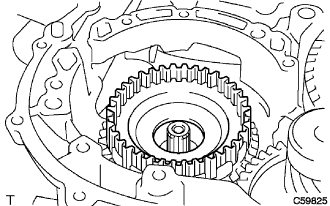 |
Remove the direct clutch hub from the transaxle case.
| 26. REMOVE DIFFERENTIAL GEAR ASSEMBLY |
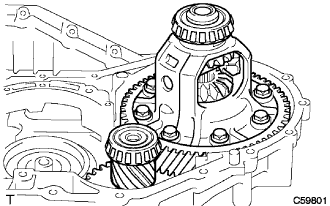 |
Remove the differential gear assembly and differential drive pinion from the transaxle case.
| 27. REMOVE GOVERNOR APPLY GASKET NO. 2 |
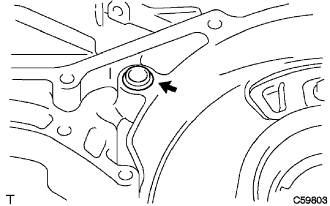 |
Remove governor apply gasket No. 2 from the transaxle case.
| 28. REMOVE TRANSAXLE REAR COVER ASSEMBLY |
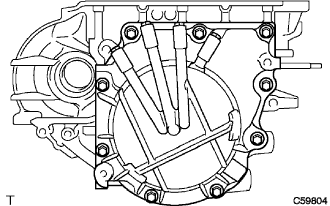 |
Remove the 9 bolts.
Tap around the circumference of the transaxle rear cover with a plastic hammer to remove the transaxle rear cover from the transaxle case.
| 29. REMOVE TRANSAXLE CASE 2ND BRAKE GASKET |
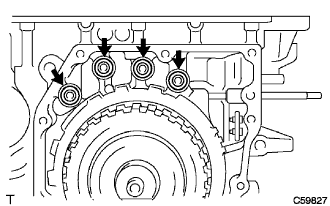 |
Using a screwdriver, remove the 4 transaxle case 2nd brake gaskets.
| 30. REMOVE FRONT CLUTCH DRUM THRUST NEEDLE ROLLER BEARING |
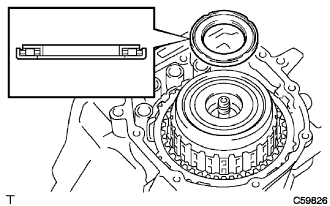 |
Using a magnetic finger, remove the clutch drum thrust needle roller bearing.
| 31. REMOVE INTERMEDIATE SHAFT ASSEMBLY |
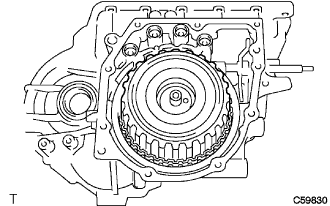 |
Remove the intermediate shaft assembly from the transaxle case.
| 32. REMOVE SUN GEAR REAR THRUST BEARING |
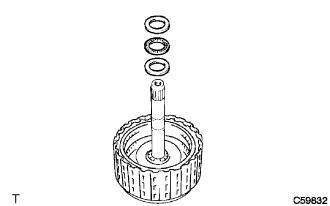 |
Remove the thrust sun gear rear thrust bearing and the 2 thrust bearing races from the intermediate shaft.
| 33. REMOVE 2ND COAST AND OVERDRIVE BRAKE DISC |
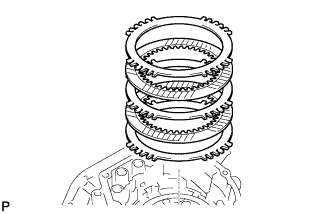 |
Remove the flange, 2 discs and 2 plates from the transaxle case.
| 34. REMOVE 2ND COAST AND OVERDRIVE BRAKE FLANGE HOLE SNAP RING |
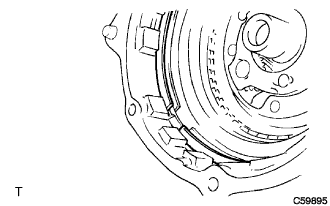 |
Using a screwdriver, remove the 2nd coast and the over drive hole snap ring from the transaxle case.
| 35. REMOVE FORWARD CLUTCH HUB SUB-ASSEMBLY |
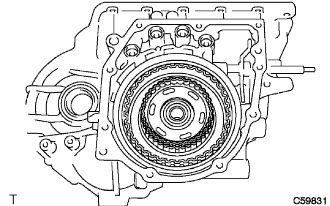 |
Remove the forward clutch hub sub-assembly from the transaxle case.
| 36. REMOVE FORWARD CLUTCH HUB THRUST NEEDLE ROLLER BEARING |
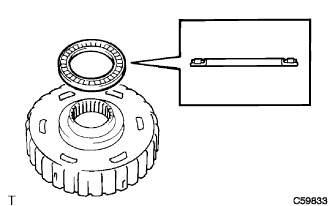 |
Remove the forward clutch hub thrust needle roller bearing from the forward clutch hub.
| 37. REMOVE FORWARD CLUTCH HUB THRUST BEARING RACE |
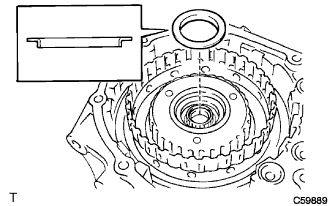 |
Remove the forward clutch hub thrust bearing race from the planetary sun gear.
| 38. REMOVE REAR PLANETARY SUN GEAR ASSEMBLY |
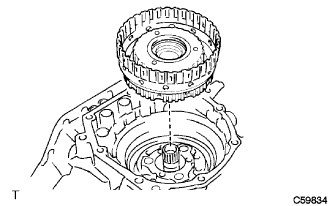 |
Remove the rear planetary sun gear assembly from the transaxle case.
| 39. REMOVE PLANETARY GEAR REAR THRUST NEEDLE ROLLER BEARING |
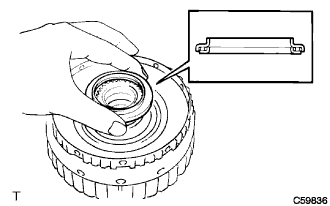 |
Remove the planetary gear rear thrust needle roller bearing from the rear planetary sun gear.
| 40. INSPECT 1 WAY CLUTCH ASSEMBLY |
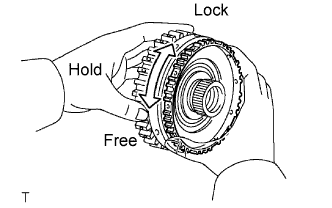 |
Hold the rear planetary sun gear and turn the 1-way clutch.
Make sure that the 1-way clutch turns freely clockwise and locks when turned counterclockwise.
| 41. REMOVE 1 WAY CLUTCH ASSEMBLY |
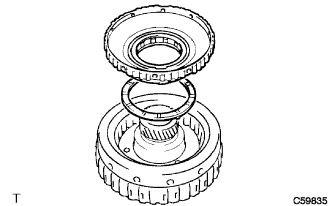 |
Remove the 1 way clutch assembly and planetary carrier thrust washer No. 2 from the rear planetary sun gear.
| 42. REMOVE PLANETARY CARRIER THRUST WASHER |
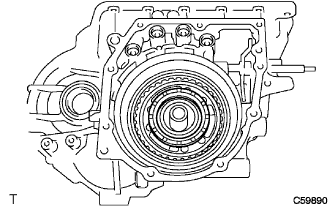 |
Remove the planetary carrier thrust washer from the transaxle case.
| 43. REMOVE PLANETARY SUN GEAR SUB-ASSEMBLY |
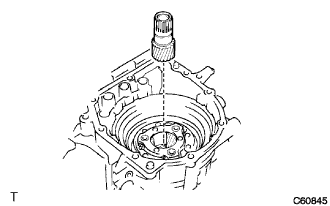 |
Remove the planetary sun gear sub-assembly from the transaxle case.
| 44. REMOVE FRONT PLANETARY FLANGE FRONT THRUST BEARING RACE |
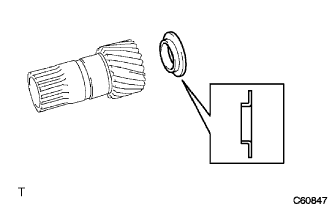 |
Remove the front planetary flange front thrust bearing race from the planetary sun gear.
| 45. REMOVE SECOND BRAKE PISTON ASSEMBLY |
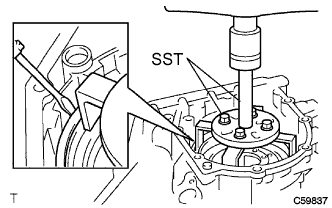 |
Using SST, a press and a screwdriver, remove the snap ring.
- SST
- 09387-00100
09950-70010 (09951-07100)
Remove the second brake piston assembly from the transaxle case.
| 46. REMOVE 2ND BRAKE PISTON RETURN SPRING SUB-ASSEMBLY |
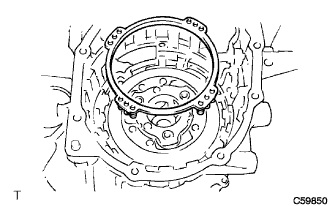 |
Remove the 2nd brake piston return spring sub-assembly from the transaxle case.
| 47. REMOVE 2ND BRAKE BRAKE DISC |
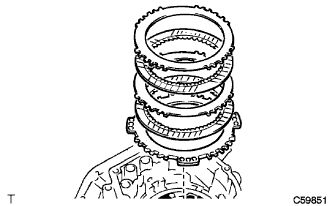 |
Remove the 2 plates, 2 discs and flange from the transaxle case.
| 48. REMOVE BRAKE DRUM GASKET |
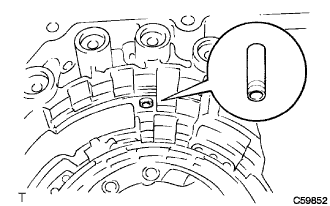 |
Remove the brake drum gasket from the transaxle case.
| 49. REMOVE OUTER RACE RETAINER |
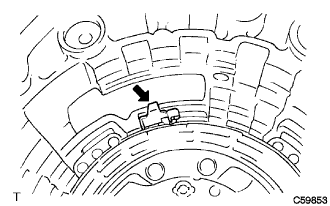 |
Remove the outer race retainer from the transaxle case.
| 50. INSPECT 1 WAY CLUTCH NO. 2 |
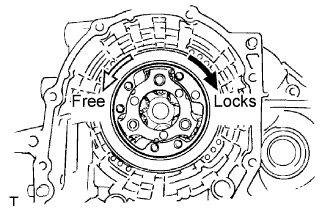 |
Check that the planetary gear turns freely counterclockwise and locks when turned clockwise.
| 51. REMOVE 1-WAY CLUTCH NO. 2 |
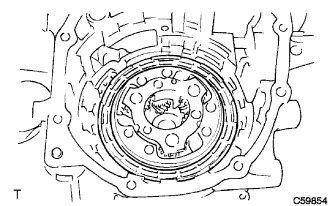 |
Remove 1-way clutch No. 2 from the transaxle case.
| 52. REMOVE PLANETARY GEAR ASSEMBLY |
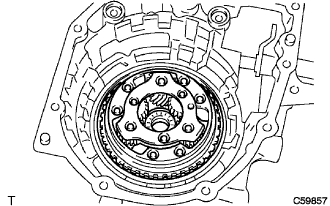 |
Remove the planetary gear assembly from the transaxle case.
| 53. REMOVE 1ST AND REVERSE BRAKE DISC |
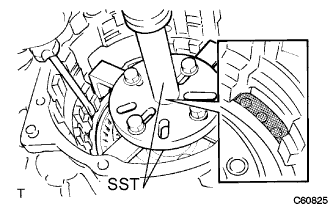 |
Using SST, a press and a screwdriver, remove the snap ring.
- SST
- 09387-00100
09950-70010 (09951-07100)
Remove the flange, 4 discs and 4 plates from the transaxle case.
| 54. REMOVE 1ST AND REVERSE BRAKE RETURN SPRING SUB-ASSEMBLY |
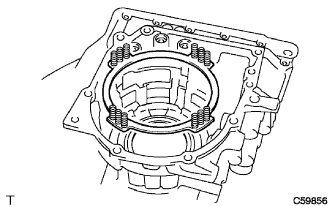 |
Remove the 1st and reverse brake return spring sub-assembly from the transaxle case.
| 55. REMOVE COUNTER DRIVE GEAR NUT |
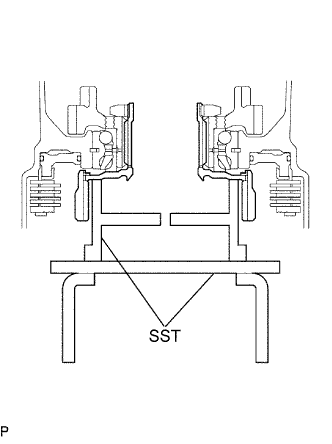 |
Using SST, lift the transaxle case.
- SST
- 09213-14010
09387-00060
Using SST and a hammer, release the counter drive gear nut.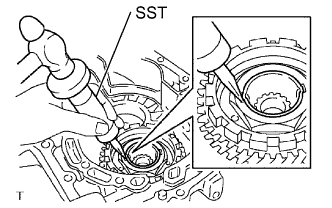
- SST
- 09930-00010
Using a 55 mm socket wrench, remove the counter drive gear nut from the planetary ring gear flange.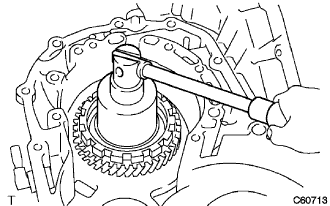
- NOTICE:
- Remove the nut without unstaking the planetary ring gear.
- If a chisel or other tool is used to unstake the planetary ring gear, the impact may damage the bearing.
- HINT:
- Shift the shift lever into the P position and fix the counter drive gear.
| 56. REMOVE PLANETARY RING GEAR FLANGE |
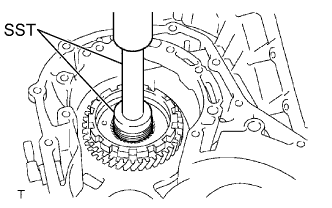 |
Using SST and a press, remove the planetary ring gear.
- SST
- 09950-60010
(09951-00420)
09950-70010 (09951-07100)
| 57. REMOVE PLANETARY RING GEAR |
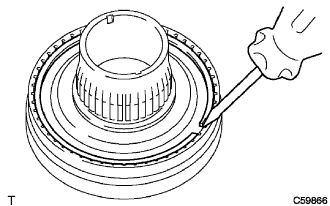 |
Using a screwdriver, remove the snap ring.
Remove the planetary ring gear from the planetary ring gear flange.
| 58. REMOVE COUNTER DRIVE GEAR |
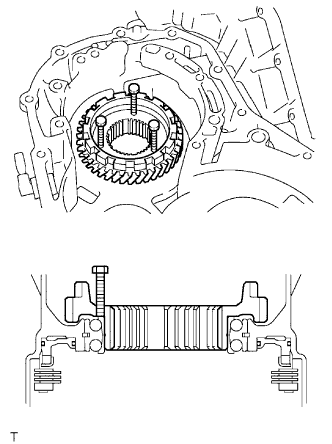 |
Install the counter drive gear with the 3 bolts.
- Bolt (M6):
- L = 40 to 80 mm
- Pitch = 1.0 mm
Rotate the 3 bolts and remove the counter drive gear and planetary ring gear.
| 59. REMOVE 1ST AND REVERSE BRAKE PISTON |
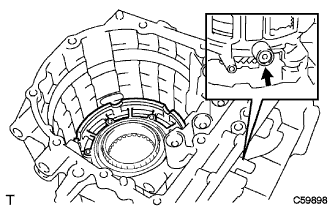 |
Apply compressed air (392 kPa, 4.0 kgf/cm2, 57 psi) to the transaxle case to remove the 1st and reverse brake piston.
- NOTICE:
- Blowing the air may cause the piston to jump out when removing the piston, hold it by hand using a shop rag or piece of cloth.
- Do not splash ATF with the compressed air.
- Blowing the air may cause the piston to jump out when removing the piston, hold it by hand using a shop rag or piece of cloth.
| 60. REMOVE 1ST AND REVERSE BRAKE O-RING |
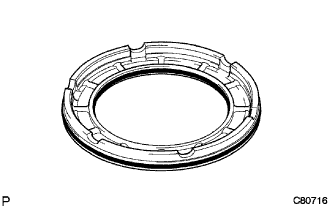 |
Remove the 2 1st and reverse brake O-rings from the 1st and reverse brake piston.
| 61. REMOVE PARKING LOCK PAWL BRACKET |
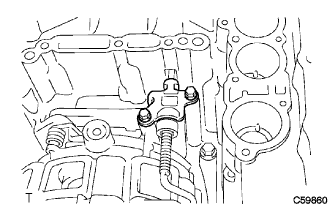 |
Remove the 2 bolts and the parking lock pawl bracket.
| 62. REMOVE MANUAL VALVE LEVER SHAFT |
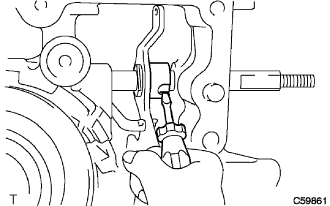 |
Using a screwdriver, cut off the manual valve lever shaft spacer to remove the manual valve lever shaft.
Using a pin punch and hammer, drive out the pin.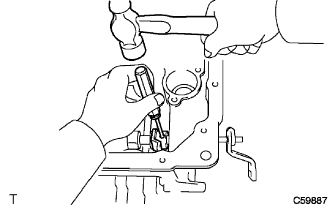
Remove the manual valve lever shaft and manual valve lever.
| 63. REMOVE PARKING LOCK ROD SUB-ASSEMBLY |
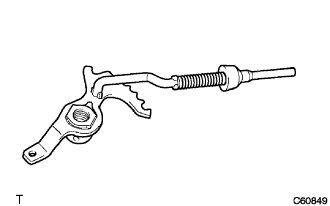 |
Remove the parking lock rod sub-assembly from the manual valve lever.
| 64. REMOVE MANUAL DETENT SPRING SUB-ASSEMBLY |
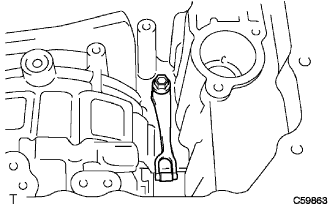 |
Remove the bolt and the manual detent spring sub-assembly.
| 65. REMOVE PARKING LOCK PAWL |
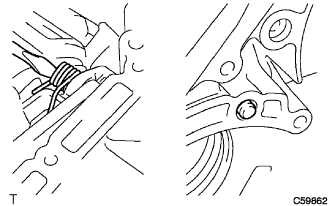 |
Remove the parking lock pawl shaft, torsion spring and parking lock pawl.
| 66. REMOVE TRANSAXLE CASE NO. 1 PLUG |
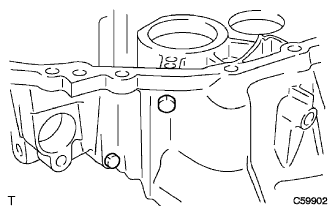 |
Remove the 2 transaxle case No. 1 plugs from the transaxle housing.
Using a screwdriver, remove the 2 O-rings from the 2 transaxle case No. 1 plugs.
| 67. REMOVE TRANSAXLE HOUSING NO. 2 PLUG |
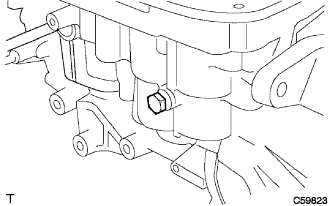 |
Remove the transaxle housing No. 2 plug from the transaxle case.
Using a screwdriver, remove the O-ring from the transaxle housing No. 2 plug.
| 68. REMOVE MANUAL VALVE LEVER SHAFT OIL SEAL |
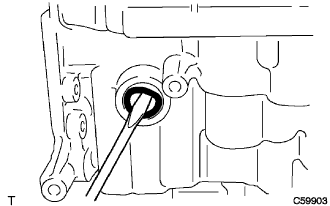 |
Using a screwdriver, remove the oil seal from the transaxle case.
| 69. REMOVE TRANSAXLE HOUSING OIL SEAL |
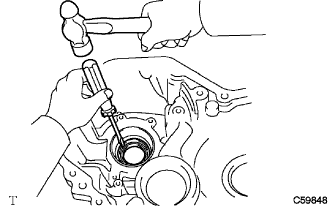 |
Using a screwdriver and a hammer, remove the transaxle housing oil seal.
| 70. REMOVE TRANSAXLE CASE OIL SEAL |
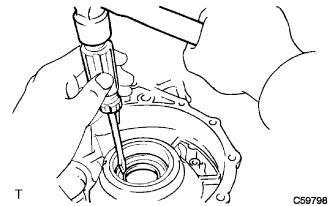 |
Using a screwdriver and hammer, remove the transaxle case oil seal.
| 71. REMOVE TRANSMISSION CASE PLATE NO. 1 |
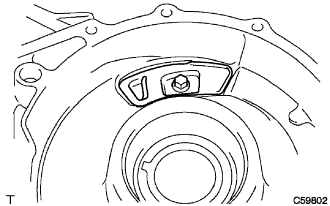 |
Remove the bolt and transmission case plate No. 1 from the transaxle case.
| 72. REMOVE TRANSAXLE HOUSING OIL SEPARATOR |
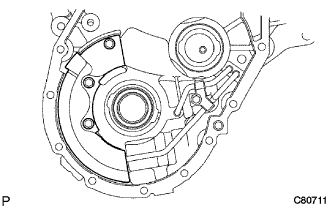 |
Remove the 3 bolts and the oil separator from the transaxle housing.
| 73. REMOVE TRANSAXLE APPLY TUBE CLAMP NO. 1 |
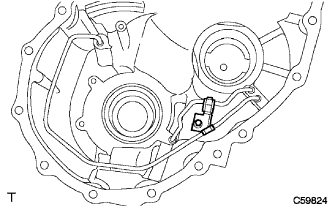 |
Remove the bolt and transaxle apply tube clamp No. 1 from the transaxle housing.
| 74. REMOVE TRANSMISSION LUBE APPLY TUBE |
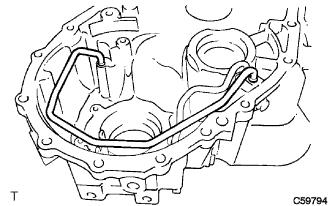 |
Remove the transmission lube apply tube from the transaxle housing.
- NOTICE:
- Do not apply excessive force when removing the apply tube.
| 75. REMOVE DIFFERENTIAL GEAR LUBE APPLY TUBE |
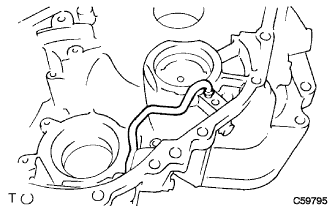 |
Remove the differential gear lube apply tube from the transaxle housing.
- NOTICE:
- Do not apply excessive force when removing the apply tube.
| 76. REMOVE BREATHER PLUG NO. 1 |
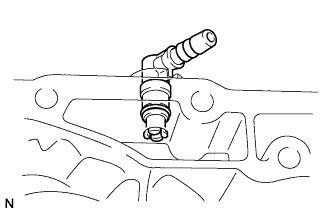 |
Remove breather plug No. 1 from the transaxle case.
Using a screwdriver, remove the O-ring from breather plug No. 1.