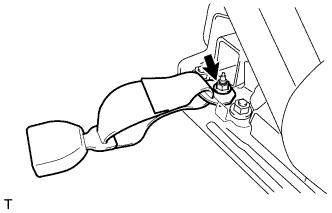
REMOVAL
Removal / installation · Vehicles built from Nov 2005
- NOTICE:
- Always use "Torx" socket wrench E10 when removing the rear seat.
| 1. REMOVE PACKAGE TRAY TRIM PANEL ASSEMBLY (w/ Package Tray Trim) |

Remove the 2 package tray trim suspenders.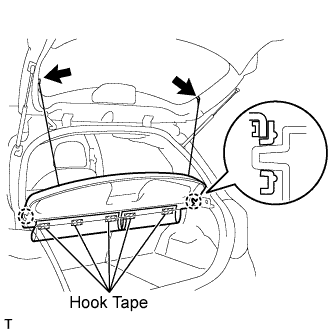

Remove the 5 pieces of hook tape.
Disengage the 2 claws and remove the package tray trim.
| 2. REMOVE DECK BOARD SUB-ASSEMBLY (w/ Deck Board) |
Release the 2 knobs and remove the deck board.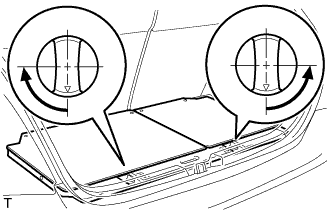
| 3. REMOVE SPARE WHEEL COVER ASSEMBLY (w/ Deck Board) |
Remove the spare wheel cover.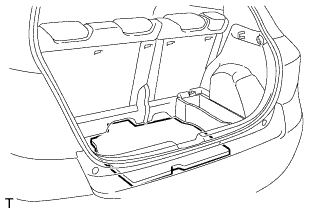
| 4. REMOVE DECK FLOOR BOX (w/ Deck Board) |
Release the 2 knobs and remove the deck floor box.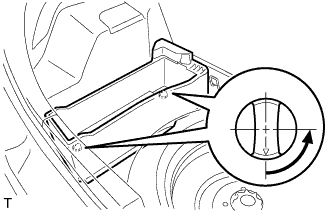
| 5. REMOVE REAR FLOOR CARPET ASSEMBLY (w/o Deck Board) |
Remove the rear floor carpet.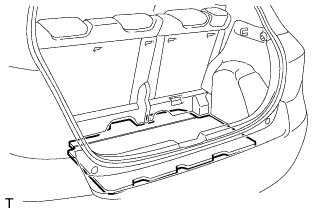
| 6. REMOVE REAR SEAT LEG COVER |
Disengage the 6 claws and remove the No. 2 rear seat leg cover.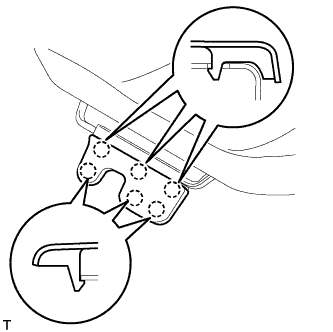
| 7. REMOVE REAR SEAT ASSEMBLY |
Using "Torx" socket wrench E10, remove the 3 bolts and pull up the rear seat cushion.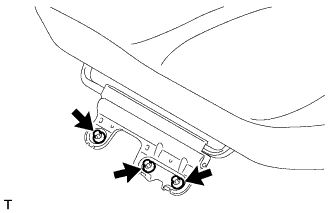
Using "Torx" socket wrench E10, remove the 4 bolts and the rear seat.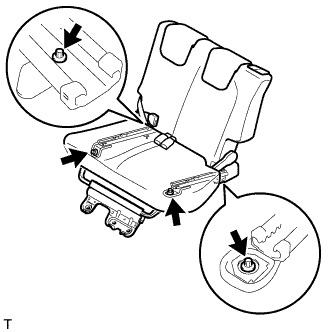
| 8. REMOVE REAR SEAT CUSHION UNDER COVER |
Disengage the 4 clips and remove the rear seatback cover.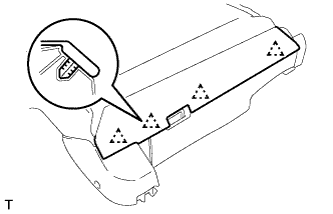
Disengage the 6 claws and remove the rear seat cushion under cover.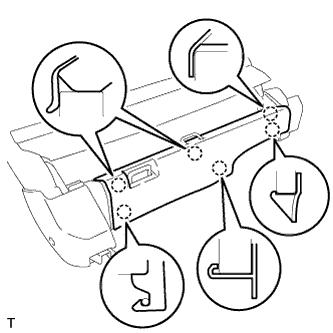
| 9. REMOVE REAR SEAT RECLINING INNER COVER |
Remove the belt of the rear center seat inner belt from the rear seatback band.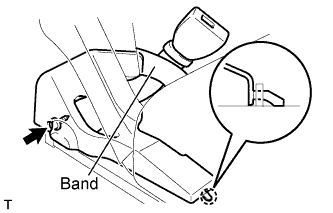
Using "Torx" socket wrench T25, remove the screw.
Disengage the claw.
Pass the rear center seat inner belt through the slit in the rear seat reclining inner cover and remove the rear seat reclining inner cover.
| 10. REMOVE REAR CENTER SEAT INNER BELT ASSEMBLY |
Remove the nut and the rear center seat inner belt.