REMOVAL
Removal / installation · Vehicles built from Aug 2005
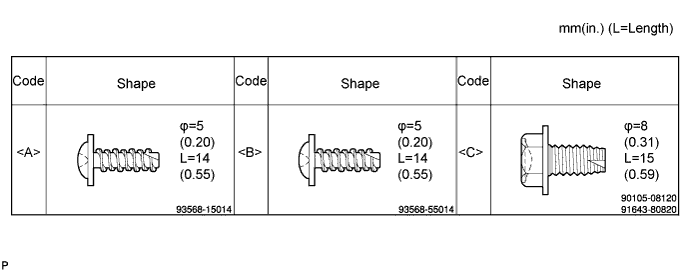
| 1. BOLTS, SCREWS AND NUTS TABLE |

- HINT:
- All bolts, screws and nuts relevant to installing and removing the instrument panel are shown, along with their alphabetic codes, in the table below.

| 2. DISCONNECT CABLE FROM NEGATIVE BATTERY TERMINAL |
| 3. REMOVE INSTRUMENT PANEL FINISH PANEL END LH |
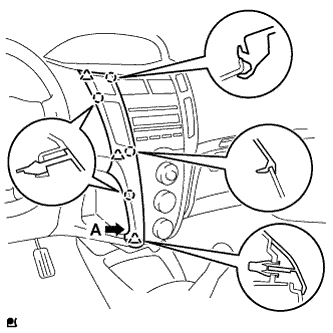 |
with CD player
Pull the instrument panel finish panel end LH rearward and disengage the 4 claws and 3 clips.
- NOTICE:
- To avoid damaging the radio receiver and the air conditioning panel, remove the instrument panel finish panel end without using any tool.
- HINT:
- Grip portion A of the instrument panel finish panel end and remove the instrument panel finish panel end from the lower side.
Disconnect the connector and remove the instrument panel finish panel end LH.
Except CD player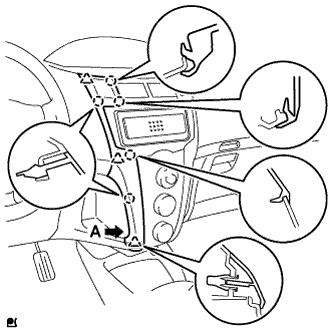
Pull the instrument panel finish panel end LH rearward and disengage the 5 claws and 3 clips.
- NOTICE:
- To avoid damaging the instrument cluster finish panel center and the air conditioning panel, remove the instrument panel finish panel end without using any tool.
- HINT:
- Grip portion A of the instrument panel finish panel end and remove the instrument panel finish panel end from the lower side.
Disconnect the connector and remove the instrument panel finish panel end LH.
| 4. REMOVE INSTRUMENT PANEL FINISH PANEL END RH |
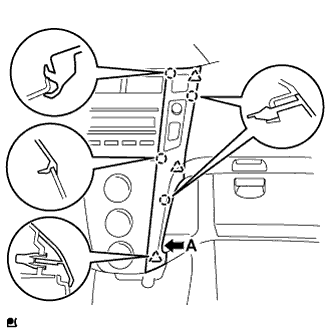 |
with CD player
Pull the instrument panel finish panel end RH and disengage the 4 claws and 3 clips.
- NOTICE:
- To avoid damaging the radio receiver and the air conditioning panel, remove the instrument panel finish panel end without using any tool.
- HINT:
- Grip portion A of the instrument panel finish panel end and remove the instrument panel finish panel end from the lower side.
Disconnect the connector and remove the instrument panel finish panel end RH.
Except CD player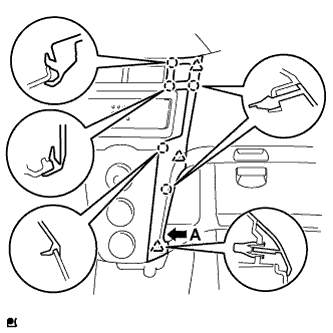
Pull the instrument panel finish panel end RH rearward and disengage the 5 claws and 3 clips.
- NOTICE:
- To avoid damaging the instrument cluster finish panel center and the air conditioning panel, remove the instrument panel finish panel end without using any tool.
- HINT:
- Grip portion A of the instrument panel finish panel end and remove the instrument panel finish panel end from the lower side.
Disconnect the connector and remove the instrument panel finish panel end RH.
| 5. REMOVE INSTRUMENT CLUSTER FINISH PANEL |
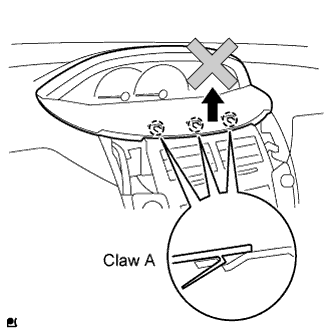 |
- NOTICE:
- Follow the procedure below to remove the instrument cluster finish panel. Claw A will break if the instrument cluster finish panel is raised carelessly.
Disengage the 2 claws and 5 clips.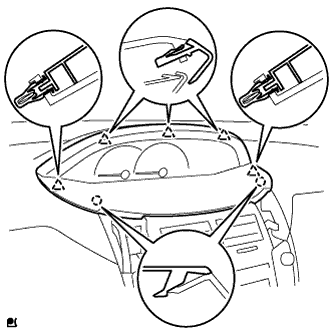
After removing the instrument panel finish panel end, insert your finger into the opening as shown, push the upper portion of the instrument cluster finish panel center and the 2 B claws of the instrument cluster finish panel, and then disengage the claws B.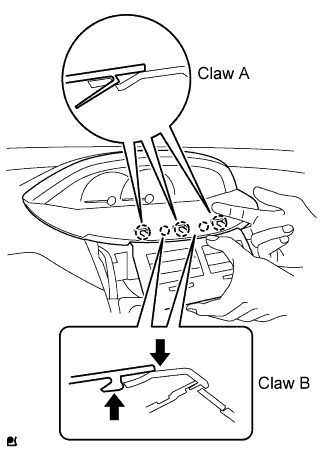
Disengage the 3 A claws and remove the instrument cluster finish panel.
| 6. REMOVE COMBINATION METER ASSEMBLY |
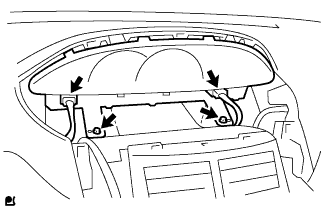 |
Disconnect the 2 connectors.
Remove the 2 screws and pull the combination meter rearward to remove it.
| 7. REMOVE FRONT DOOR OPENING TRIM WEATHERSTRIP RH |
Separate the front door opening trim weatherstrip.
| 8. REMOVE FRONT DOOR OPENING TRIM WEATHERSTRIP LH |
Separate the front door opening trim weatherstrip.
| 9. REMOVE FRONT PILLAR GARNISH RH |
w/ Curtain Shield Airbag: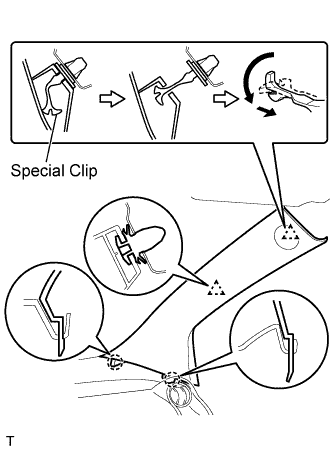
- NOTICE:
- Install a protective cover onto the curtain shield airbag as soon as the front pillar garnish is removed.
- Replace the special clip with a new one when the front pillar garnish is removed.
- Install a protective cover onto the curtain shield airbag as soon as the front pillar garnish is removed.
Disengage the 2 clips and the 2 claws and remove the front pillar garnish.
w/o Curtain Shield Airbag: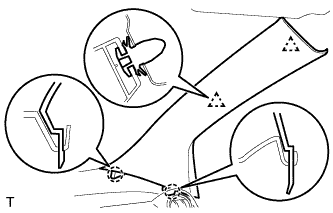
Disengage the 2 clips and the 2 claws and remove the front pillar garnish.
Disconnect the connector.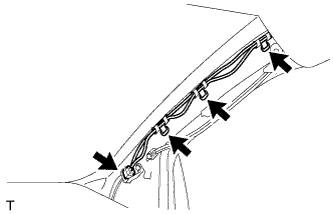
Using a clip remover, remove the 3 antenna cord clamps.
w/ Front No. 2 Speaker: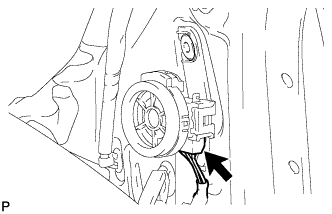
Disconnect the speaker connector.
Using a screwdriver with its tip wrapped in protective tape, disengage the clip and hook and remove the front No. 2 speaker.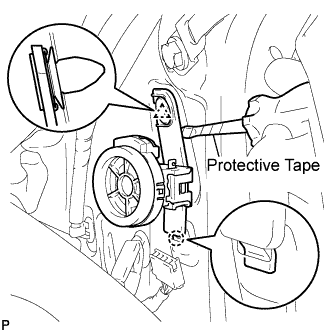
w/ Curtain Shield Airbag:
Completely cover the curtain shield airbag with a piece of cloth or nylon and fix the ends of the fabric with adhesive tape, as shown in the illustration.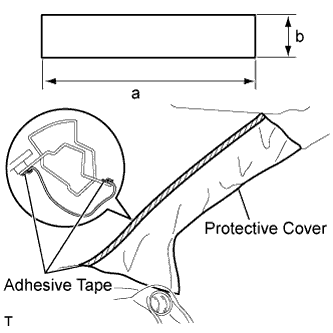
Protective cover size: Area
Measurement
a
700 mm (27.56 in.)
b
120 mm (4.72 in.)
| 10. REMOVE FRONT PILLAR GARNISH LH |
w/ Curtain Shield Airbag: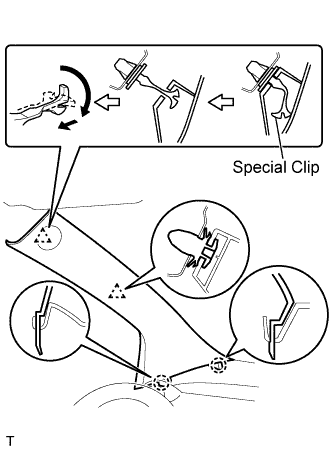
- NOTICE:
- Install a protective cover onto the curtain shield airbag as soon as the front pillar garnish is removed.
- Replace the special clip with a new one when the front pillar garnish is removed.
- Install a protective cover onto the curtain shield airbag as soon as the front pillar garnish is removed.
Disengage the 2 clips and the 2 claws and remove the front pillar garnish.
w/o Curtain Shield Airbag: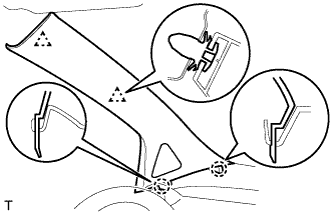
Disengage the 2 clips and the 2 claws and remove the front pillar garnish.
Using a clip remover, remove the 4 wire harness clamps.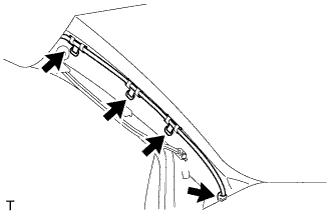
w/ Front No. 2 Speaker: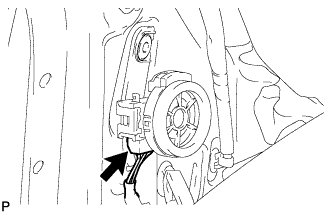
Disconnect the speaker connector.
Using a screwdriver with its tip wrapped in protective tape, disengage the clip and hook and remove the front No. 2 speaker.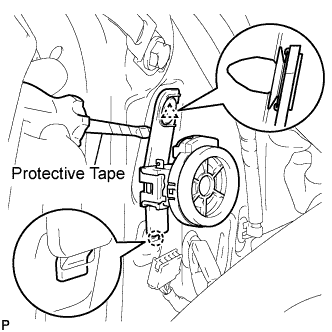
w/ Curtain Shield Airbag: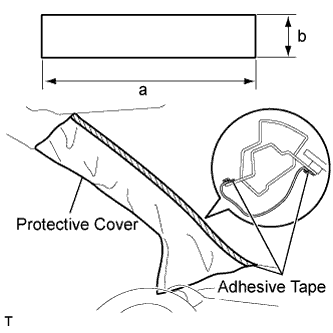
Completely cover the curtain shield airbag with a piece of cloth or nylon and fix the ends of the fabric with adhesive tape, as shown in the illustration.
Protective cover size: Area
Measurement
a
700 mm (27.56 in.)
b
120 mm (4.72 in.)
| 11. REMOVE SWITCH HOLE BASE |
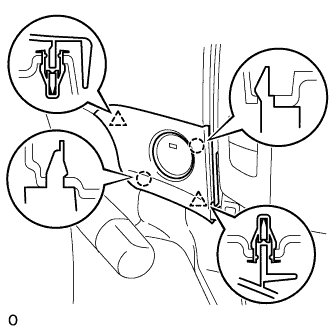 |
Disengage the 2 clips and 2 claws and remove the switch hole base.
| 12. REMOVE GLOVE COMPARTMENT DOOR ASSEMBLY |
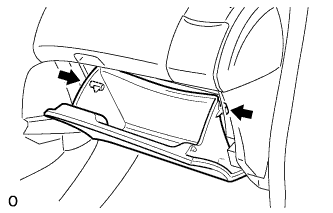 |
Slightly deform the upper part of the glove compartment door assembly to release the 2 stoppers and open the glove compartment door assembly until it becomes horizontal.
Pull the glove compartment door assembly out horizontally to disengage the hinge portion and remove the glove compartment door assembly.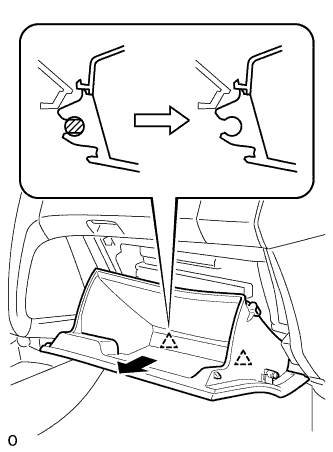
- NOTICE:
- Pull the glove compartment door out horizontally, otherwise, installation failure caused by excessive play around the hinge portion will result.
| 13. REMOVE INSTRUMENT PANEL SUB-ASSEMBLY UPPER |
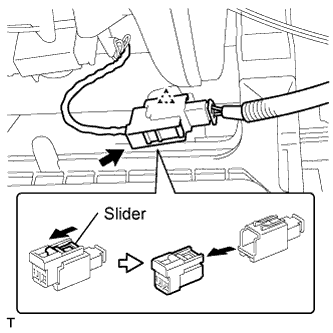 |
Slide the slider and disconnect the passenger airbag connector.
Disconnect the clamp.
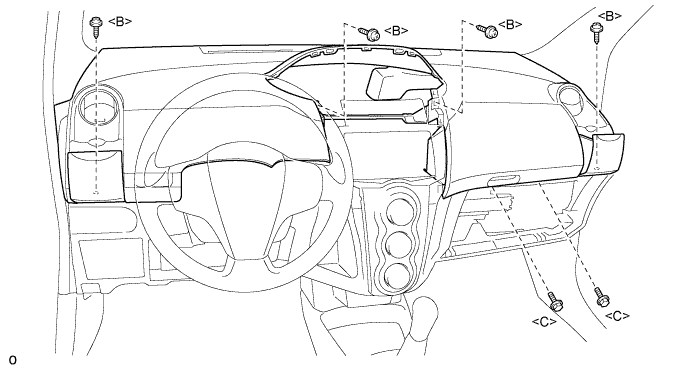
Remove the 2 <C> bolts and 4 <B> screws.
Disconnect the connectors.
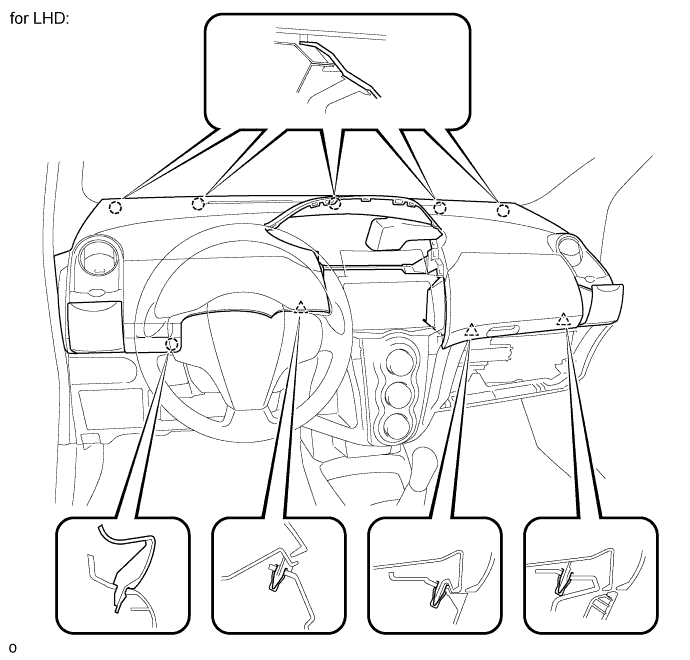
Disengage the claw and 3 clips while lifting the rear instrument panel up.
While lifting the instrument panel, slide it toward the rear of the vehicle. Disengage the 5 claws of the front side of the instrument panel and remove the instrument panel.
| 14. REMOVE STARTER CUT RELAY |
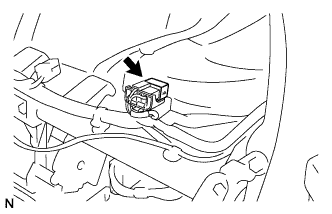 |
Remove the starter cut relay.