INSTALLATION
Removal / installation · Vehicles built from Nov 2006
| 1.
INSTALL FRONT DRIVE SHAFT ASSEMBLY LH |
 |
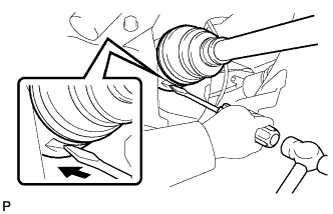
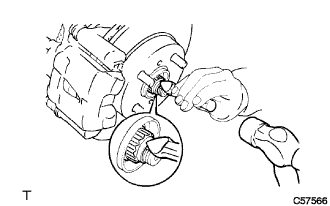
Coat the spline of the inboard joint with gear oil.
- Align the inboard joint splines and install the drive shaft with a screwdriver and hammer.
- NOTICE:
- Face the cut area of the front drive shaft hole snap ring downward.
- Do not damage the oil seal.
- Do not damage the inboard joint boot.
- HINT:
- Confirm whether the drive shaft is securely driven in by checking the reaction force and sound.
| 2.
INSTALL FRONT DRIVE SHAFT ASSEMBLY RH |
|
- HINT:
- The installation procedure for the RH side is the same as that for the LH side.
| 3.
INSTALL FRONT AXLE ASSEMBLY |
|
Push the front axle out of the vehicle to align the spline of the drive shaft with the front axle and insert the front axle.
- NOTICE:
- Do not push the front axle further out of the vehicle than is necessary.
- Do not damage the outboard joint boot.
- Check for any foreign matter on the speed sensor rotor and insertion part.
- Do not damage the speed sensor rotor.
| 4.
INSTALL FRONT LOWER SUSPENSION ARM |
|
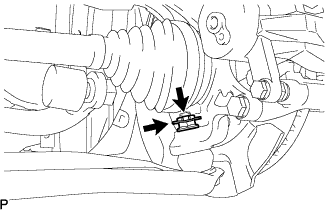
- Install the lower arm onto the steering knuckle with a new castle nut.
-
Torque:
- 98 N*m{
1000 kgf*cm
, 72 ft.*lbf
}
- NOTICE:
- If the holes for the clip are not aligned, tighten the nut by a further turn of up to 60°.
Install a new clip.
| 5.
INSTALL FRONT STABILIZER LINK ASSEMBLY |
|
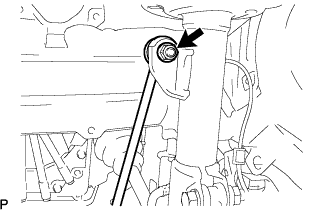
- Install the stabilizer link with the nut.
-
Torque:
- 74 N*m{
755 kgf*cm
, 55 ft.*lbf
}
- HINT:
- If the ball joint turns together with the nut, use a socket hexagon wrench 6 to hold the stud.
| 6.
INSTALL TIE ROD END SUB-ASSEMBLY |
|
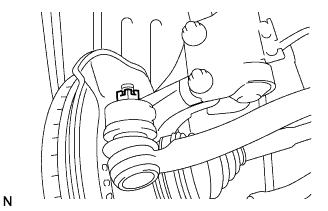
- Install the tie rod end onto the steering knuckle with a new castle nut.
-
Torque:
- 49 N*m{
500 kgf*cm
, 36 ft.*lbf
}
- NOTICE:
- If the holes for the clip are not aligned, tighten the nut by a further turn of up to 60°.
Install a new cotter pin.
| 7.
INSTALL FRONT SPEED SENSOR |
|
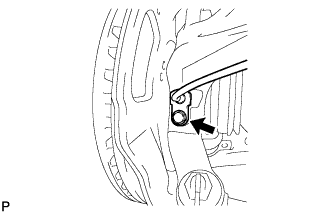
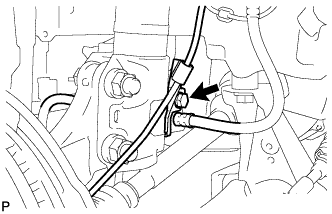
Install the speed sensor onto the steering knuckle with the bolt.
-
Torque:
- 8.5 N*m{
87 kgf*cm
, 75 in.*lbf
}
- NOTICE:
- Check that the speed sensor tip and installation portion are free of foreign matter.
- Install the speed sensor without turning it from its original installation angle.
- Install the flexible hose and speed sensor with the bolt.
-
Torque:
- 29 N*m{
300 kgf*cm
, 22 ft.*lbf
}
- NOTICE:
- Install the flexible hose and speed sensor without twisting them.
| 8.
INSTALL FRONT AXLE HUB NUT |
|
Using a 30 mm socket wrench, install a new axle hub nut.
-
Torque:
- 216 N*m{
2203 kgf*cm
, 160 ft.*lbf
}
Using a chisel and hammer, caulk the axle hub nut.
| 9.
INSTALL FRONT WHEEL |
|
-
Torque:
- 103 N*m{
1050 kgf*cm
, 76 ft.*lbf
}
| 10.
CONNECT CABLE TO NEGATIVE BATTERY TERMINAL |
|
-
Torque:
- 5.4 N*m{
55 kgf*cm
, 48 in.*lbf
}
| 12.
INSPECT TRANSAXLE OIL
|
|
Stop the vehicle in a level place.
Remove the transmission filler plug and the gasket.
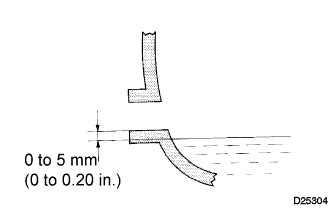
Check that the oil surface is within 5 mm (0.20 in.) of the bottom of the transmission filler plug opening.
- NOTICE:
- Excessively large or small amounts of oil may cause problems.
- After replacing the oil, drive the vehicle and check the oil level again.
Check for oil leakage when the oil level is low.
Install the transmission filler plug and a new gasket.
-
Torque:
- 39 N*m{
400 kgf*cm
, 29 ft.*lbf
}
| 13.
INSPECT FOR TRANSAXLE OIL LEAK |
|
| 14.
INSPECT AND ADJUST FRONT WHEEL ALIGNMENT |
|
(Click here)
| 15.
CHECK VSC SENSOR SIGNAL |
|
(Click here)