INSTALLATION
Removal / installation · Vehicles built from Aug 2005
| 1. INSTALL NO. 1 RADIO BRACKET |

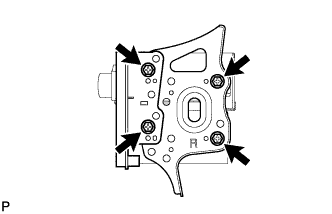  |
w/ Cassette Tape Player:
Install the radio bracket and the radio receiver panel with the 4 screws.
w/ CD Player: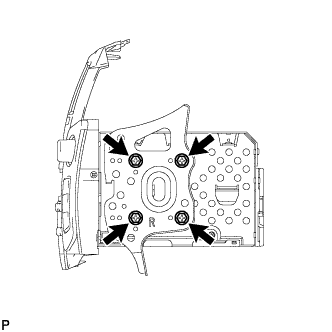
Install the radio bracket with the 4 screws.
| 2. INSTALL NO. 2 RADIO BRACKET |
|
|
w/ Cassette Tape Player:
Install the radio bracket and the radio receiver panel with the 4 screws.
w/ CD Player: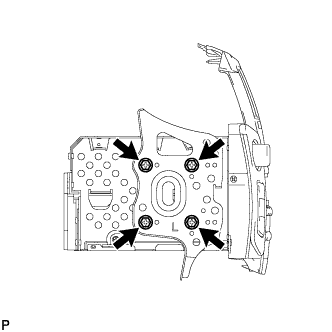
Install the radio bracket with the 4 screws.
| 3. INSTALL RADIO RECEIVER ASSEMBLY |
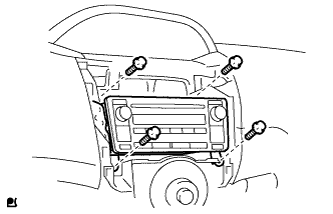 |
w/ Cassette Tape Player:
Connect the connectors.
Install the radio receiver with the 4 screws.
w/ CD Player: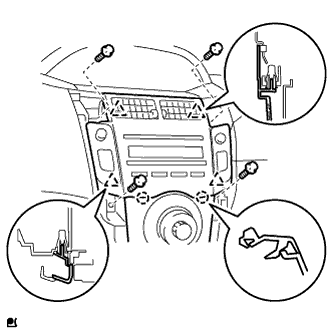
Connect the connectors.
Engage the 4 clips and 2 claws and install the radio receiver.
Install the 4 screws.
| 4. INSTALL INSTRUMENT CLUSTER FINISH PANEL CENTER SUB-ASSEMBLY (w/ Cassette Tape Player) |
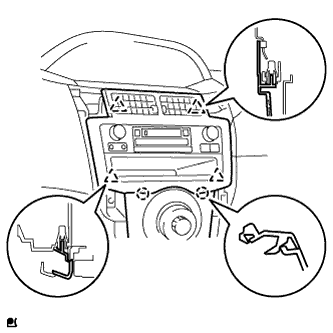 |
Engage the 4 clips and 2 claws and install the instrument cluster finish panel.
| 5. INSTALL INSTRUMENT CLUSTER FINISH PANEL |
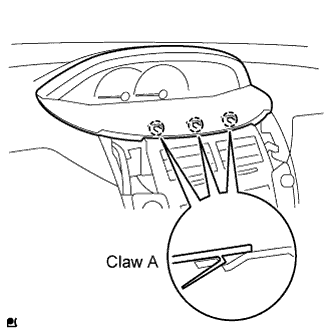 |
Fit the 3 A claws of the instrument cluster finish panel into the upper instrument cluster finish panel center.
Engage the 4 claws and 5 clips and install the instrument cluster finish panel.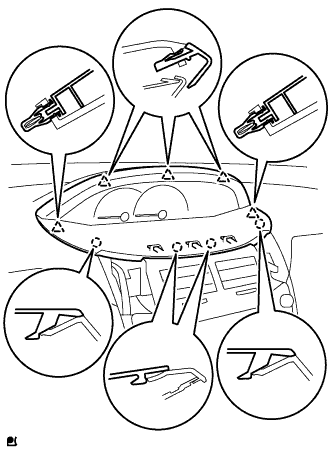
| 6. INSTALL INSTRUMENT PANEL FINISH PANEL END RH |
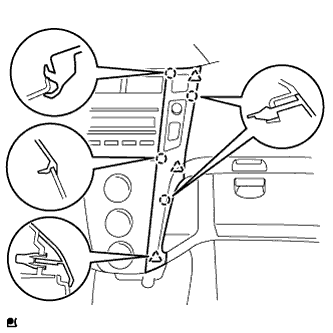 |
with CD player
Connect the connector.
Engage the 4 claws and 3 clips and install the instrument panel finish panel end RH.
Except CD player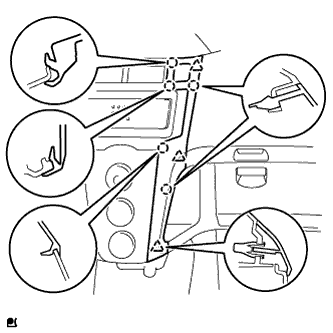
Connect the connector.
Engage the 5 claws and 3 clips and install the instrument panel finish panel end RH.
| 7. INSTALL INSTRUMENT PANEL FINISH PANEL END LH |
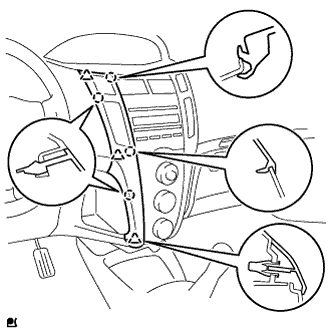 |
with CD player
Connect the connector.
Engage the 4 claws and 3 clips and install the instrument panel finish panel end LH.
Except CD player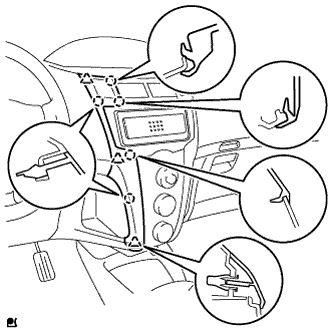
Connect the connector.
Engage the 5 claws and 3 clips and install the instrument panel finish panel end LH.
| 8. CONNECT CABLE TO NEGATIVE BATTERY TERMINAL |
- Torque:
- 5.4 N*m{ 55 kgf*cm , 48 in.*lbf }