INSTALLATION
Removal / installation · Vehicles built from Nov 2005
| 1. INSTALL RADIATOR RESERVE TANK HOSE GROMMET |

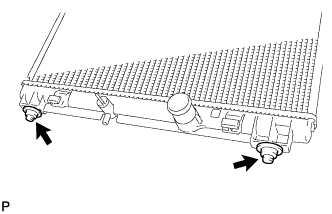  |
Install the 2 radiator reserve tank hose grommets onto the radiator assembly.
| 2. INSTALL RADIATOR SUPPORT CUSHION |
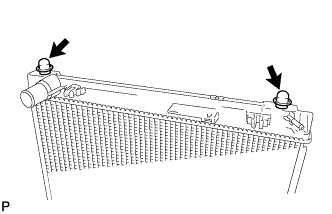 |
Install the 2 radiator support cushions onto the radiator assembly.
| 3. INSTALL FAN SHROUD NO. 2 |
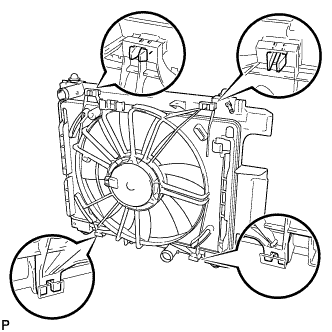 |
Engage the 2 claws and install fan shroud No. 2.
| 4. INSTALL WATER BY-PASS HOSE NO. 4 |
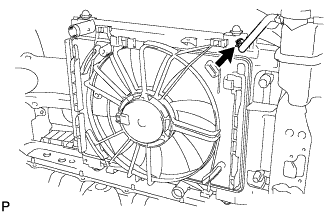 |
Install water by-pass hose No. 4 with the clip.
| 5. INSTALL RADIATOR ASSEMBLY (w/ Air Conditioning System) |
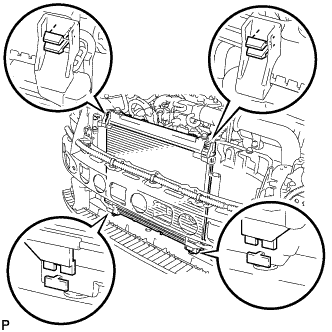 |
Engage the 2 claws and install the radiator assembly onto vehicle.
- NOTICE:
- Do not apply excessive force to the cooler condenser assembly or piping when installing the radiator assembly.
Install the vacuum transmitting pipe onto the fan shroud.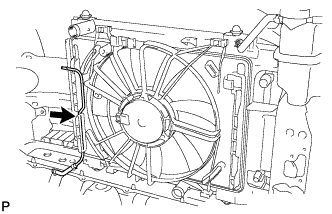
Connect the cooling fan motor connector and wire harness clamp.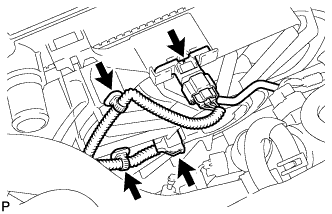
Install the turbo pressure sensor and wire harness clamp onto the fan shroud.
| 6. INSTALL RADIATOR ASSEMBLY (w/o Air Conditioning System) |
|
|
Install the radiator assembly onto vehicle.
Install the vacuum transmitting pipe onto the fan shroud.
Connect the cooling fan motor connector and wire harness clamp.
Install the turbo pressure sensor and wire harness clamp onto the fan shroud.
| 7. INSTALL COOLER REFRIGERANT LIQUID PIPE E (TO COOLER UNIT) (w/ Air Conditioning System) |
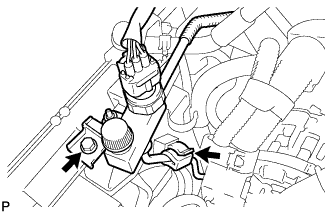 |
Install the cooler refrigerant liauid pipe onto the fan shroud with the bolt.
- Torque:
- 5.4 N*m{ 55 kgf*cm , 48 in.*lbf }
| 8. CONNECT RADIATOR HOSE NO. 2 |
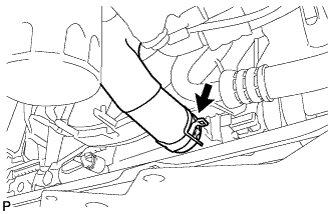 |
Connect radiator hose No. 2 with the clip.
| 9. CONNECT RADIATOR HOSE NO. 1 |
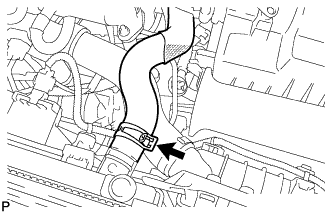 |
Connect radiator hose No. 1 with the clip.
| 10. INSTALL INTERCOOLER ASSEMBLY |
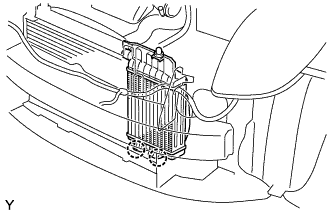 |
Install the 2 grommets.
Install the radiator support cushion.
Install the intercooler.
Connect the hose.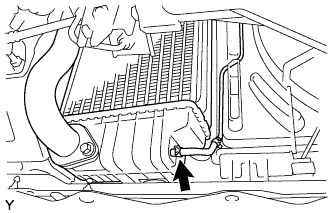
Engage the 2 clamps, and connect the wire harness.
| 11. CONNECT AIR HOSE NO. 2 |
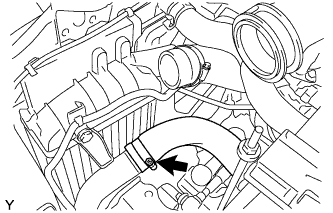 |
Connect air hose No. 2 with the hose clamp.
- Torque:
- 6.0 N*m{ 61 kgf*cm , 53 in.*lbf }
| 12. CONNECT AIR HOSE NO. 3 |
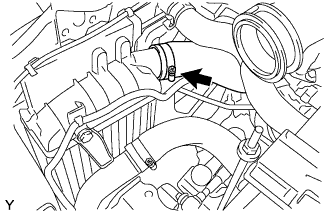 |
Connect air hose No. 3 with the hose clamp.
- Torque:
- 6.0 N*m{ 61 kgf*cm , 53 in.*lbf }
| 13. INSTALL RADIATOR SUPPORT UPPER |
Install the radiator support upper with the 4 bolts.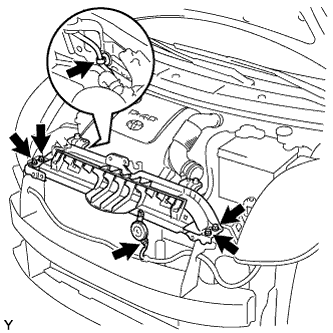
- Torque:
- 5.5 N*m{ 56 kgf*cm , 49 in.*lbf }
Engage the clamp, and connect the wire harness.
Connect the horn connector.
| 14. INSTALL HOOD LOCK ASSEMBLY |
Temporarily install the hood lock assembly with the 3 bolts.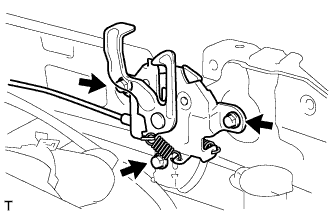
| 15. INSTALL RADIATOR RESERVE TANK ASSEMBLY |
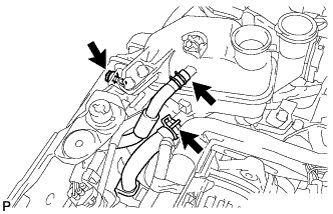 |
Install the radiator reserve tank with the bolt.
- Torque:
- 19.5 N*m{ 199 kgf*cm , 14 ft.*lbf }
Connect water by-pass hose No. 5 with the clip.
Connect water by-pass hose No. 4 with the clip.
| 16. INSTALL AIR CLEANER ASSEMBLY |
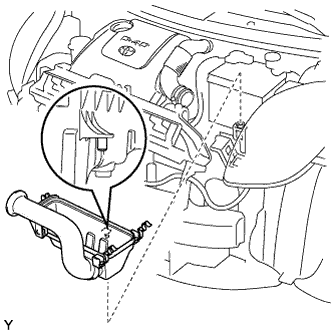 |
Align the protruding portion of the air cleaner case with the hole, as shown in the illustration, to install the air cleaner case onto the vehicle.
Tighten the air cleaner case with the 3 bolts.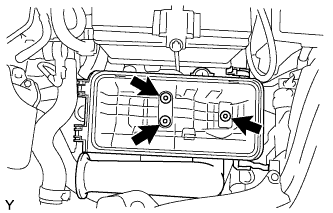
- Torque:
- 7.8 N*m{ 80 kgf*cm , 69 in.*lbf }
Install the air cleaner element.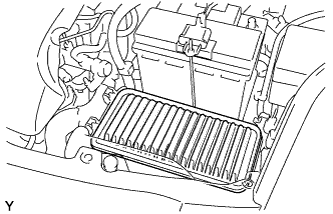
Connect the air cleaner hose with hose clamp to the air cleaner cap.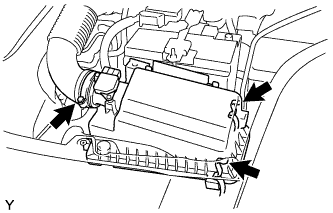
- Torque:
- 6.0 N*m{ 61 kgf*cm , 53 in.*lbf }
Install the air cleaner cap onto the air cleaner case, then hang the 2 hook clamps.
Fit the wire harness into the air cleaner cap.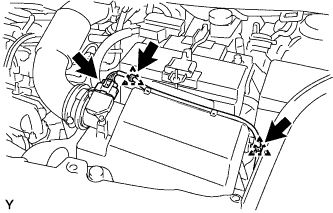
Connect the mass air flow meter connector.
| 17. INSTALL ENGINE UNDER COVER |
Provisionally install the engine under cover with the 5 bolts, 4 screws and 2 clips.
Tighten the 4 screws.
Tighten the 5 bolts.
- Torque:
- 5.0 N*m{ 51 kgf*cm , 44 in.*lbf }
| 18. INSTALL FRONT BUMPER COVER |
w/ Front Spoiler: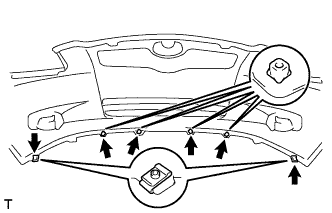
Install the 2 clips and the 4 screw grommets.
w/o Front Spoiler: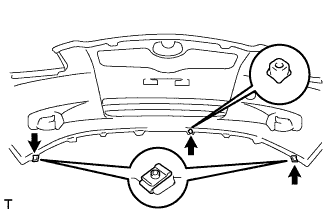
Install the 2 clips and the screw grommet.
w/ Fog Light:
Connect the 2 fog light connectors.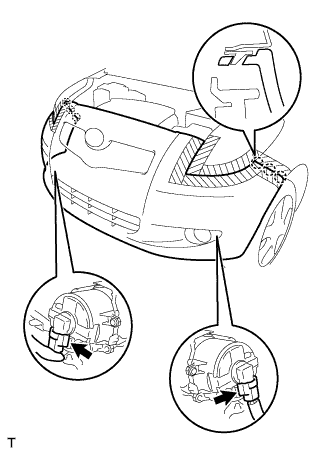
Engage the 6 claws and install the front bumper cover.
w/o Fog Light: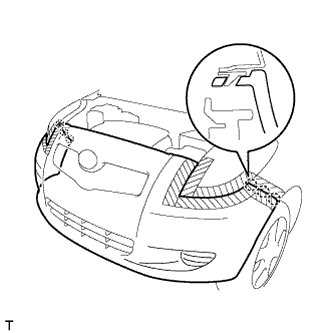
Engage the 6 claws and install the front bumper cover.
w/ Front Spoiler: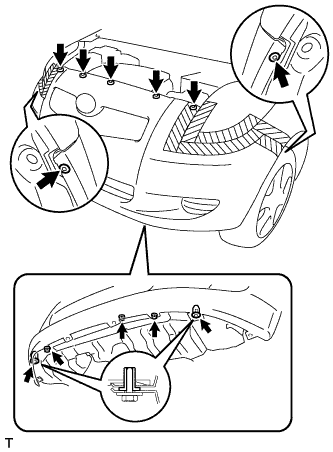
Install the 7 clips.
Install the 2 screw grommets.
Tighten the 3 screws.
w/o Front Spoiler: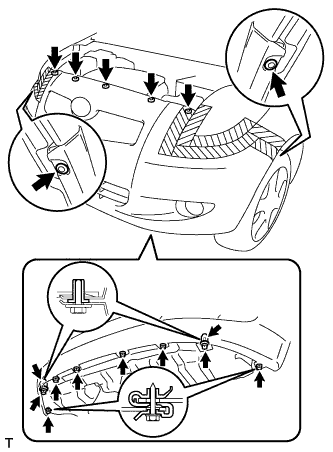
Install the 7 clips.
Install the 2 screw grommets.
Tighten the 8 screws.
Remove the protective tape.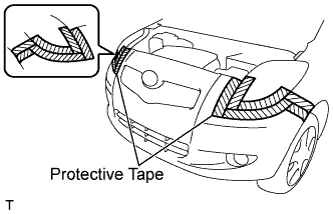
| 19. INSTALL FRONT SPOILER COVER RH (w/ Front Spoiler) |
Install the front spoiler cover with the 4 screws.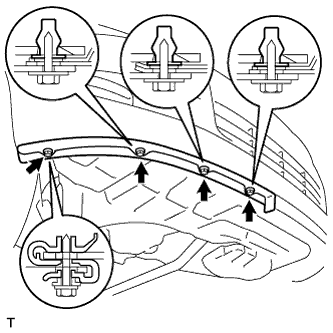
| 20. INSTALL FRONT SPOILER COVER LH (w/ Front Spoiler) |
Install the front spoiler cover with the 5 screws.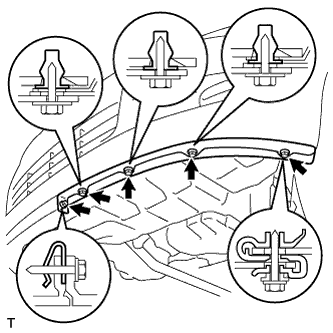
| 21. CONNECT CABLE TO NEGATIVE BATTERY TERMINAL |
- Torque:
- 5.4 N*m{ 55 kgf*cm , 48 in.*lbf }
| 22. ADD ENGINE COOLANT |
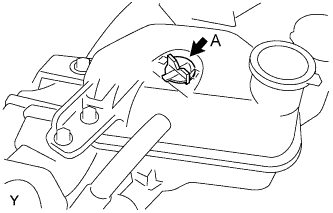 |
Remove air bleed valve A.
Fill the cooling system with coolant up to line B.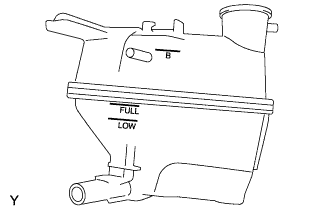
- Capacity:
- 4.7 liters (5.0 US qts, 4.1 lmp. qts)
- HINT:
- Use of improper coolant may damage the engine cooling system.
- Use only Toyota Super Long Life Coolant or similar high quality ethylene glycol based non-silicate, non-amine, non-nitrite, and non-borate engine coolant with long-life hybrid organic acid technology (coolant with long-life hybrid organic acid technology consists of a combination of low phosphates and organic acids).
- Use of improper coolant may damage the engine cooling system.
- NOTICE:
- Do not substitute plain water for engine coolant.
Tighten air bleed valve A.
Install the radiator cap.
Warm up the engine.
Set the air conditioning as follows while warming up the engine.
Item
Manual air conditioning system
Automatic air conditioning system
Set control as follows
Fan speed - Any setting except "OFF"
Temperature - Toward WARM
Air conditioning switch "OFF"
Fan speed - Any setting except "OFF"
Temperature - To the highest temperature
Air conditioning switch "OFF"
"AUTO" switch "OFF"
Run the engine at 3,000 rpm for 5 seconds and idling for 45 seconds alternately.
Do the above operation for 7 minutes or more.
After the engine cools down, check that the coolant level is between LOW and FULL lines.
| 23. ADJUST HOOD LOCK ASSEMBLY |
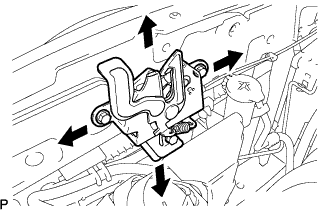 |
Loosen the 3 bolts.
Adjust the hood lock position so that the striker can enter it smoothly.
Tighten the 3 bolts after the adjustment.
- Torque:
- 7.5 N*m{ 76 kgf*cm , 66 in.*lbf }
| 24. CHECK FOR ENGINE COOLANT LEAK |
- CAUTION:
- To avoid the danger of being burned, do not remove the radiator cap sub-assembly while the engine and radiator assembly are still hot. Thermal expansion will cause hot engine coolant and steam to blow out from the radiator assembly.
Fill the radiator assembly with engine coolant, then attach a radiator cap tester.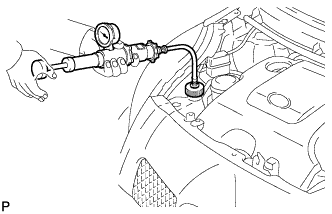
Pump it to 137 kPa (1.4 kgf/cm2, 19.9 psi), then check that the pressure does not drop.
If the pressure drops, check the hoses, radiator assembly and water pump assembly for leakage. If there are no signs or traces of external engine coolant leakage, check the heater core, cylinder block and head.