INSTALLATION
Removal / installation · Vehicles built from Nov 2005
- NOTICE:
- Always use "Torx" socket wrench E10 when installing the rear seat.
| 1. INSTALL FUEL SUCTION WITH PUMP AND GAUGE TUBE ASSEMBLY |

Install a new fuel suction tube gasket onto the fuel tank.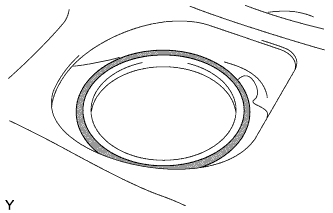

Align the protrusion of the fuel pump with the cutout of the fuel tank and install the fuel suction with pump and gauge tube assembly.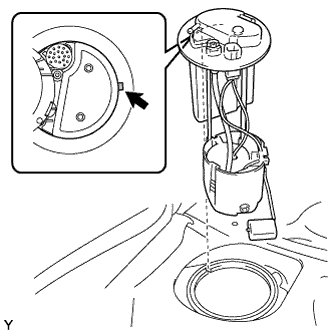
- NOTICE:
- The arm of the sender gauge should not be bent.
| 2. INSTALL FUEL PUMP GAUGE RETAINER |
Align the end of the threads of the fuel pump gauge retainer with that of the fuel tank.
Set SST to the fuel pump gauge retainer.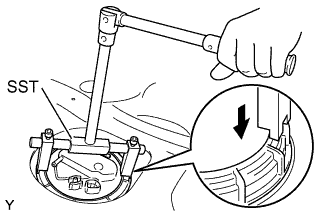
- SST
- 09808-14020
(09808-01410, 09808-01420, 09808-01430)
- NOTICE:
- Use SST. Do not use any other tools such as a screwdriver.
- As the fuel pipes are located on the track of SST, SST should be reset a few times to prevent it from coming into contact with the pipes when installing the fuel pump gauge retainer.
- Use SST. Do not use any other tools such as a screwdriver.
- HINT:
- Fit the cutout of the SST into the rib on the fuel pump gauge retainer.
While holding the fuel pump assembly by hand, use SST to tighten the fuel pump gauge retainer one and half turns so that the mark on the retainer is within the range indicated in the illustration.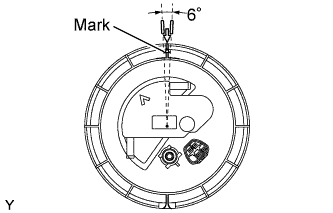
| 3. CONNECT NO. 1 CANISTER OUTLET HOSE SUB-ASSEMBLY |
Connect the canister outlet hose.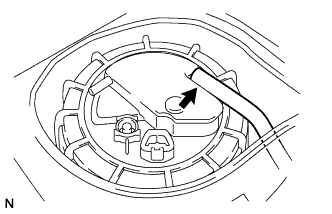
| 4. CONNECT NO. 2 FUEL EMISSION TUBE |
Connect fuel emission tube No. 2.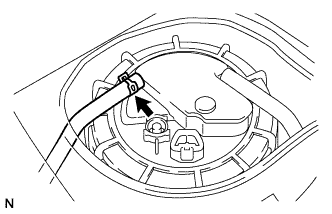
| 5. CONNECT FUEL TANK MAIN TUBE SUB-ASSEMBLY |
Insert the fuel tank main tube.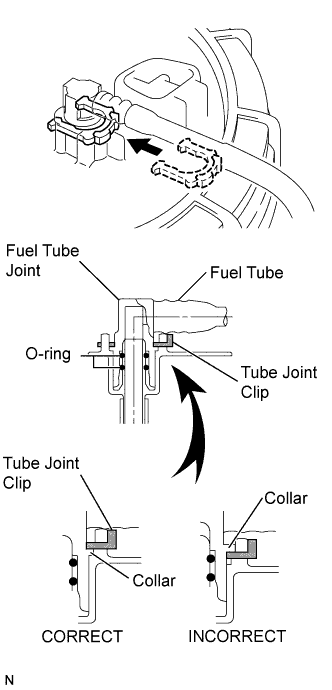
Install the tube joint clip.
- NOTICE:
- Check that there are no scratches or foreign matter on the connecting parts.
- Check that the fuel tube joint is inserted securely.
- Check that the fuel tube joint clip is on the collar of the fuel tube joint.
- After installing the tube joint clip, check that the fuel tube joint has not been pulled off.
- Do not damage any of the clips. If a clip is damaged, replace it.
- Check that there are no scratches or foreign matter on the connecting parts.
| 6. CONNECT CABLE TO NEGATIVE BATTERY TERMINAL |
- Torque:
- 5.4 N*m{ 55 kgf*cm , 48 in.*lbf }
| 7. ADD FUEL |
| 8. CHECK FOR FUEL LEAK |
When using the intelligent tester.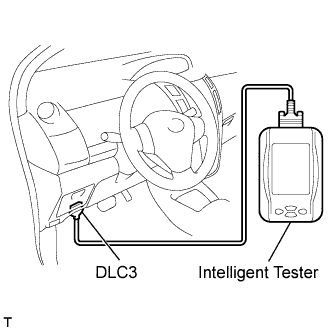
Connect the intelligent tester to the DLC3.
Turn the ignition switch on (IG) and the intelligent tester main switch ON.
- NOTICE:
- Do not start the engine.
Select the Active Test mode on the intelligent tester.
- HINT:
- Refer to the intelligent tester operator's manual for further details.
Check that there is no fuel leakage anywhere in the fuel system after doing maintenance.
| 9. INSTALL REAR FLOOR SERVICE HOLE COVER |
Connect the fuel pump connector.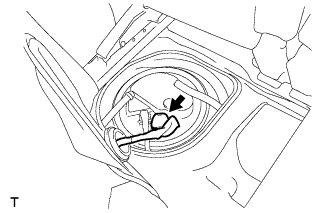
Install the rear floor service hole cover with new butyl tape.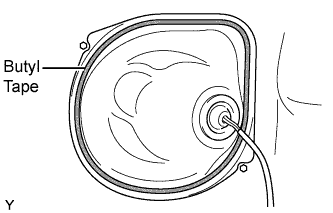
| 10. INSTALL REAR SEAT ASSEMBLY |
Insert the 2 locating pins through the 2 body holes and install the rear seat.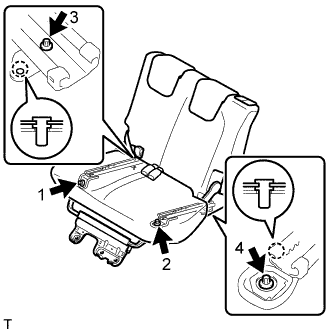
Using "Torx" socket wrench E10, install the 4 bolts in the sequence shown in the illustration.
- Torque:
- 37 N*m{ 375 kgf*cm , 27 ft.*lbf }
Install the rear seat cushion.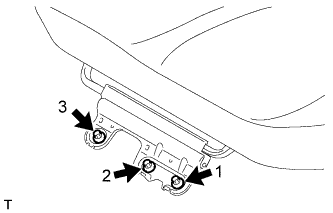
Using "Torx" socket wrench E10, install the 3 bolts in the sequence shown in the illustration.
- Torque:
- 37 N*m{ 375 kgf*cm , 27 ft.*lbf }
| 11. INSTALL NO. 2 REAR SEAT LEG COVER |
Engage the 6 claws and install the No. 2 rear seat leg cover.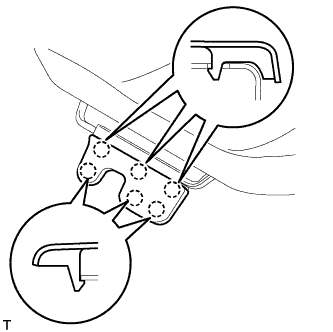
| 12. INSTALL DECK FLOOR BOX (w/ Deck Board) |
Install the deck floor box and lock the 2 knobs.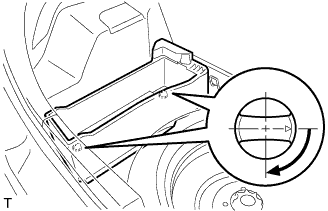
| 13. INSTALL SPARE WHEEL COVER ASSEMBLY (w/ Deck Board) |
Install the spare wheel cover.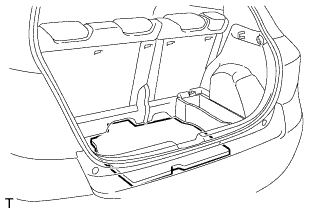
| 14. INSTALL DECK BOARD SUB-ASSEMBLY (w/ Deck Board) |
Set the deck board and lock the 2 knobs.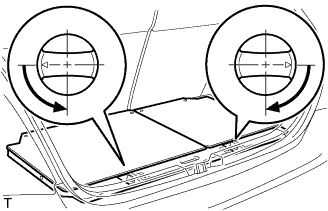
| 15. INSTALL REAR FLOOR CARPET ASSEMBLY (w/o Deck Board) |
Install the rear floor carpet.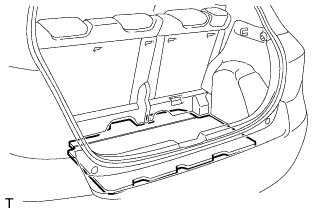
| 16. INSTALL PACKAGE TRAY TRIM PANEL ASSEMBLY (w/ Package Tray Trim) |
Engage the 2 claws and install the package tray trim panel.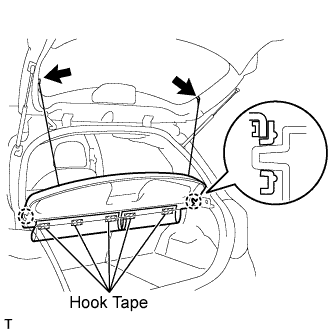
Install the 5 pieces of hook tape.
Install the 2 package tray trim suspenders.