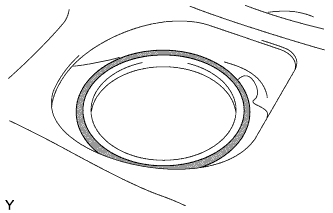
REMOVAL
Removal / installation · Vehicles built from Nov 2005
- NOTICE:
- Always use "Torx" socket wrench E10 when removing the rear seat.
| 1. REMOVE PACKAGE TRAY TRIM PANEL ASSEMBLY (w/ Package Tray Trim) |

Remove the 2 package tray trim suspenders.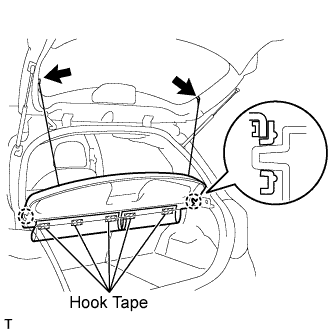

Remove the 5 pieces of hook tape.
Disengage the 2 claws and remove the package tray trim.
| 2. REMOVE DECK BOARD SUB-ASSEMBLY (w/ Deck Board) |
Release the 2 knobs and remove the deck board.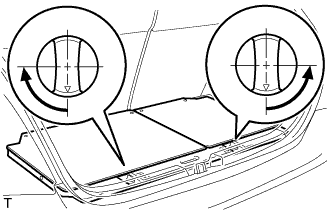
| 3. REMOVE SPARE WHEEL COVER ASSEMBLY (w/ Deck Board) |
Remove the spare wheel cover.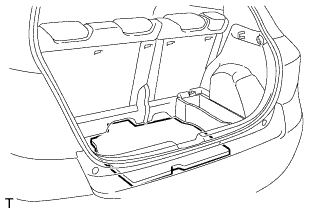
| 4. REMOVE DECK FLOOR BOX (w/ Deck Board) |
Release the 2 knobs and remove the deck floor box.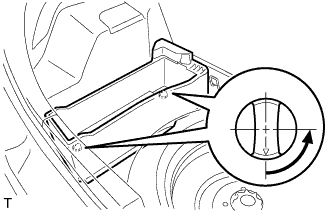
| 5. REMOVE REAR FLOOR CARPET ASSEMBLY (w/o Deck Board) |
Remove the rear floor carpet.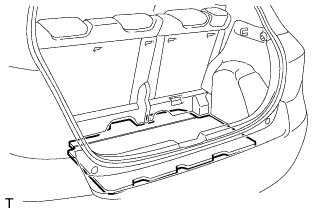
| 6. REMOVE NO. 2 REAR SEAT LEG COVER |
Disengage the 6 claws and remove the No. 2 rear seat leg cover.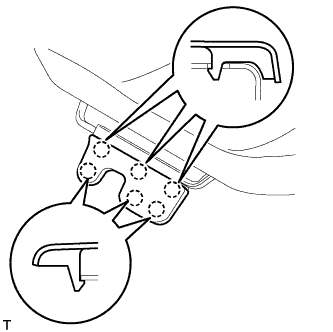
| 7. REMOVE REAR SEAT ASSEMBLY |
Using "Torx" socket wrench E10, remove the 3 bolts and pull up the rear seat cushion.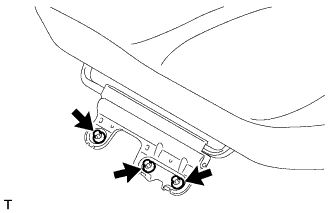
Using "Torx" socket wrench E10, remove the 4 bolts and the rear seat.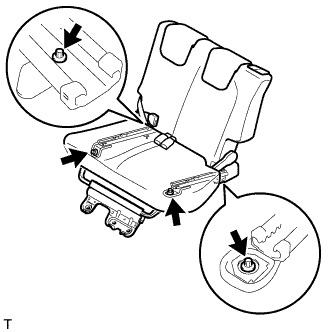
| 8. REMOVE REAR FLOOR SERVICE HOLE COVER |
Remove the clip from the floor carpet.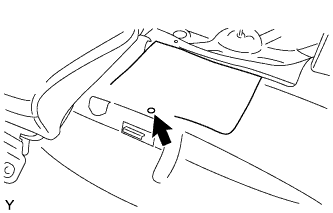
Remove the rear floor service hole cover.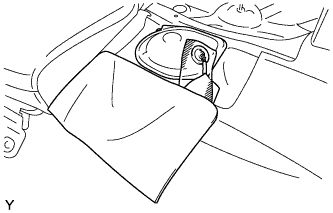
Disconnect the fuel pump connector.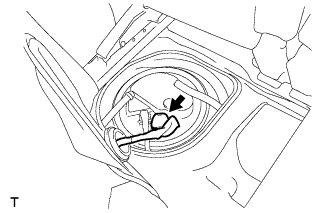
| 9. DISCHARGE FUEL SYSTEM PRESSURE |
| 10. DISCONNECT CABLE FROM NEGATIVE BATTERY TERMINAL |
| 11. DISCONNECT FUEL TANK MAIN TUBE SUB-ASSEMBLY |
Widen the tip of the tube joint clip and pull out the clip.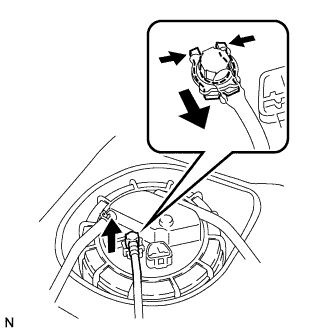
Pull out the fuel tank main tube to disconnect it.
- NOTICE:
- Keep the O-ring free of foreign matter, as it becomes contaminated easily.
- Do not use any tools in this procedure.
- Do not forcefully bend or twist the tube.
- Put the tube in a plastic bag to prevent damage and contamination.
- If the fuel suction plate and tube are stuck together, pinch the tube and turn it carefully to disconnect it.
- Do not damage any clip. If a clip is damaged, replace it.
- Keep the O-ring free of foreign matter, as it becomes contaminated easily.
| 12. DISCONNECT NO. 2 FUEL EMISSION TUBE |
Loosen the clamp and disconnect fuel emission tube No. 2.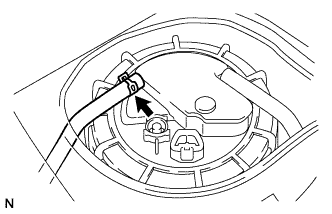
| 13. DISCONNECT NO. 1 CANISTER OUTLET HOSE |
Disconnect the canister outlet hose.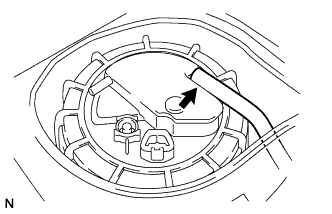
| 14. REMOVE FUEL PUMP GAUGE RETAINER |
Using SST, remove the fuel pump gauge retainer.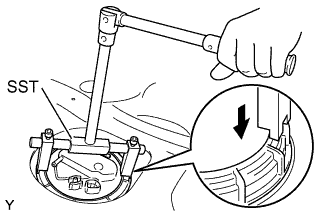
- SST
- 09808-14020
(09808-01410, 09808-01420, 09808-01430)
- HINT:
- Fuel the cutout of the SST into the rib on the fuel pump gauge retainer.
| 15. REMOVE FUEL SUCTION WITH PUMP AND GAUGE TUBE ASSEMBLY |
Remove the fuel suction with pump and gauge tube assembly.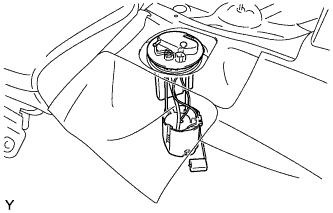
- NOTICE:
- Do not bend the arm of the sender gauge.
Remove the fuel suction tube gasket from the fuel tank.