REASSEMBLY
Removal / installation · Vehicles built from Jan 2006
- CAUTION:
- Wear protective gloves. Sharp surfaces on the front seat adjuster frame could cause injuries to your hands.
- HINT:
- The procedure described below is for the driver side of LHD. Use the same procedure for both the front passenger and driver sides of LHD, unless otherwise specified.
| 1. INSTALL FRONT SEAT CUSHION PROTECTOR |

Install the 2 front seat cushion protectors.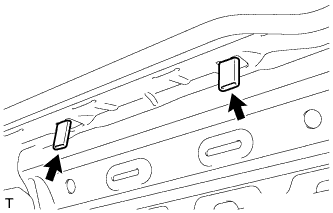

| 2. INSTALL FRONT SEAT CUSHION LOWER SHIELD RH |
w/ Vertical Adjuster: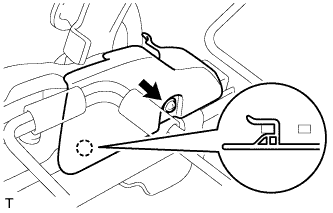
Engage the claw and install the front seat cushion lower shield.
Tighten the screw.
w/o Vertical Adjuster: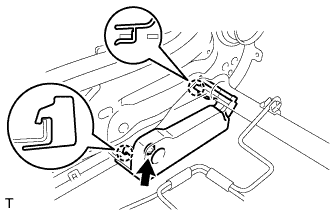
Engage the 2 claws and install the front seat cushion lower shield.
Tighten the screw.
| 3. INSTALL FRONT SEAT CUSHION LOWER SHIELD LH |
w/ Vertical Adjuster: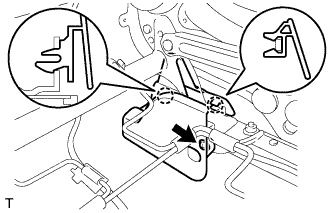
Engage the 2 claws and install the front seat cushion lower shield.
Tighten the screw.
w/o Vertical Adjuster: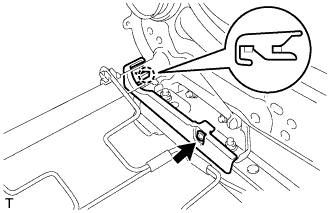
Engage the claw and install the front seat cushion lower shield.
Tighten the screw.
| 4. INSTALL RECLINING ADJUSTER OUTSIDE COVER RH |
Install the reclining adjuster outside cover with the screw.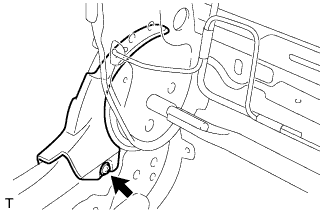
| 5. INSTALL RECLINING ADJUSTER OUTSIDE COVER LH |
- HINT:
- Use the same procedure as for the RH side.
| 6. INSTALL RECLINING ADJUSTER INSIDE COVER RH |
Engage the claw and install the reclining adjuster inside cover.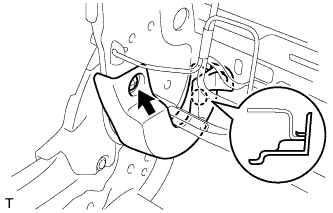
Tighten the screw.
| 7. INSTALL RECLINING ADJUSTER INSIDE COVER LH |
Engage the claw and install the reclining adjuster inside cover.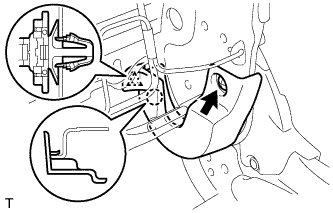
Tighten the screw.
w/ Front Seat Side Airbag:
Install the clamp.
| 8. INSTALL VERTICAL ADJUSTER SPACER (w/ Vertical Adjuster) |
Engage the claw and install the vertical adjuster spacer.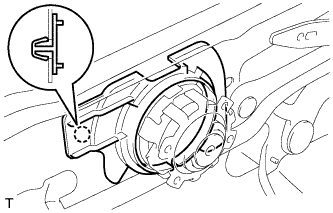
| 9. INSTALL FRONT SEATBACK COVER PAD |
Install the front seatback cover pad.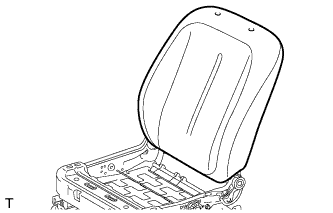
Using hog ring pliers, install 2 new hog rings.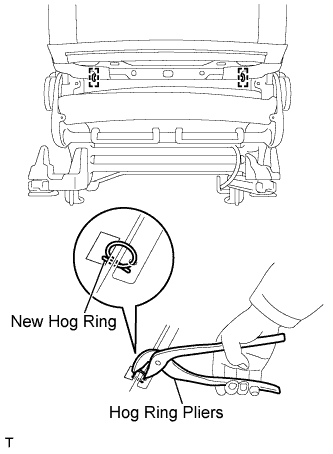
Using hog ring pliers, install 3 new hog rings.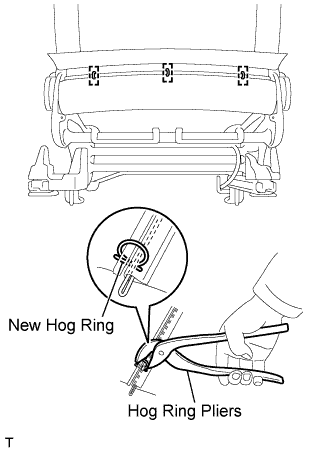
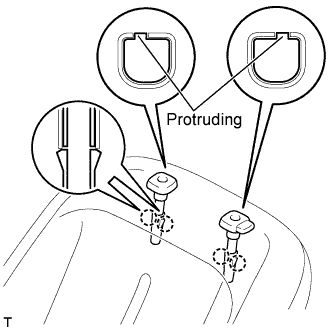
| 10. INSTALL FRONT SEAT HEADREST SUPPORT |
 |
- HINT:
- Use the same procedure for both sides.
Align the protruding portion of the front seat headrest support with the installation groove of the front seat adjuster frame.
Engage the 2 claws and install the front seat headrest support.
| 11. INSTALL FRONT SEAT CUSHION COVER PAD |
Install the front seat cushion cover pad with the 2 clips.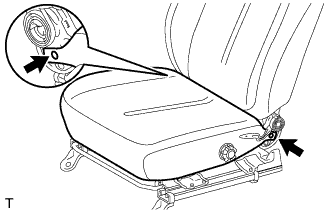
for Driver Side: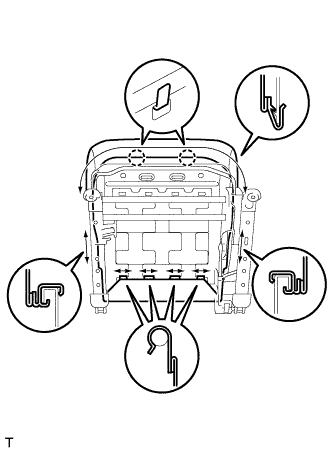
Engage the 2 claws and the 7 hooks.
for Front Passenger Side: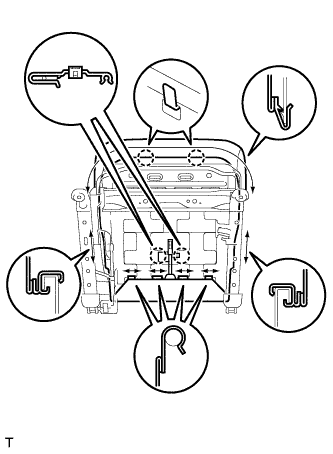
Engage the 2 claws and the 7 hooks.
Engage the 2 claws and install the occupant detection sensor connector.
| 12. INSTALL FRONT SEAT CUSHION OUTER SHIELD |
Engage the 2 claws and the clip and install the front seat cushion outer shield.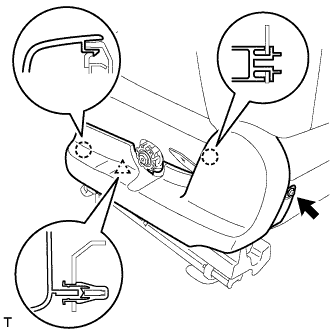
Tighten the screw.
| 13. INSTALL RECLINING ADJUSTER RELEASE HANDLE |
Engage the claw and install the reclining adjuster release handle.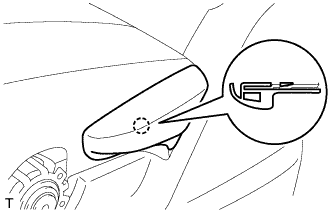
| 14. INSTALL VERTICAL ADJUSTER KNOB (w/ Vertical Adjuster) |
Install the vertical seat adjuster knob.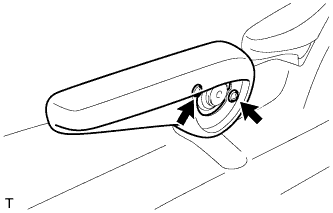
| 15. INSTALL VERTICAL ADJUSTER COVER (w/ Vertical Adjuster) |
Engage the 3 claws and install the vertical adjuster cover.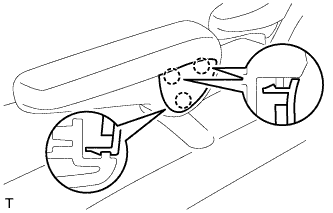
| 16. INSTALL FRONT SEAT CUSHION INNER SHIELD |
Engage the claw and the clip and install the front seat cushion inner shield.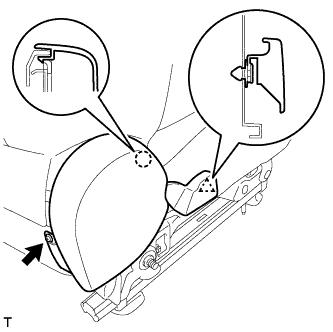
Tighten the screw.
| 17. INSTALL FRONT SEAT INNER BELT ASSEMBLY |
Install the front seat inner belt with the nut.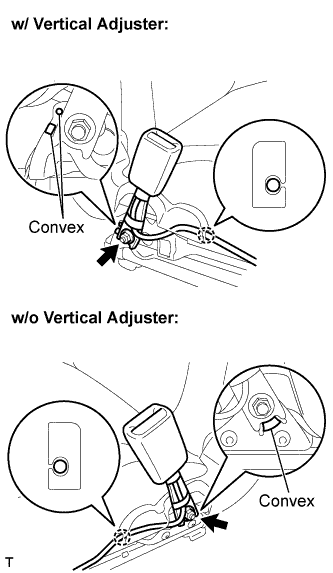
- Torque:
- 42 N*m{ 430 kgf*cm , 31 ft.*lbf }
- NOTICE:
- Do not place the front seat inner belt over the convex areas of the front seat adjuster frame.
Install the wire harness into the claw of the front seat cushion inner shield.
for Driver Side: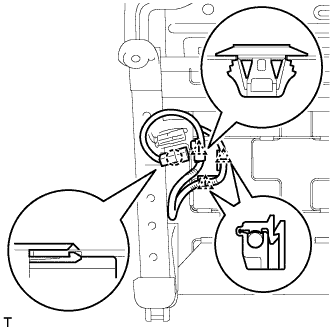
Install the 3 clamps.
Engage the claw and install the connector.
for Front Passenger Side: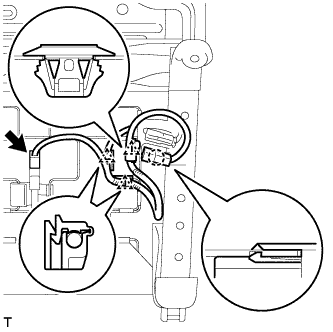
Install the 3 clamps.
Engage the claw and install the connector.
Connect the occupant detection sensor connector.