Removal / installation · Vehicles built from Nov 2006
1.
REPLACE RING PIN
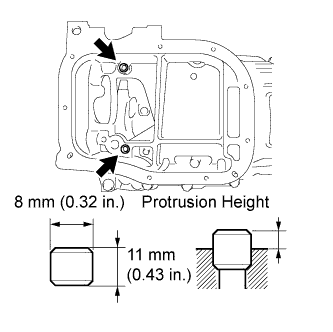
Remove the 2 ring pins.
Using a plastic-faced hammer, tap in 2 new ring pins to the crankcase.
Standard protrusion:
3 mm (0.1181 in.)
2.
REPLACE STUD BOLT
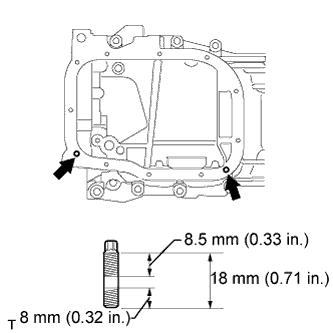
for Crankcase:
Remove the 2 stud bolts.
Using "TORX" socket wrench E5, install the 2 stud bolts as shown in the illustration.
Torque:
5.0 N*m{
51 kgf*cm
, 44 in.*lbf
}
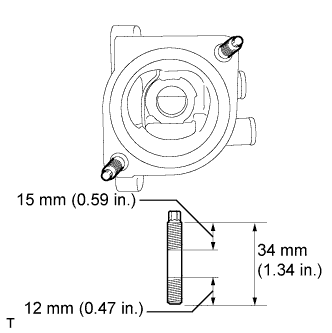
for water inlet housing:
Remove the 2 stud bolts.
Using a "TORX" socket E5, install the 2 stud bolts as shown in the illustration.
Torque:
5.0 N*m{
51 kgf*cm
, 44 in.*lbf
}
3.
REPLACE SPARK PLUG TUBE GASKET
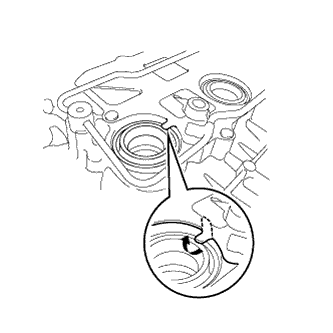
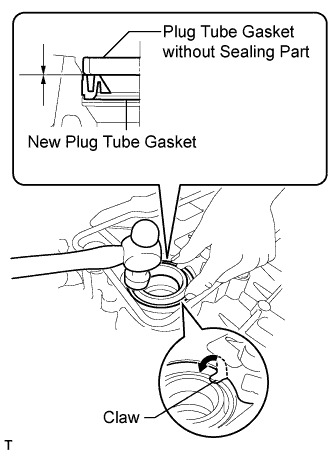
Pry up the claws of the ventilation baffle plate.
NOTICE:
Do not deform the claws of the baffle plate more than necessary.
Remove the 4 gaskets from the cylinder head covers.
NOTICE:
Try not to deform the plug tube gaskets. The removed gaskets will be used when reinstalling the gaskets.
Do not damage the connection of the cylinder head cover.
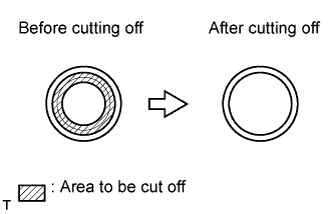
Using a cutter, cut off the sealing part of the removed plug tube gasket.
Using a plug tube gasket which has had the sealing part cut off, uniformly tap in a plug tube gasket all the way.
NOTICE:
Keep the lip free of foreign matter.
Do not tap on the oil seal at an angle.
HINT:
If a plug tube gasket that will be used to install a new gasket is deformed, and cannot be positioned on a new gasket, correct the deformation using pliers.
Return the claws of the ventilation baffle plate to their original positions.
4.
REPLACE TIMING CHAIN OR BELT COVER OIL SEAL
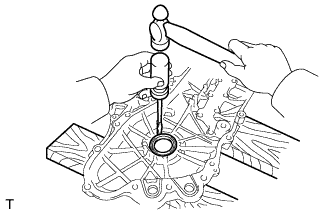
Using a screwdriver and hammer, remove the oil seal.
NOTICE:
Be careful not to damage the timing chain cover sub-assembly.
HINT:
Tape the screwdriver tip before use.
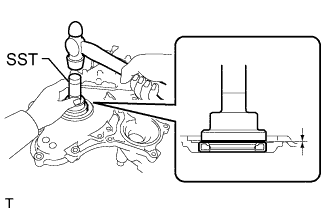
Using SST, tap in a new oil seal until its surface is flush with the timing gear case edge.
SST
09223-22010
Apply a light coat of MP grease to the lip of the oil seal.
NOTICE:
Keep the lip free of foreign matter.
Do not tap on the oil seal at an angle.
Make sure that the oil seal edge does not stick out of the timing chain cover.
5.
REPLACE ENGINE REAR OIL SEAL
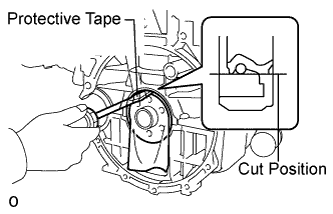
Using a knife, cut off the oil seal lip.
Using a screwdriver with its tip taped, pry out the oil seal.
NOTICE:
After removing the oil seal, check the crankshaft for damage. If it is damaged, smooth the surface with 400-grit sandpaper.
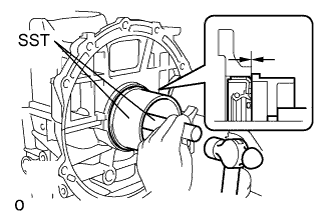
Using SST and a hammer, evenly tap in a new oil seal until its surface is flush with the rear oil seal retainer edge.