INSTALLATION
Removal / installation · Vehicles built from Nov 2006
| 1. INSTALL CAMSHAFT TIMING OIL CONTROL VALVE ASSEMBLY |

Apply a light coat of engine oil to a new O-ring and install it onto the camshaft timing oil control valve assembly (for intake camshaft side).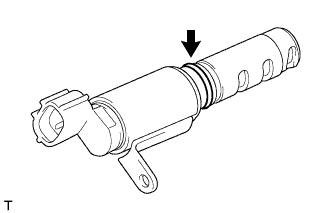

- NOTICE:
- Do not twist the O-ring.
Install the camshaft timing oil control valve assembly with the bolt (for intake camshaft side).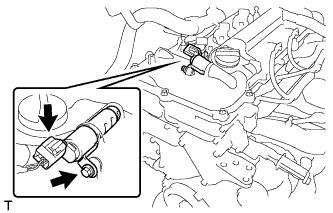
- Torque:
- 10 N*m{ 102 kgf*cm , 7 ft.*lbf }
Connect the camshaft timing oil control valve assembly connector (for intake camshaft side).
Apply a light coat of engine oil to a new O-ring and install it onto the camshaft timing oil control valve assembly (for exhaust camshaft side).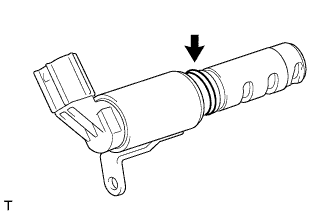
- NOTICE:
- Do not twist the O-ring.
Install the camshaft timing oil control valve assembly with the bolt (for exhaust camshaft side).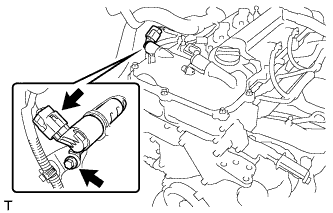
- Torque:
- 10 N*m{ 102 kgf*cm , 7 ft.*lbf }
Connect the camshaft timing oil control valve assembly connector (for exhaust camshaft side).
| 2. CONNECT CABLE TO NEGATIVE BATTERY TERMINAL |
- Torque:
- 5.4 N*m{ 55 kgf*cm , 48 in.*lbf }
| 3. INSPECT FOR OIL LEAK |
| 4. INSTALL NO. 2 CYLINDER HEAD COVER |
Disengage the 4 fittings shown and install the No. 2 cylinder head cover by applying pressure to it.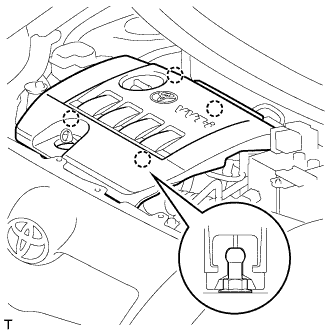
- HINT:
- Make sure that the oil and the engine oil level dipstick are correctly installed before installing the No. 2 cylinder head cover.