 |
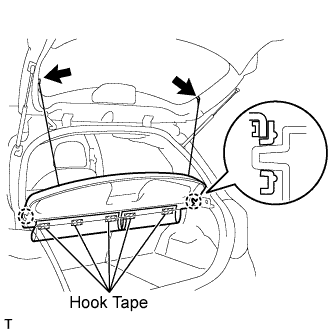
Remove the 2 package tray trim suspenders.
QUARTER TRIM SPEAKER (for Hatchback 3 Door) > REMOVAL |
| 1. DISCONNECT CABLE FROM NEGATIVE BATTERY TERMINAL |
| 2. REMOVE PACKAGE TRAY TRIM PANEL ASSEMBLY (w/ Package Tray Trim) |
|
Remove the 2 package tray trim suspenders.
Remove the 5 pieces of hook tape.
Disengage the 2 claws and remove the package tray trim.
| 3. REMOVE DECK BOARD SUB-ASSEMBLY (w/ Deck Board) |
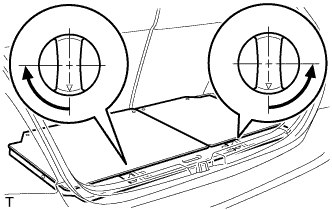 |
Release the 2 knobs and remove the deck board.
| 4. REMOVE SPARE WHEEL COVER ASSEMBLY (w/ Deck Board) |
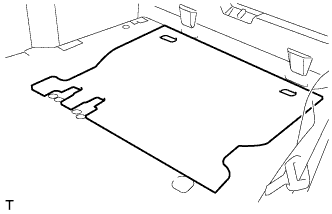 |
Remove the spare wheel cover.
| 5. REMOVE DECK FLOOR BOX RH (w/ Deck Board) |
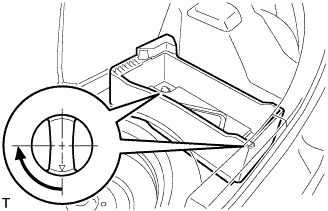 |
Release the 2 knobs and remove the deck floor box.
| 6. REMOVE DECK FLOOR BOX LH (w/ Deck Board) |
| 7. REMOVE REAR FLOOR CARPET ASSEMBLY (w/o Deck Board) |
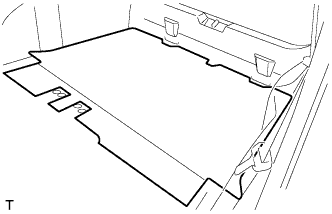 |
Remove the rear floor carpet.
| 8. REMOVE NO. 1 REAR SEAT LEG COVER |
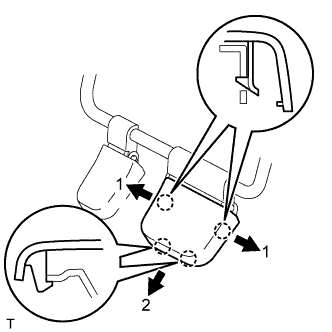 |
Disengage the 4 claws in the sequence shown in the illustration and remove the No. 1 rear seat leg cover.
| 9. REMOVE NO. 2 REAR SEAT LEG COVER (for LH Side) |
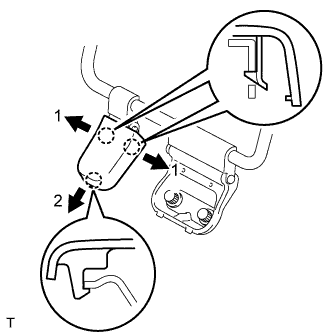 |
Disengage the 3 claws in the sequence shown in the illustration and remove the No. 1 rear seat leg cover.
| 10. REMOVE REAR SEAT ASSEMBLY |
for RH side:
Remove the rear seat assembly (Click here ).
for LH Side:
Remove the rear seat assembly (Click here ).
| 11. REMOVE FRONT DOOR SCUFF PLATE |
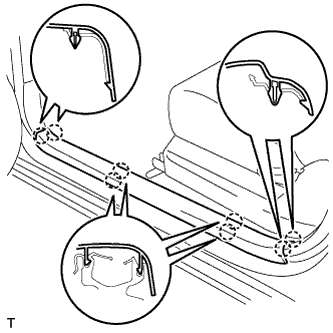 |
Disengage the 8 claws and remove the front scuff plate.
| 12. SEPARATE FRONT DOOR OPENING TRIM WEATHERSTRIP |
Separate the front door opening trim weatherstrip.
| 13. REMOVE FRONT SEAT OUTER BELT BAR SUB-ASSEMBLY (w/ Seat Belt Bar) |
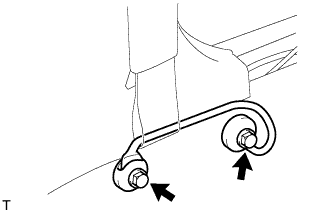 |
Remove the 2 bolts and the front seat outer belt bar.
| 14. REMOVE FRONT QUARTER TRIM PANEL ASSEMBLY |
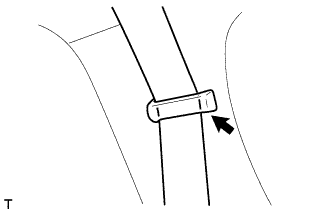 |
Remove the belt of the rear seat outer belt from the rear seat shoulder belt hanger.
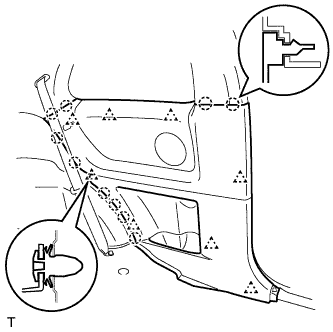 |
Disengage the 8 clips, retainer and 10 claws and remove the quarter trim panel.
| 15. REMOVE REAR SPEAKER ASSEMBLY |
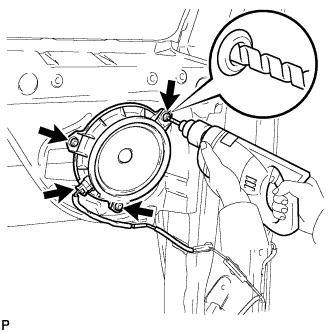 |
Disconnect the connector.
Drill out the 3 rivet heads using a drill with a bit diameter of less than 4 mm (0.16 in.), and remove the rear speaker assembly from the quarter panel.
Operate the drill around the rivet head circumference and cut out the flange.
After drilling out the flange, continue drilling to push out the shards on the drill.
Using a vacuum cleaner, remove the rivet fragments and shavings from the inside of the quarter panel.