 |
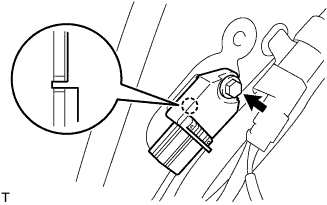
Insert the hook into the body hole and install the airbag sensor with the bolt.
- Torque:
- 9.0 N*m{ 90 kgf*cm , 80 in.*lbf }
- NOTICE:
- Do not use a rear airbag sensor that has been dropped.
- Do not subject the rear airbag sensor to any impact or force.
REAR AIRBAG SENSOR (for Sedan) > INSTALLATION |
| 1. INSTALL REAR AIRBAG SENSOR |
Confirm that the ignition switch is turned to off.
Confirm that the negative battery terminal is detached.
|
Insert the hook into the body hole and install the airbag sensor with the bolt.
Confirm that there is no looseness by shaking the rear airbag sensor.
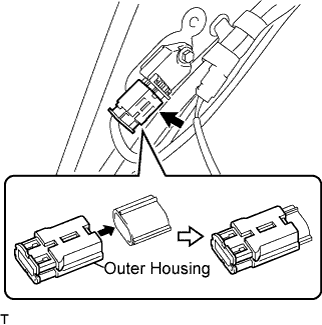 |
Connect the airbag connector.
| 2. INSTALL REAR SEAT SIDE COVER RH |
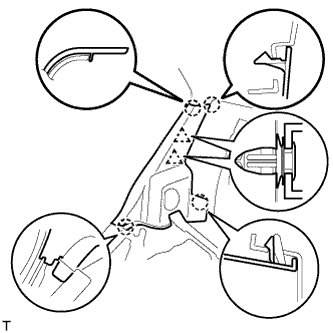 |
Engage the 2 clips and the 4 claws and install the rear seat side cover.
| 3. INSTALL REAR DOOR OPENING TRIM WEATHERSTRIP RH |
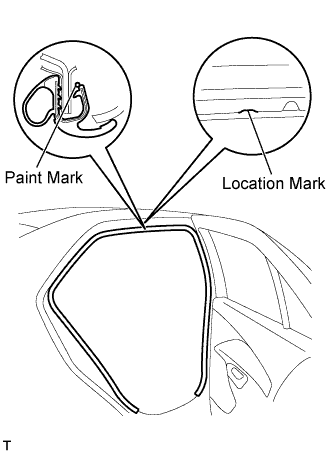 |
Align the location mark with the paint mark first, and install the rear door opening trim weatherstrip, as shown in the illustration.
| Area | Color |
| RH side | Green |
| LH side | Red |
| 4. INSTALL REAR DOOR SCUFF PLATE RH |
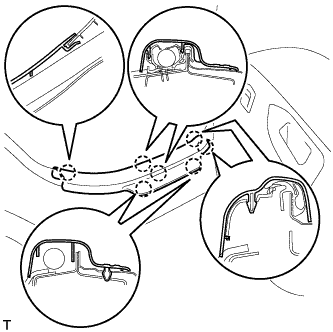 |
Engage the 7 claws and install the rear door scuff plate.
| 5. INSTALL LUGGAGE COMPARTMENT TRIM INNER PAD (for 60/40 Split Seatback Type) |
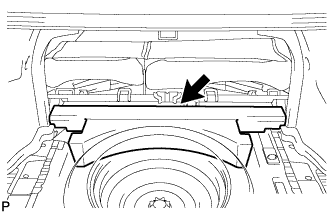 |
Install the luggage compartment trim inner pad.
| 6. INSTALL SPARE WHEEL COVER ASSEMBLY |
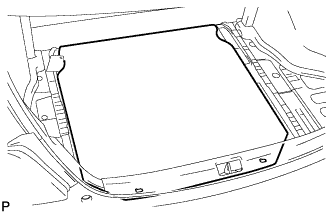 |
Install the spare wheel cover.
| 7. INSTALL LUGGAGE COMPARTMENT FLOOR MAT |
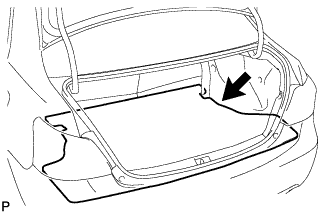 |
Install the luggage compartment floor mat.
| 8. INSTALL REAR SEATBACK ASSEMBLY (for Fixed Seat Type) |
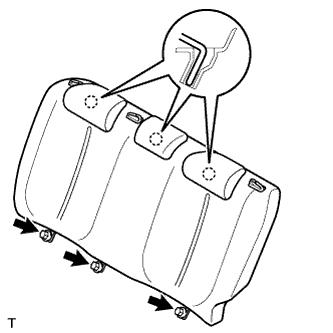 |
Engage the 3 hooks and install the rear seatback.
Tighten the 3 bolts.
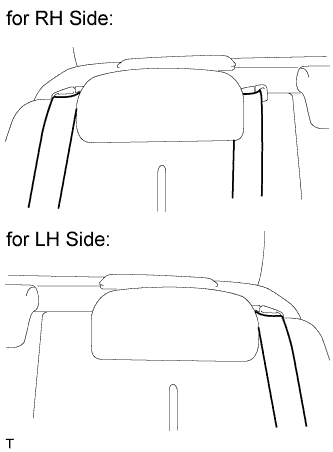 |
Install the rear seat outer belt into the rear seat shoulder belt guide.
for 3 Point Type Rear Center Seat belt:
Install the rear center seat outer belt into the rear center seat shoulder belt guide.
| 9. INSTALL REAR SEATBACK ASSEMBLY LH (for 60/40 Split Seat Type) |
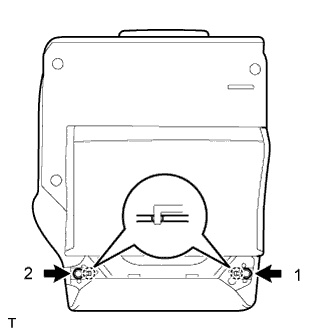 |
Insert the 2 hooks into the rear seatback frame hole and install the rear seatback tightening the 2 bolts in the sequence shown in the illustration.
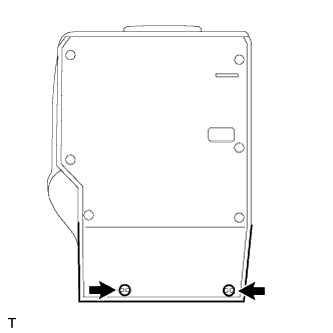 |
Install the rear seatback cover with the 2 clips.
Pull up the rear seatback.
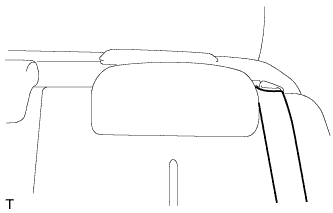 |
Install the rear seat outer belt into the rear seat shoulder belt guide.
| 10. INSTALL REAR SEATBACK ASSEMBLY RH (for 60/40 Split Seat Type) |
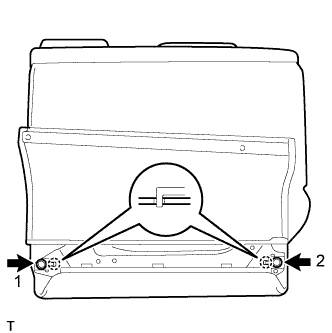 |
Insert the 2 hooks into the rear seatback frame hole and install the rear seatback tightening the 2 bolts in the sequence shown in the illustration.
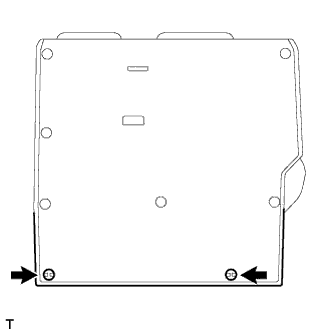 |
Install the rear seatback cover with the 2 clips.
Pull up the rear seatback.
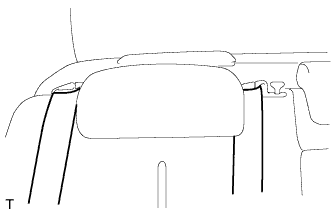 |
Install the rear seat outer belt into the rear seat shoulder belt guide.
for 3 Point Type Rear Seat Belt:
Install the rear center seat outer belt into the rear center seat shoulder belt guide.
| 11. INSTALL REAR SEAT CUSHION COVER PAD SUB-ASSEMBLY |
for 60/40 Split Seat Type:
Install the rear seat cushion cover pad sub-assembly .
for Fixed Seat Type:
Install the rear seat cushion cover pad sub-assembly .
| 12. CONNECT CABLE TO NEGATIVE BATTERY TERMINAL |
| 13. INSPECT SRS WARNING LIGHT |