FRONT LOWER SUSPENSION ARM (for Hatchback) > INSTALLATION |
| 1. TEMPORARILY TIGHTEN FRONT SUSPENSION LOWER ARM |
|
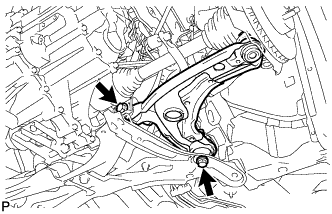
Provisionally tighten the lower arm with the 2 bolts.
Install the lower arm onto the steering knuckle with a new castle nut.
Install a new clip.
| 2. INSTALL FRONT WHEEL |
| 3. STABILIZE SUSPENSION |
Lower the vehicle from the jack.
Bounce the vehicle up and down several times to stabilize the suspension.
| 4. FULLY TIGHTEN FRONT SUSPENSION LOWER ARM |
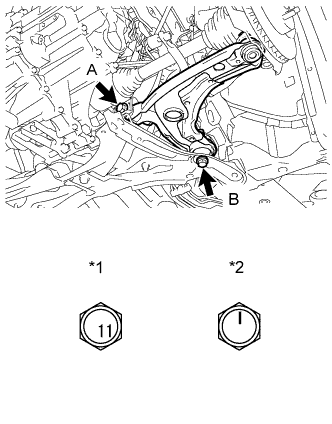 |
Fully tighten the 2 bolts.
| *1 | for Bolt with Bolt Strength Class 11T |
| *2 | for Bolt with Bolt Strength Class 10T |
| 5. INSPECT AND ADJUST FRONT WHEEL ALIGNMENT |