LOWER INSTRUMENT PANEL (for Hatchback) > INSTALLATION |
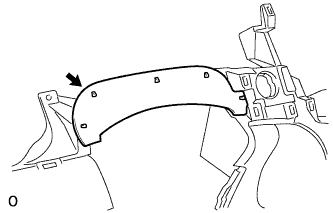
| 1. INSTALL INSTRUMENT CLUSTER FINISH PANEL SEAL |
|
Engage the 5 claws and install the panel seal.
| 2. INSTALL NO. 2 INSTRUMENT PANEL BOX |
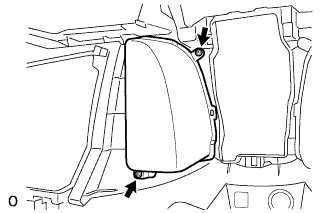 |
Install the instrument panel box with the 2 <A> screws.
| 3. INSTALL NO. 1 INSTRUMENT PANEL BOX |
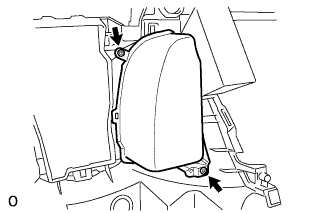 |
Install the instrument panel box with the 2 <A> screws.
| 4. INSTALL INSTRUMENT PANEL BOX SPRING |
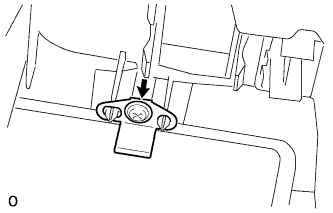 |
Install the instrument panel box spring with screw <A>.
| 5. INSTALL FRONT PANEL SEAL |
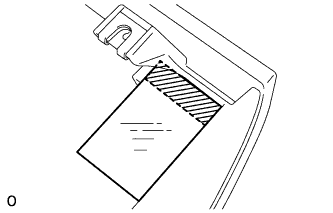 |
Install the front panel seal.
| 6. INSTALL AIRBAG CUT OFF SWITCH CYLINDER |
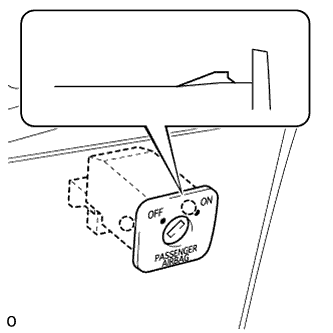 |
Engage the 2 claws and install the airbag cut off switch cylinder.
| 7. INSTALL HEADLIGHT LEVELING SWITCH |
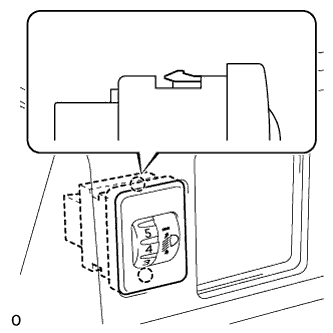 |
Engage the 2 claws and install the headlight leveling switch.
| 8. INSTALL OUTER MIRROR SWITCH ASSEMBLY |
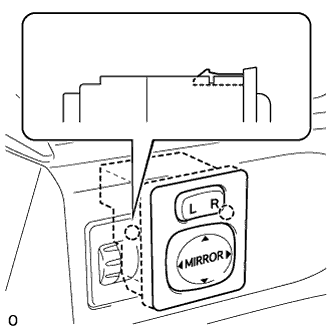 |
Engage the 2 claws and install the outer mirror switch.
| 9. INSTALL CIGARETTE LIGHTER INDICATOR LENS |
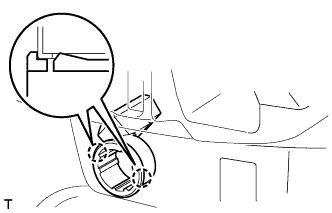 |
Engage the 2 claws and install a new cigarette lighter indicator lens.
| 10. INSTALL CIGARETTE LIGHTER COVER |
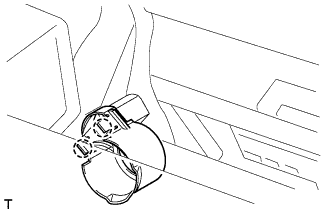 |
Engage the 2 claws and install the cigarette lighter cover.
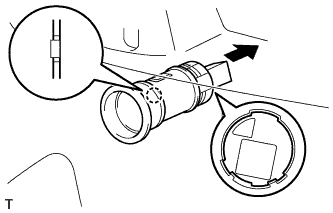 |
Align the protrusion of the cigarette lighter socket with the cutout of the cigarette lighter indicator lens and install the cigarette lighter socket.
Securely engage the claw.
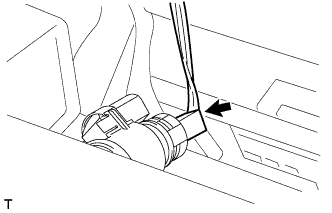 |
Connect the cigarette lighter connector.
| 11. INSTALL CIGARETTE LIGHTER KNOB |
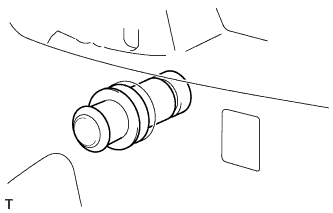 |
Install the cigarette lighter knob.
| 12. INSTALL POWER OUTLET SOCKET COVER |
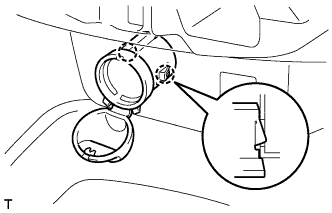 |
Engage the 2 claws and install a new power outlet socket cover.
| 13. INSTALL POWER OUTLET SOCKET ASSEMBLY |
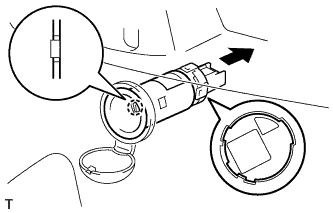 |
Align the protrusion of the power outlet socket with the cutout of the power outlet socket cover and install the power outlet socket.
Securely engage the claw.
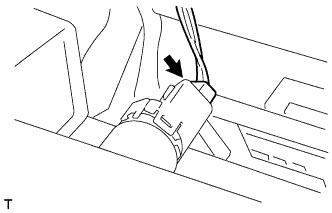 |
Connect the power outlet connector.
| 14. INSTALL LOWER INSTRUMENT PANEL SUB-ASSEMBLY |
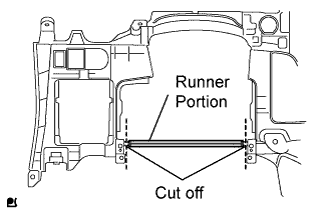 |
Using a nipper, cut off both ends of the runner portion shown in the illustration (When installing a new one).
w/ Driver Side Knee Airbag
Apply butyl tape to install a new instrument panel safety pad No. 1 onto the instrument panel lower (When installing a new one).
Apply butyl tape to install a new instrument panel safety pad No. 2 onto the instrument panel lower (When installing a new one).
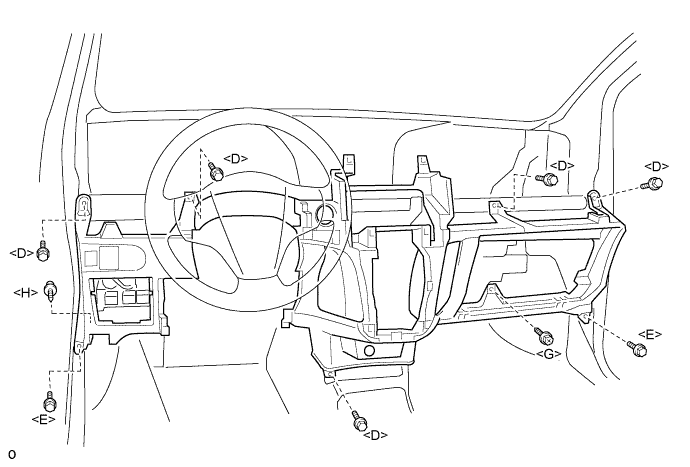
Install the lower instrument panel with the 5 <D> bolts, 2 <E> bolts, screw <G> and screw <H>.
Connect the clamps and connectors.
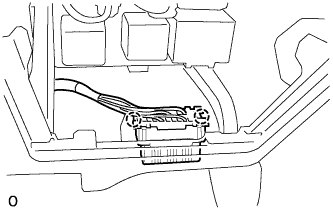 |
Engage the 2 claws to connect the DLC3 connector.
| 15. CONNECT HOOD LOCK CONTROL LEVER SUB-ASSEMBLY |
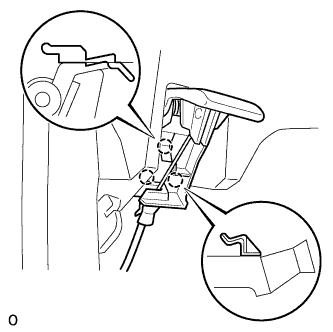 |
Engage the 3 claws to connect the control lever.
| 16. CONNECT ANTENNA CORD SUB-ASSEMBLY |
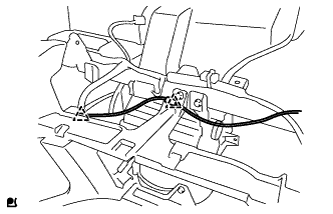 |
for LHD:
Connect the 2 antenna cord clamps.
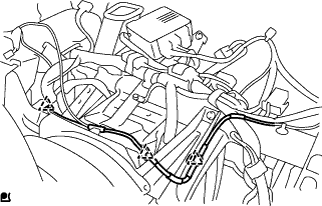 |
for RHD:
Connect the 3 antenna cord clamps.
| 17. INSTALL NO. 6 HEATER TO REGISTER DUCT ASSEMBLY |
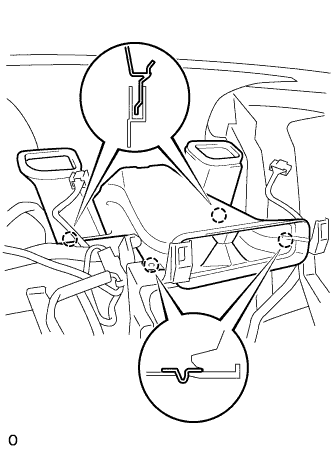 |
Engage the 4 claws and install the heater to register duct.
| 18. INSTALL INSTRUMENT PANEL BOX |
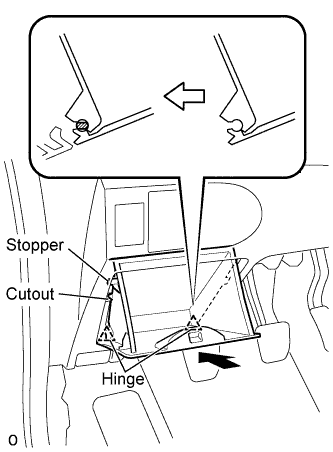 |
Insert the stopper of the instrument panel box from the cutout of the instrument panel lower.
Engage the 2 hinges with the instrument panel open.
Close the instrument panel box.
| 19. INSTALL DRIVER SIDE KNEE AIRBAG ASSEMBLY (w/ Driver Side Knee Airbag) |
| 20. INSTALL STEERING COLUMN COVER LOWER (w/ Driver Side Knee Airbag) |
| 21. INSTALL INSTRUMENT PANEL UNDER TRAY (w/o Driver Side Knee Airbag) |
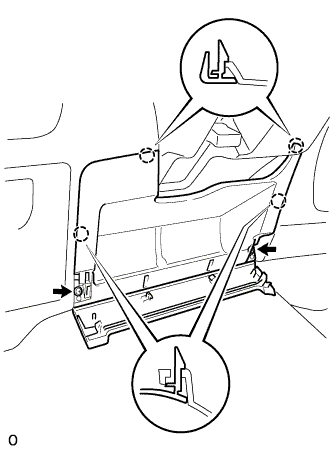 |
Engage the 4 claws and install the instrument panel under tray.
Install the 2 <A> screws.
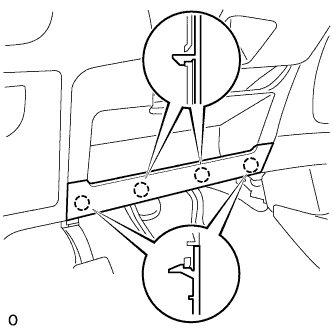 |
Engage the 4 claws and install the instrument panel under tray.
| 22. INSTALL CONSOLE BOX ASSEMBLY REAR |
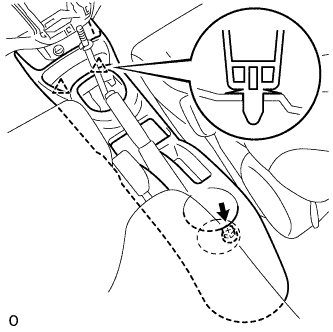 |
Engage the 2 clips and install the console box rear.
Install bolt <F>.
| 23. INSTALL CONSOLE BOX CARPET |
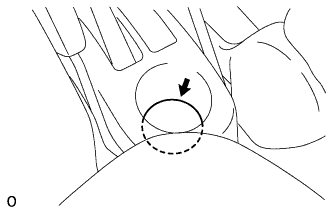 |
Install the console box carpet.
| 24. INSTALL CONSOLE BOX COVER REAR |
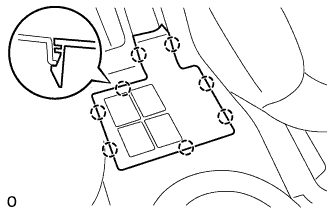 |
Engage the 8 claws and install the console box rear cover.
| 25. INSTALL FRONT ASH RECEPTACLE ASSEMBLY |
| 26. INSTALL SHIFTING HOLE COVER SUB-ASSEMBLY (for Manual Transaxle) |
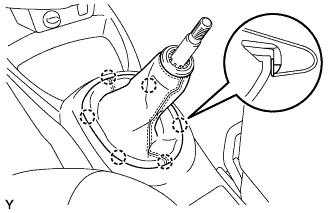 |
Engage the 6 claws and install the shifting hole cover.
| 27. INSTALL SHIFT LEVER KNOB SUB-ASSEMBLY (for Manual Transaxle) |
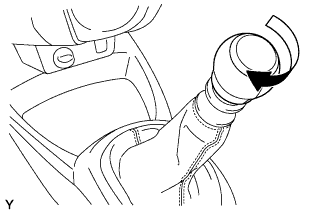 |
Install the shift lever knob.
| 28. INSTALL COWL SIDE TRIM BOARD RH |
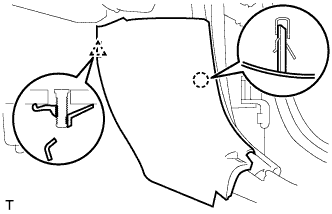 |
Engage the claw and stud bolt and install the cowl side trim board.
| 29. INSTALL COWL SIDE TRIM BOARD LH |
| 30. INSTALL INSTRUMENT PANEL UNDER COVER SUB-ASSEMBLY LH |
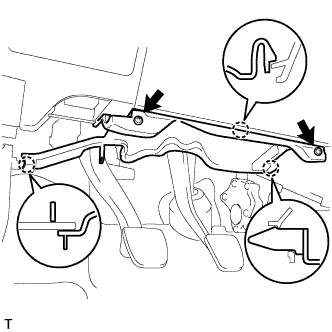 |
Engage the 3 claws and install the instrument panel under cover.
Tighten the 2 screws.
| 31. INSTALL INSTRUMENT PANEL UNDER COVER SUB-ASSEMBLY RH |
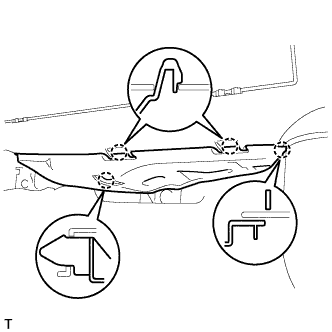 |
Engage the 4 claws and install the instrument panel under cover.
| 32. INSTALL FRONT DOOR SCUFF PLATE RH |
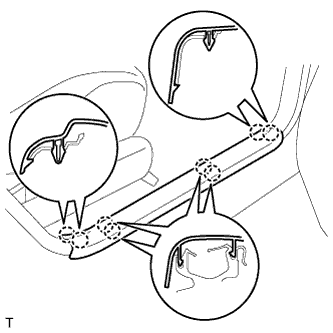 |
Engage the 8 claws and install the front door scuff plate.
| 33. INSTALL FRONT DOOR SCUFF PLATE LH |
| 34. INSTALL UPPER INSTRUMENT PANEL SUB-ASSEMBLY |
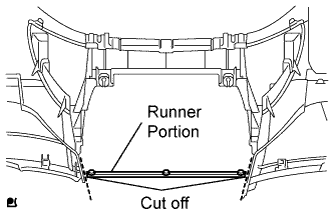 |
Using a nipper, cut off both ends of the runner portion shown in the illustration (When installing a new one).
Engage the 5 claws at the upper side of the instrument panel.
Engage the claw and the 3 clips at the lower side of the instrument panel.
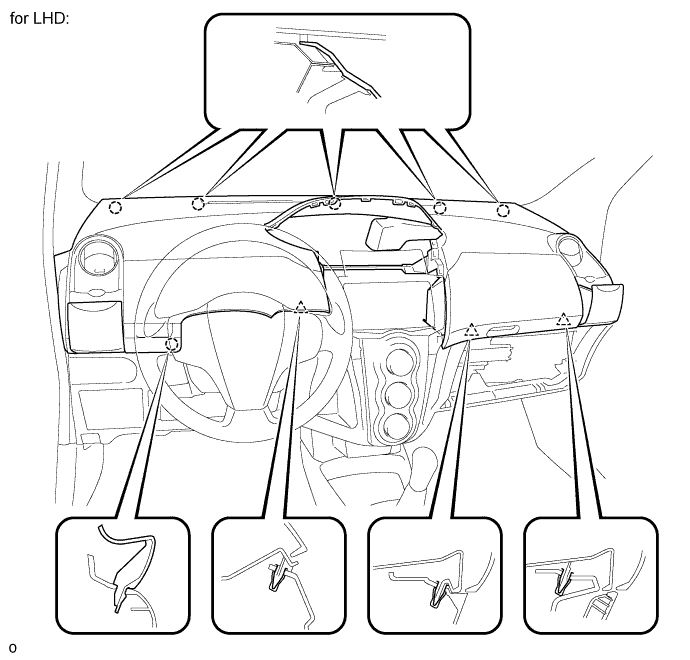
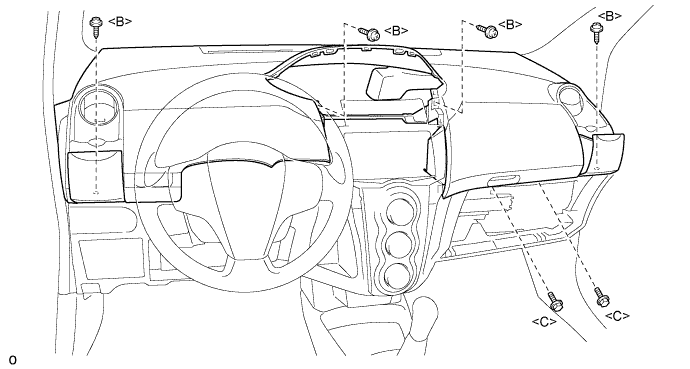
Install the instrument panel upper with the 2 <C> bolts and the 4 <B> screws.
Connect the connectors.
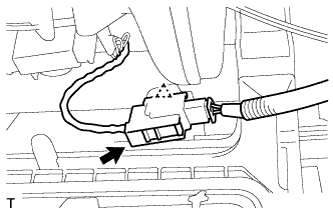 |
Connect the passenger airbag connector and clamp.
| 35. INSTALL GLOVE COMPARTMENT DOOR ASSEMBLY |
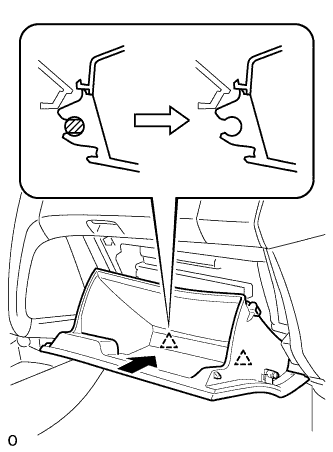 |
Engage the claw of the hinge portion in the horizontal direction to install the glove compartment door assembly.
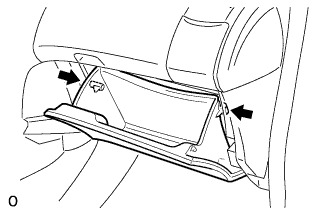 |
Slightly deform the upper portion of the glove compartment door assembly to engage the stopper.
| 36. INSTALL NO. 1 SWITCH HOLE BASE |
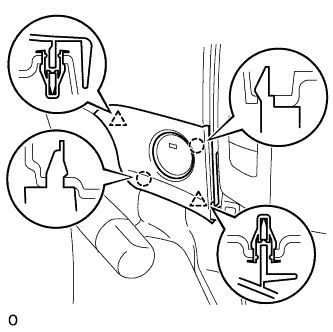 |
Disengage the 2 clips and 2 claws and install the switch hole base.
| 37. INSTALL FRONT PILLAR GARNISH RH |
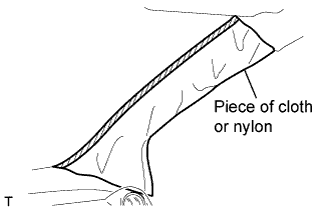 |
w/ Curtain Shield Airbag:
Remove the piece of cloth or nylon.
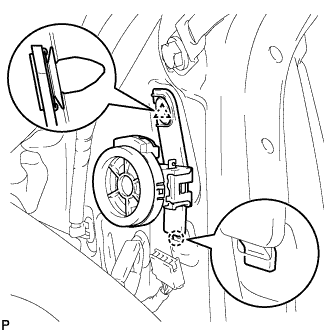 |
w/ Front No. 2 Speaker:
Insert the hook into the body hole.
Engage the clip and install the front speaker.
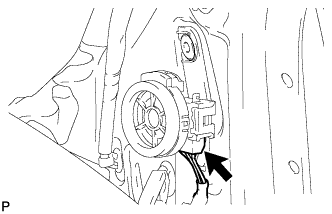 |
Connect the speaker connector.
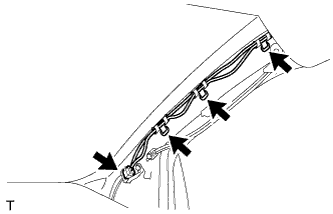 |
Install the 3 antenna cord clamps.
Connect the connector.
w/ Curtain Shield Airbag:
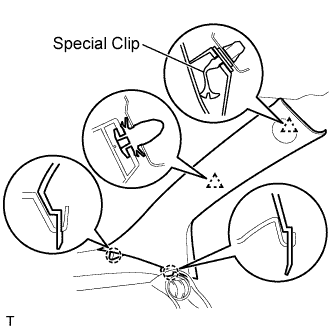 |
Install a new special clip and the clip onto a new front pillar garnish.
Engage the 2 clips and the 2 claws and install the front pillar garnish.
w/o Curtain Shield Airbag:
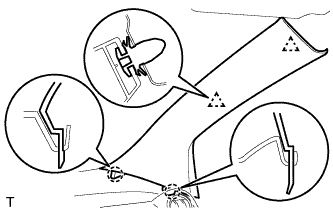 |
Engage the 2 clips and the 2 claws and install the front pillar garnish.
| 38. INSTALL FRONT PILLAR GARNISH LH |
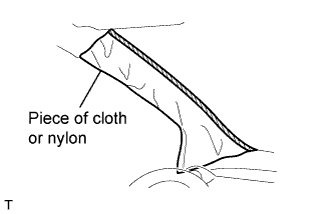 |
w/ Curtain Shield Airbag:
Remove the piece of cloth or nylon.
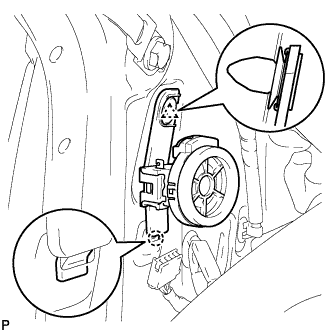 |
w/ Front No. 2 Speaker:
Insert the hook into the body hole.
Engage the clip and install the front speaker.
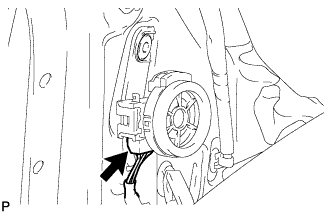 |
Connect the speaker connector.
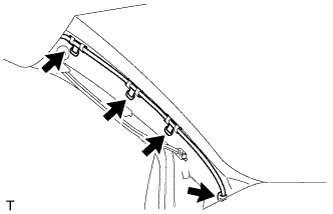 |
Install the 4 wire harness clamps.
w/ Curtain Shield Airbag:
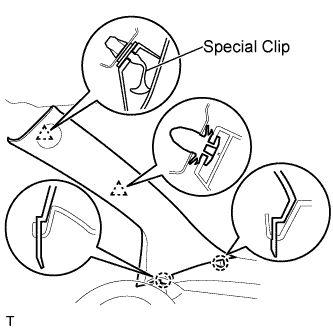 |
Install a new special clip and the clip onto a new front pillar garnish.
Engage the 2 clips and the 2 claws and install the front pillar garnish.
w/o Curtain Shield Airbag:
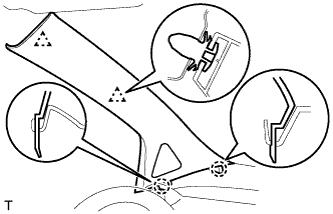 |
Engage the 2 clips and the 2 claws and install the front pillar garnish.
| 39. INSTALL FRONT DOOR OPENING TRIM WEATHERSTRIP RH |
Install the front door opening trim weatherstrip.
| 40. INSTALL FRONT DOOR OPENING TRIM WEATHERSTRIP LH |
Install the front door opening trim weatherstrip.
| 41. CONNECT AIR INLET DAMPER CONTROL CABLE SUB-ASSEMBLY |
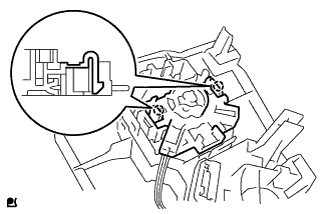 |
Engage the 2 claws and connect the air inlet damper control cable.
| 42. CONNECT DEFROSTER DAMPER CONTROL CABLE SUB-ASSEMBLY |
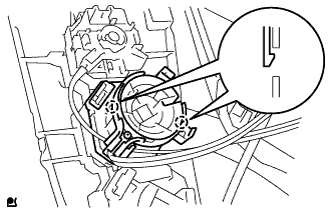 |
Engage the 2 claws and connect the defroster damper control cable.
| 43. CONNECT AIR MIX DAMPER CONTROL CABLE SUB-ASSEMBLY |
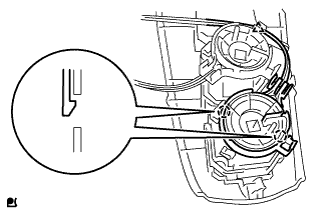 |
Engage the 2 claws and connect the air mix control cable clamp.
Connect the defroster damper control cable to the clamp.
| 44. INSTALL AIR CONDITIONER PANEL SUB-ASSEMBLY |
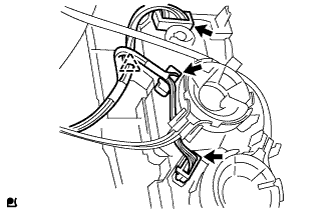 |
Connect the 3 connectors and the clamp.
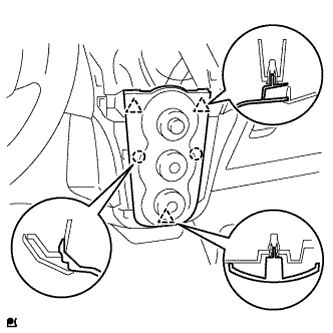 |
Engage the 3 clips and 2 claws and install the air conditioning panel.
| 45. INSTALL RADIO TUNER OPENING COVER (w/o Radio Receiver) |
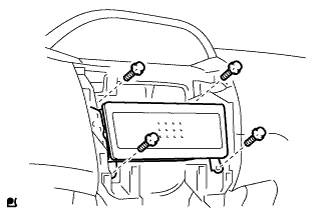 |
Install the radio tuner opening cover with the 4 bolts.
| 46. INSTALL RADIO RECEIVER ASSEMBLY |
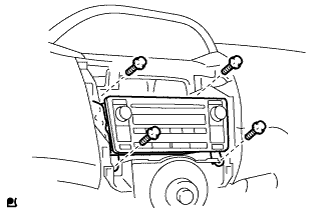 |
w/ Cassette Tape Player:
Connect the connectors.
Install the radio receiver with the 4 screws.
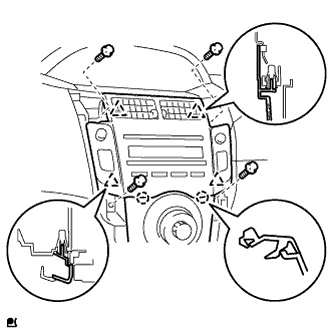 |
w/ CD Player:
Connect the connectors.
Engage the 4 clips and 2 claws and install the radio receiver.
Install the 4 screws.
| 47. INSTALL INSTRUMENT CLUSTER FINISH PANEL SUB-ASSEMBLY CENTER (Except CD Player) |
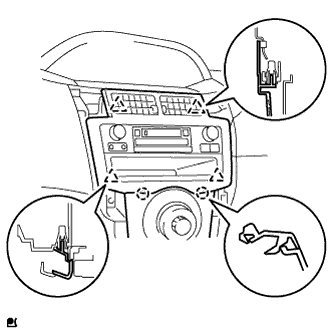 |
Engage the 4 clips and 2 claws and install the instrument cluster finish panel.
| 48. INSTALL COMBINATION METER ASSEMBLY |
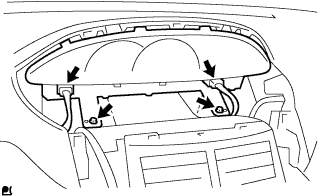 |
Install the combination meter assembly with the 2 screws.
Connect the 2 connectors.
| 49. INSTALL INSTRUMENT CLUSTER FINISH PANEL NO.1 |
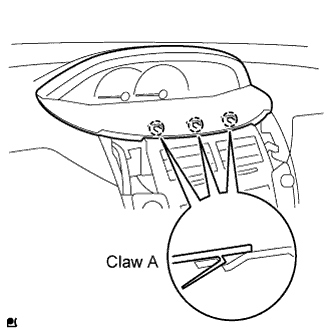 |
Fit the 3 A claws of the instrument cluster finish panel into the upper instrument cluster finish panel center.
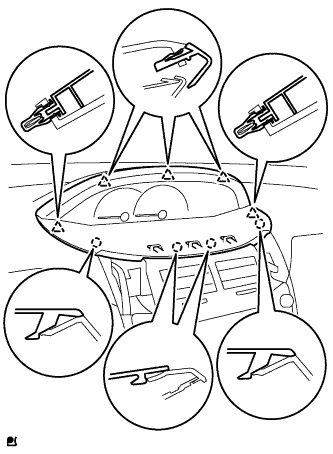 |
Engage the 4 claws and 5 clips and install the instrument cluster finish panel.
| 50. INSTALL INSTRUMENT PANEL FINISH PANEL END RH |
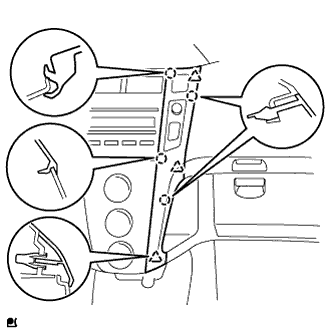 |
with CD player
Connect the connector.
Engage the 4 claws and 3 clips and install the instrument panel finish panel end RH.
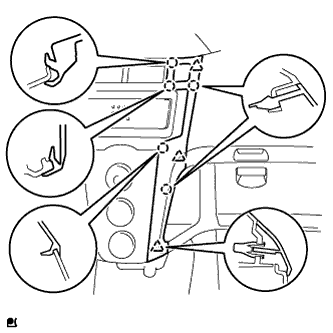 |
Except CD player
Connect the connector.
Engage the 5 claws and 3 clips and install the instrument panel finish panel end RH.
| 51. INSTALL INSTRUMENT PANEL FINISH PANEL END LH |
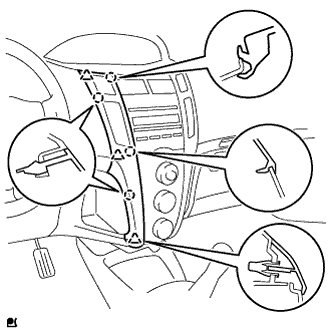 |
with CD player
Connect the connector.
Engage the 4 claws and 3 clips and install the instrument panel finish panel end LH.
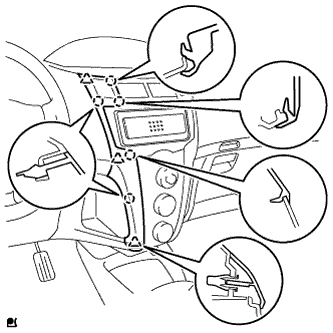 |
Except CD player
Connect the connector.
Engage the 5 claws and 3 clips and install the instrument panel finish panel end LH.
| 52. CONNECT CABLE TO NEGATIVE BATTERY TERMINAL |
| 53. CHECK SRS WARNING LIGHT |