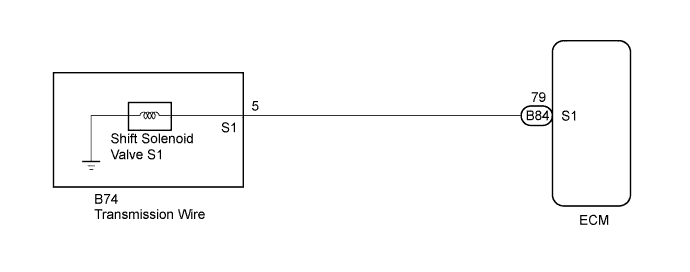
DTC P0973 Shift Solenoid "A" Control Circuit Low (Shift Solenoid Valve S1) |
DTC P0974 Shift Solenoid "A" Control Circuit High (Shift Solenoid Valve S1) |
| DTC No. | DTC Detection Condition | Trouble Area |
| P0973 | ECM detects short in solenoid valve S1 circuit 4 times when solenoid valve S1 is operated (1 trip detection logic). |
|
| P0974 | ECM detects open in solenoid valve S1 circuit 4 times when solenoid valve S1 is not operated (1 trip detection logic). |
|
| Gearshift controlled by ECM | 1st | 2nd | 3rd | 4th |
| Shift solenoid valve S1 | ON | ON | OFF | OFF |
| 1.INSPECT TRANSMISSION WIRE (SHIFT SOLENOID VALVE S1) |
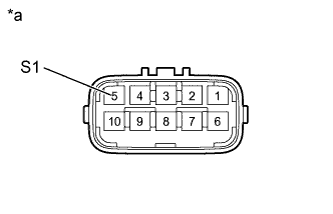 |
Disconnect the transmission wire connector from the transaxle.
Measure the resistance according to the value(s) in the table below.
| Tester Connection | Condition | Specified Condition |
| 5 (S1) - Body ground | 20°C (68°F) | 11 to 15 Ω |
| *a | Component without harness connected (Transmission Wire) |
|
| ||||
| OK | |
 |
| 2.CHECK HARNESS AND CONNECTOR (TRANSMISSION WIRE - ECM) |
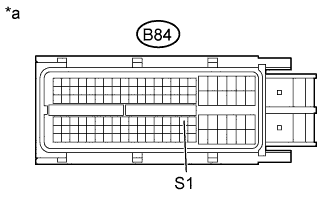 |
Connect the transmission wire connector to the transaxle.
Disconnect the ECM connector.
Measure the resistance according to the value(s) in the table below.
| Tester Connection | Condition | Specified Condition |
| B84-79 (S1) - Body ground | 20°C (68°F) | 11 to 15 Ω |
| *a | Front view of wire harness connector (to ECM) |
|
| ||||
| OK | ||
 | ||
| ||
| 3.INSPECT SHIFT SOLENOID VALVE S1 |
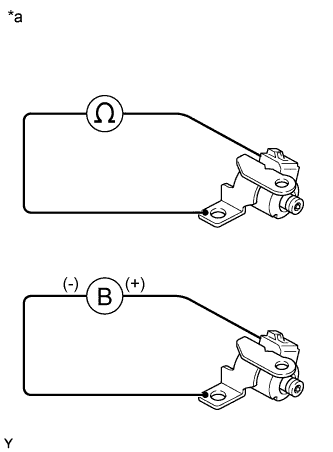 |
Remove shift solenoid valve S1.
Measure the resistance according to the value(s) in the table below.
| Tester Connection | Condition | Specified Condition |
| 1 - Solenoid Body | 20°C (68°F) | 11 to 15 Ω |
Connect the positive (+) lead to the terminal of the solenoid connector and the negative (-) lead to the solenoid body to check the solenoid valve operation.
| *a | Component without harness connected (Shift Solenoid Valve S1) |
|
| ||||
| OK | ||
| ||
| ||

