OIL PUMP > REMOVAL |
| 1. DISCONNECT CABLE FROM NEGATIVE BATTERY TERMINAL |
| 2. REMOVE FRONT WHEEL RH |
| 3. REMOVE ENGINE UNDER COVER RH (for Plastic Type) |
| 4. REMOVE ENGINE UNDER COVER LH (for Plastic Type) |
| 5. REMOVE NO. 1 ENGINE UNDER COVER SUB-ASSEMBLY (for Metal Type) |
| 6. DRAIN ENGINE OIL |
Remove the oil filler cap.
Remove the oil pan drain plug and drain the engine oil.
Clean the drain plug.
Install the drain plug with a new gasket.
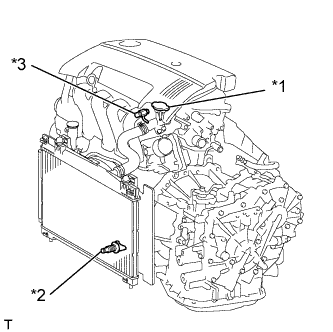
| 7. DRAIN COOLANT |
|
| *1 | Water Filler Cap Sub-assembly |
| *2 | Radiator Drain Cock Plug |
| *3 | Cylinder Block Drain Cock Plug |
Loosen the radiator drain cock plug.
Remove the water filler cap sub-assembly.
Loosen the cylinder block drain cock plug, then drain the coolant.
| 8. REMOVE GENERATOR ASSEMBLY |
| 9. REMOVE NO. 2 CYLINDER HEAD COVER |
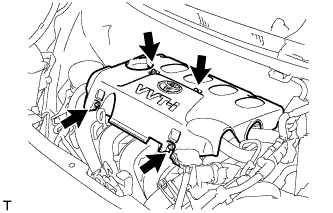 |
Remove the 4 nuts and No. 2 cylinder head cover.
| 10. REMOVE NO. 1 IGNITION COIL |
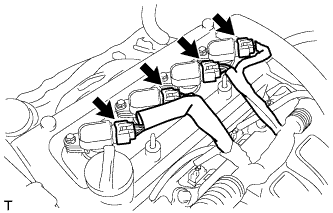 |
Disconnect the 4 No. 1 ignition coil connectors.
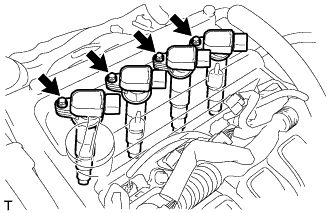 |
Remove the 4 bolts and the 4 No. 1 ignition coils.
| 11. DISCONNECT VENTILATION HOSE |
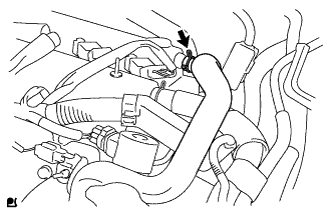 |
Disconnect the ventilation hose from the cylinder head cover.
| 12. DISCONNECT FUEL VAPOR FEED HOSE ASSEMBLY |
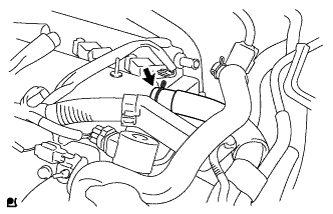 |
Disconnect the fuel vapor feed hose assembly from the cylinder head cover.
| 13. REMOVE CYLINDER HEAD COVER SUB-ASSEMBLY |
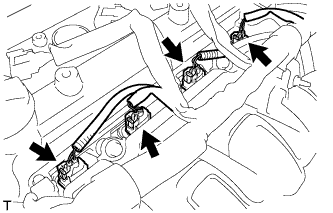 |
Disconnect the fuel injector connectors.
for LHD:
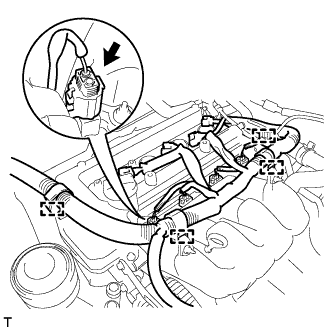 |
Disconnect the connector and 4 wire harness clamps shown in the illustration and disconnect the engine wire harness.
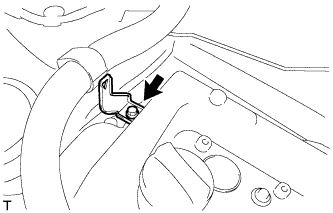 |
Remove the bolt and the wire harness bracket.
for RHD:
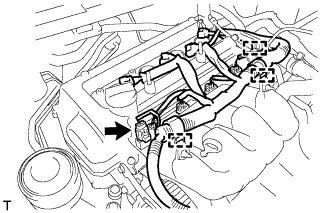 |
Disconnect the connector and 3 wire harness clamps shown in the illustration and disconnect the engine wire harness.
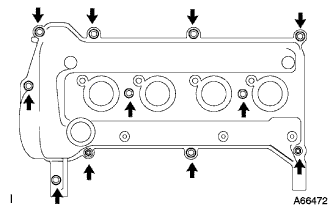 |
Remove the 9 bolts, 2 nuts and 2 seal washers and then remove the cylinder head cover sub-assembly.
| 14. REMOVE ENGINE MOUNTING INSULATOR SUB-ASSEMBLY RH |
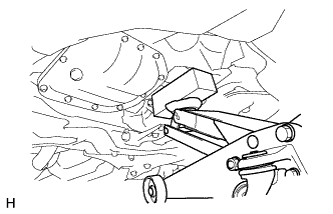 |
Place a wooden block on a jack underneath the engine.
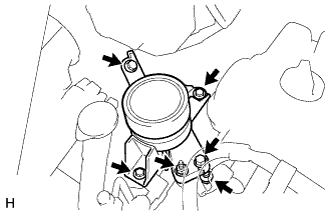 |
Remove the 4 bolts, 2 nuts and the engine mounting insulator sub-assembly RH.
| 15. REMOVE CRANKSHAFT DAMPER SUB-ASSEMBLY |
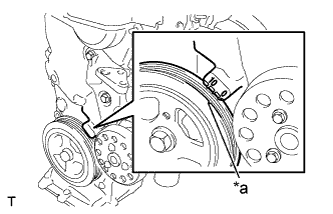 |
Set the No. 1 cylinder to TDC/compression.
Turn the crankshaft damper sub-assembly, and align its timing notch with timing mark "0" of the oil pump.
| *a | Timing Notch |
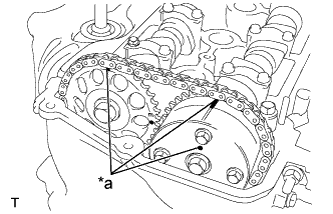 |
Check that the timing marks on the camshaft timing sprocket and the camshaft timing gear are all facing upward as shown in the illustration.
| *a | Timing Marks |
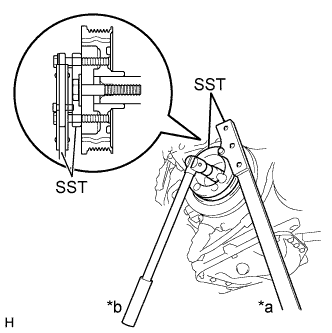 |
Using SST, loosen the bolt while holding the crankshaft damper sub-assembly.
| *a | Hold |
| *b | Loosen |
Remove the SSTs and the bolt.
Remove the crankshaft damper sub-assembly.
| 16. REMOVE CRANKSHAFT POSITION SENSOR |
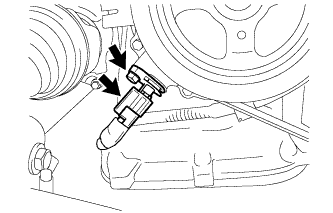 |
Disconnect the crankshaft position sensor connector.
Remove the bolt and crankshaft position sensor.
| 17. REMOVE CAMSHAFT TIMING OIL CONTROL VALVE ASSEMBLY |
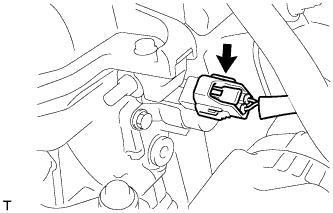 |
Disconnect the camshaft timing oil control valve assembly connector.
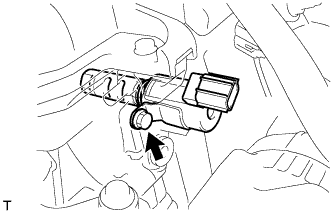 |
Remove the bolt and camshaft timing oil control valve assembly.
Remove the O-ring from the camshaft timing oil control valve assembly.
| 18. REMOVE WATER PUMP PULLEY |
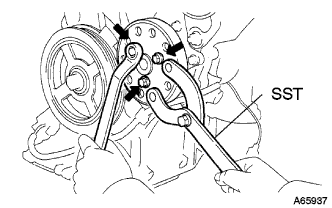 |
Using SST, hold the water pump pulley.
Remove the 3 bolts and the water pump pulley.
| 19. REMOVE WATER PUMP ASSEMBLY |
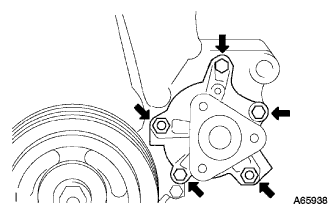 |
Remove the 3 bolts and 2 nuts and remove the water pump assembly and water pump gasket.
| 20. REMOVE TRANSVERSE ENGINE ENGINE MOUNTING BRACKET |
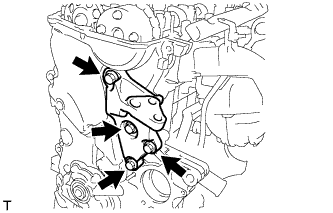 |
Remove the 4 bolts and the transverse engine engine mounting bracket.
| 21. REMOVE OIL PUMP ASSEMBLY |
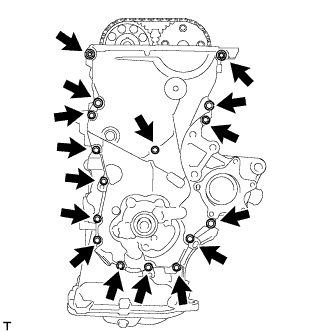 |
Remove the 15 bolts and the nut.
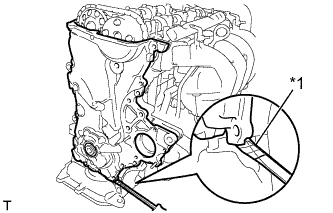 |
Using a screwdriver with its tip wrapped in protective tape, pry the oil pump assembly to remove it.
| *1 | Protective Tape |
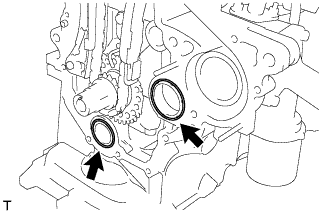 |
Remove the 2 O-rings from the cylinder block and oil pan sub-assembly.