Install the antenna cord into the clamp of the rear side rail spacer.
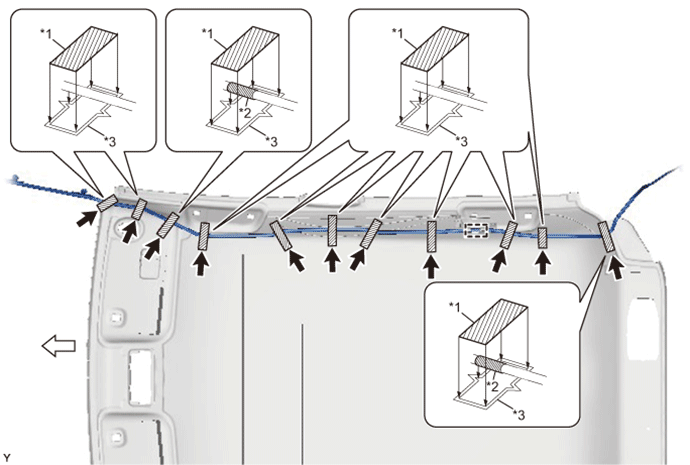
| *1 | Tape | *2 | Positioning Tape |
| *3 | Marking | - | - |
 | Front | - | - |
RADIO ANTENNA CORD > INSTALLATION |
| 1. INSTALL NO. 2 ANTENNA CORD SUB-ASSEMBLY |
Install the antenna cord into the clamp of the rear side rail spacer.
| *1 | Tape | *2 | Positioning Tape |
| *3 | Marking | - | - |
| Front | - | - |
Align the 2 antenna cord positioning tapes with the markings of the roof headlining.
Install the antenna cord onto the roof headlining with 11 new pieces of tape.
Install the rest of antenna cord onto the roof headlining with a new piece of tape.
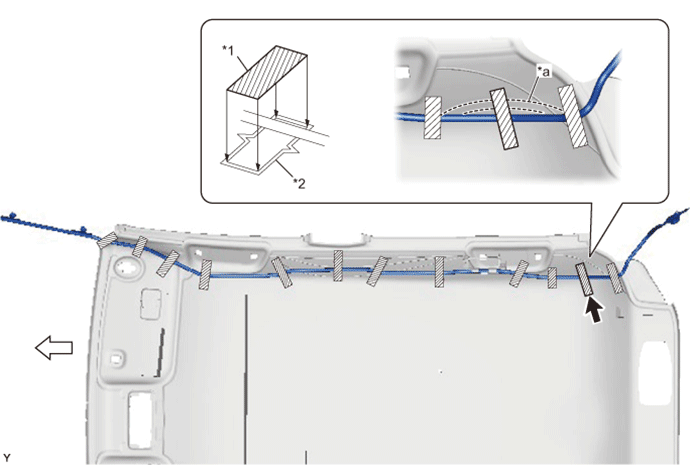
| *1 | Tape | *2 | Marking |
| *a | Rest of Antenna Cord | - | - |
| Front | - | - |
| 2. INSTALL ROOF HEADLINING ASSEMBLY (for 5 Door) |
| 3. INSTALL ROOF HEADLINING ASSEMBLY (for 3 Door) |
| 4. INSTALL ANTENNA CORD SUB-ASSEMBLY |
Install the 2 clamps.
Install the 3 clamps.
Install the antenna cord with the bolt.
Connect the connector.
| 5. INSTALL STEREO OPENING COVER WITH BRACKET (w/o Radio Receiver) |
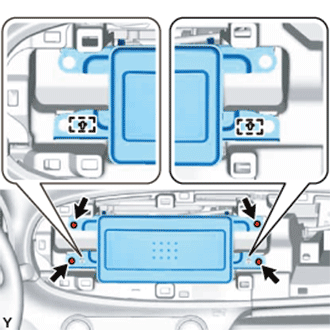 |
Align the 2 holes in the radio bracket with the 2 bosses of the instrument panel.
Install the radio stereo opening cover with bracket with the 4 screws.
| 6. INSTALL RADIO RECEIVER ASSEMBLY WITH BRACKET (w/ Radio Receiver) |
Connect the connectors.
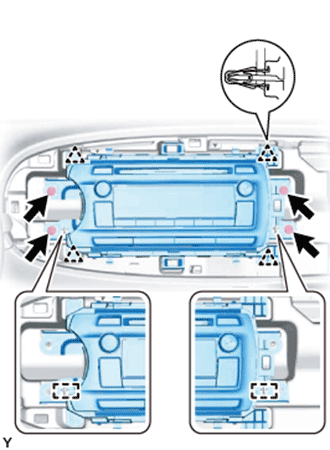 |
Align the 2 holes in the radio bracket with the 2 bosses of the instrument panel and engage the 4 clips.
Install the radio receiver assembly with bracket with the 4 screws.
| 7. INSTALL UPPER INSTRUMENT PANEL SUB-ASSEMBLY |