REMOVAL
BULB
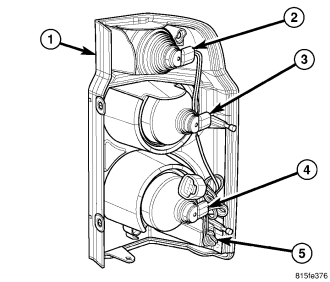
NOTE: The rear lamp unit (1) contains four bulbs. For domestic market vehicles they are: backup (2), park/stop (3), park/turn signal (4) and rear side marker (5). For export market vehicles they are: turn signal (2), park/stop (3), park (4) and backup (5). The service procedures for each bulb are the same, only the bulb sizes and types may differ.
1. Disconnect and isolate the battery negative cable.
2. Remove the rear lamp unit (1) from the end of the quarter panel. (Refer to 8 - ELECTRICAL/LAMPS/LIGHTING - EXTERIOR/REAR LAMP UNIT - REMOVAL).
3. Firmly grasp the appropriate bulb socket (2, 3, 4 or 5) on the back of the rear lamp unit housing and rotate it counterclockwise about 30 degrees to unlock it.
4. Pull the socket and bulb straight out from the keyed opening in the housing.
5. Pull the base of the bulb straight out of the socket.
LAMP
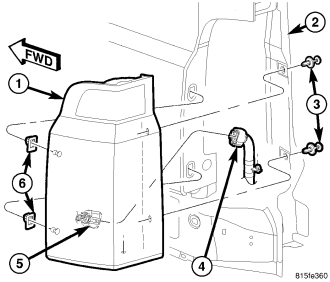
1. Disconnect and isolate the battery negative cable.
2. Open the liftgate to access and remove the two push-pins (3) that secure the rear lamp unit (1) to the side jamb (2) of the liftgate opening.
3. Pull the outboard side of the rear lamp unit rearward far enough to unsnap the two ball studs on the outboard side of the lamp housing from the two plastic grommets (6) in the quarter outer panel.
4. Pull the lamp away from the vehicle far enough to access and disengage the retainer on the body wire harness (4) from the tab on the lower lamp housing.
5. Disconnect the body wire harness connector from the pigtail wire connector (5) on the back of the lamp housing.
6. Remove the lamp from the lamp opening of the quarter outer panel.