REMOVAL
A/C COMPRESSOR
WARNING: Review safety precautions and warnings in this group before performing this procedure (refer to 24 - HEATING & AIR CONDITIONING/PLUMBING - WARNING) and (refer to 24 - HEATING & AIR CONDITIONING/PLUMBING - CAUTION). Failure to follow the warnings and cautions could result in possible personal injury or death.
NOTE: Typical A/C compressor shown in illustrations.
1. Disconnect and isolate the negative battery cable.
2. Recover the refrigerant from the refrigerant system (refer to 24 - HEATING & AIR CONDITIONING/PLUMBING - STANDARD PROCEDURE - REFRIGERANT SYSTEM RECOVERY).
3. Raise and support the vehicle.
4. Remove the splash shield from the right side frame rail (refer to 23 - BODY/EXTERIOR/SPLASH SHIELD-RIGHT SIDE RAIL - REMOVAL).
5. Remove the accessory drive belt (refer to 7 - COOLING/ACCESSORY DRIVE/DRIVE BELTS - REMOVAL).
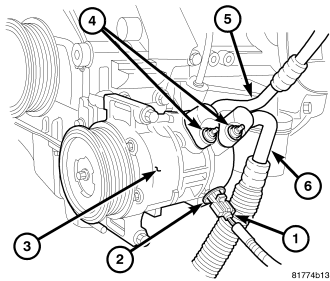
6. Disconnect the engine wire harness (1) from the compressor control valve (2).
7. Remove the nuts (4) that secure the A/C discharge line (5) and the A/C suction line (6) to the A/C compressor (3).
8. Disconnect the A/C discharge and suction lines from the A/C compressor and remove and discard the O-ring seals and gaskets.
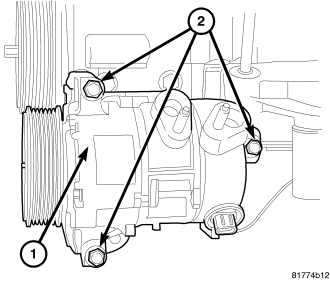
9. Support the A/C compressor (1) and remove the three bolts (2) that secure the compressor to the engine and remove the compressor.
10. Install plugs in, or tape over the opened refrigerant line fittings and compressor ports.