INSTALLATION
CAMSHAFT CORE HOLE PLUG
1. Clean core hole in block.
NOTE: Do not apply adhesive to the new core hole plug. A new plug will have adhesive pre-applied.
2. Install a new core hole plug at the rear of camshaft, using suitable flat faced tool. The plug must be fully seated on the cylinder block shoulder.
CAMSHAFT
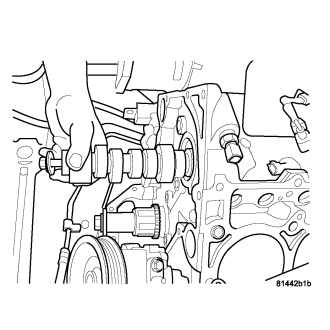
CAUTION: 5.7L engines equipped with MDS uses a unique camshaft for use with the Multi Displacement System. When installing a new camshaft, the replacement camshaft must be compatible with the Multi Displacement System.
1. Lubricate camshaft lobes and camshaft bearing journals and insert the camshaft (figure1).
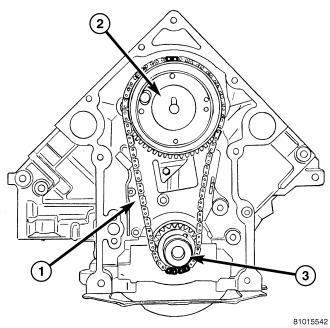
2. Install camshaft Tensioner plate assembly. Tighten bolts to 28 N·m (250 in. lbs.) torque.
3. Install timing chain and sprockets (Refer to 9 - ENGINE/VALVE TIMING/TIMING BELT/CHAIN AND SPROCKETS - INSTALLATION) .
4. Measure camshaft end play (Refer to 9 - ENGINE - SPECIFICATIONS) . If not within limits install a new thrust plate.
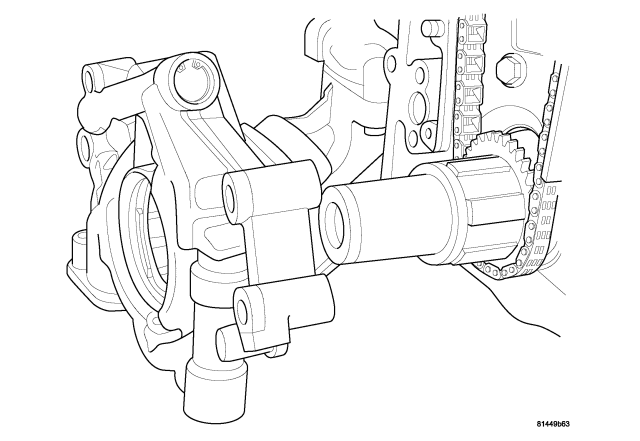
5. Install the oil pump (figure2) (Refer to 9 - ENGINE/LUBRICATION/OIL PUMP - INSTALLATION) .
6. Install the oil pick up tube.
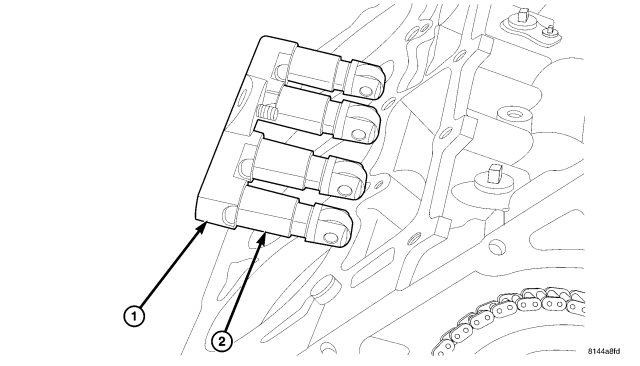
7. Each tappet (2) reused must be installed in the same position from which it was removed. When camshaft is replaced, all of the tappets must be replaced.
CAUTION: 5.7L engines equipped with MDS uses both standard roller tappets and deactivating roller tappets, for use with the Multi Displacement System. The deactivating roller tappets must be used in cylinders 1,4,6,7. The deactivating tappets can be identified by the two holes in the side of the tappet body, for the latching pins.
8. Install tappets (2) and retaining yoke assembly (1). (Refer to 9 - ENGINE/ENGINE BLOCK/HYDRAULIC LIFTERS (CAM IN BLOCK) - INSTALLATION).
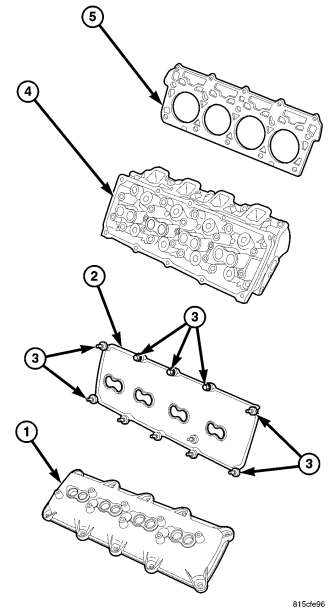
9. Install both left and right cylinder heads (4) (Refer to 9 - ENGINE/CYLINDER HEAD - INSTALLATION) .
10. Install pushrods.
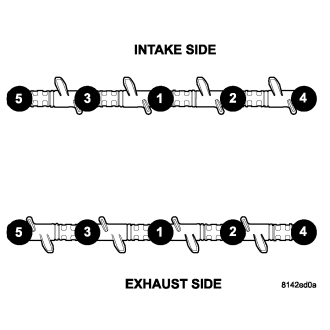
11. Install rocker arms (Refer to 9 - ENGINE/CYLINDER HEAD/ROCKER ARM / ADJUSTER ASSY - INSTALLATION) .
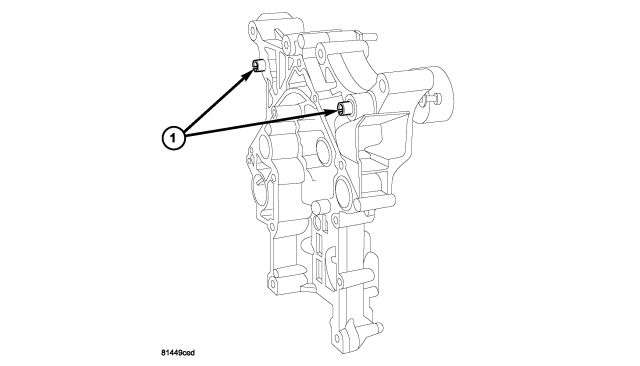
12. Install timing case cover (figure4) (Refer to 9 - ENGINE/VALVE TIMING/TIMING BELT / CHAIN COVER(S) - INSTALLATION) .
13. Install the oil pan (Refer to 9 - ENGINE/LUBRICATION/OIL PAN - INSTALLATION) .
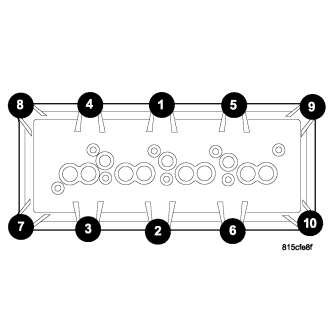
14. Install cylinder head covers (Refer to 9 - ENGINE/CYLINDER HEAD/CYLINDER HEAD COVER(S) - INSTALLATION) .
15. Install intake manifold (Refer to 9 - ENGINE/MANIFOLDS/INTAKE MANIFOLD - INSTALLATION) .
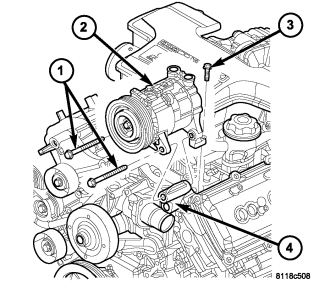
16. Install the A/C compressor (2).
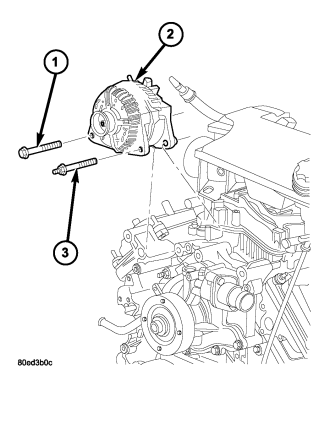
17. Install the generator (2).
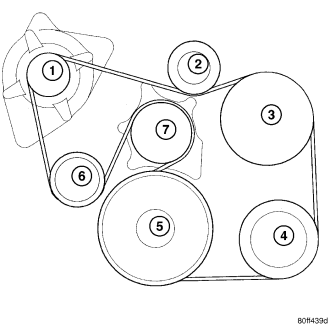
18. Install the accessory drive belt. (Refer to 7 - COOLING/ACCESSORY DRIVE/DRIVE BELTS - INSTALLATION).
19. Install the radiator (Refer to 7 - COOLING/ENGINE/RADIATOR - INSTALLATION).
20. Install the air cleaner assembly. (Refer to 9 - ENGINE/AIR INTAKE SYSTEM - INSTALLATION)
21. Install the battery negative cable.
22. Refill coolant. (Refer to 7 - COOLING - STANDARD PROCEDURE)
23. Refill engine oil.
24. Start engine and check for leaks.