HEADLINER
REMOVAL
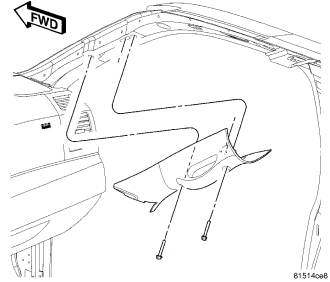
1. Remove the A-pillar trim panels, (Refer to 23 - BODY/INTERIOR/A-PILLAR TRIM - REMOVAL).
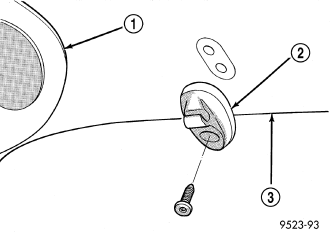
2. Remove the sun visor supports, (Refer to 23 - BODY/INTERIOR/SUN VISOR SUPPORT - REMOVAL)
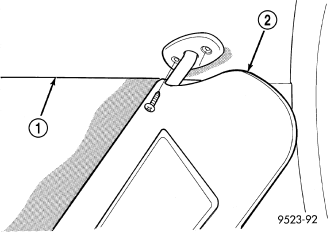
3. Remove the sun visors, (Refer to 23 - BODY/INTERIOR/SUN VISOR - REMOVAL).
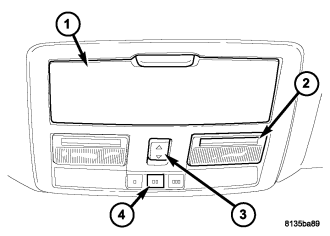
4. Remove the overhead console, (Refer to 8 - ELECTRICAL/OVERHEAD CONSOLE - REMOVAL).
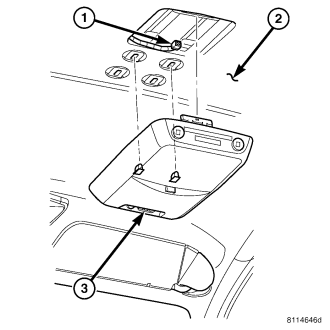
5. Remove the overhead video monitor. (Refer to 8 - ELECTRICAL/AUDIO/MONITOR-MEDIA SYSTEM - REMOVAL)
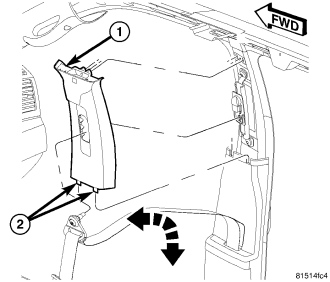
6. Remove the left upper b-pillar trim panels. (Refer to 23 - BODY/INTERIOR/B-PILLAR UPPER TRIM - REMOVAL)
7. Remove the grab handles above each rear passenger door, (Refer to 23 - BODY/INTERIOR/ASSIST HANDLE - REMOVAL).
8. Remove the left upper c-pillar trim panels, (Refer to 23 - BODY/INTERIOR/C-PILLAR TRIM - REMOVAL).
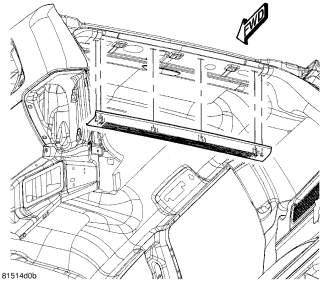
9. Remove the upper liftgate trim panel, (Refer to 23 - BODY/INTERIOR/LIFTGATE OPENING UPPER TRIM - REMOVAL).
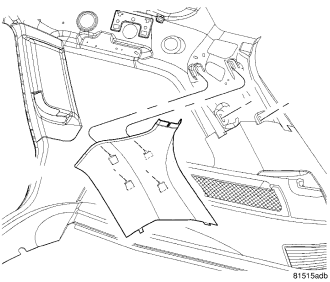
10. Remove the D-pillar trim panels, (Refer to 23 - BODY/INTERIOR/D-PILLAR TRIM - REMOVAL).
11. Pull the top of each door seal downward slightly.
12. Fold the rear passenger seats down.
13. Disconnect the headliner wire harness connector located at the left A-pillar.
14. If equipped, disconnect the headliner wire harness connector(s) from the inside rear view mirror.
15. If equipped, disconnect the headliner wire harness connector from the rain sensor.
16. Lower the rear of the headliner downward from the roof panel and disconnect the rear washer hose.
17. Disconnect the headliner wire harness connector located at the left D-pillar.
18.
CAUTION: Be careful not to crease the headliner.
Lower the front of the headliner downward and remove the headliner through the liftgate door opening.INSTALLATION
CAUTION: Be careful not to crease the headliner.
1. Position the headliner in the vehicle through the liftgate door opening.
2. Connect the headliner wire harness connector located at the left D-pillar.
3. Connect the rear washer hose.
4. Raise the rear of the headliner upward.
5. Raise the front of the headliner upward and install the sun visor supports, (Refer to 23 - BODY/INTERIOR/SUN VISOR SUPPORT - INSTALLATION).
6. Install the sun visors, (Refer to 23 - BODY/INTERIOR/SUN VISOR - INSTALLATION).
7. Install the overhead console, (Refer to 8 - ELECTRICAL/OVERHEAD CONSOLE - INSTALLATION).
8. If equipped, connect the headliner wire harness connector(s) to the inside rear view mirror.
9. If equipped, connect the headliner wire harness connector to the rain sensor.
10. Connect the headliner wire harness connector located at the left A-pillar.
11. Install the grab handle above each rear passenger door, (Refer to 23 - BODY/INTERIOR/ASSIST HANDLE - INSTALLATION).
12. Install the A-pillar trim panel, (Refer to 23 - BODY/INTERIOR/A-PILLAR TRIM - INSTALLATION).
13. Install the upper B-pillar trim panel, (Refer to 23 - BODY/INTERIOR/B-PILLAR UPPER TRIM - INSTALLATION).
14. Install the upper C-pillar trim panel, (Refer to 23 - BODY/INTERIOR/C-PILLAR TRIM - INSTALLATION).
15. Install the D-pillar trim panels, (Refer to 23 - BODY/INTERIOR/D-PILLAR TRIM - INSTALLATION).
16. Install the upper liftgate trim panel, (Refer to 23 - BODY/INTERIOR/LIFTGATE OPENING UPPER TRIM - INSTALLATION).
17. Seat the top of each of door seal to the door opening.
18. Place the rear passenger seats in the upright position.
19. Install the video monitor, if equipped. (Refer to 8 - ELECTRICAL/AUDIO/MONITOR-MEDIA SYSTEM - INSTALLATION)