STRIKER-LATCH
REMOVAL
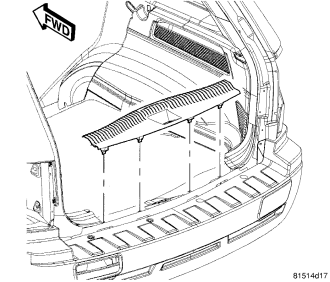
1. Remove the scuff plate trim panel from the inside of the liftgate opening lower panel. (Refer to 23 - BODY/INTERIOR/LIFTGATE SCUFF PLATE - REMOVAL)
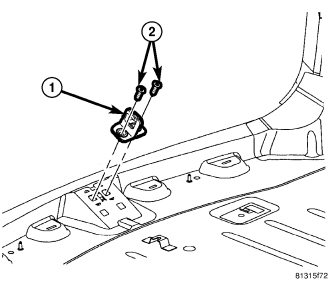
2. Mark the latch striker (1) location on the inside of the liftgate opening lower panel to aid reinstallation.
3. Remove the two screws (2) that secure the latch striker to the inside of the liftgate opening lower panel.
4. Remove the latch striker from the vehicle.
INSTALLATION
1. Position the liftgate latch striker (1) to the inside of the liftgate opening lower panel and align using the marks made during removal..
2. Install and tighten the two screws (2) that secure the latch striker to the liftgate opening lower panel. Tighten the screws to 28 N·m (21 ft. lbs.).
3. Adjust the latch striker position as necessary to achieve proper liftgate latch operation.
4. Install the scuff plate. (Refer to 23 - BODY/INTERIOR/LIFTGATE SCUFF PLATE - INSTALLATION)
5. Check and adjust the striker if necessary. (Refer to 23 - BODY/DECKLID/HATCH/LIFTGATE/TAILGATE/LATCH STRIKER - ADJUSTMENTS)