OVERHEAD CONSOLE-SERVICE INFO
DESCRIPTION
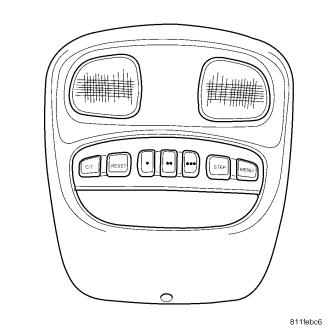
An overhead console is standard factory-installed equipment on this model. The overhead console includes an Electronic Vehicle Information Center Module. Some overhead consoles also contain a universal garage door transmitter. All overhead consoles are equipped with two reading and courtesy lamps. On vehicles equipped with a power sunroof, the sunroof switch is located between the two reading and courtesy lamps. The overhead console is mounted with one screw in the front and two snap clips in the rear. A molded plastic retainer bracket located above the headliner is used to provide secure overhead console attachment.
If any of the EVIC functions are faulty or damaged, the complete Electronic Overhead Module (EOM) must be replaced. Replaceable overhead console components include:
- The incandescent bulbs used for push button back-lighting
- Courtesy lamps
- Courtesy lamp lens
- EOM
- The overhead console housing
OPERATION
Refer to the vehicle Owner's Manual for specific operation of overhead console and its systems.
DIAGNOSIS AND TESTING - OVERHEAD CONSOLE
The most reliable, efficient, and accurate means to diagnose the overhead console or related system requires the use of a scan tool and the Service and Body Diagnostic Procedures Manuals. The scan tool can provide vital information to the technician trying to find a problem with a overhead console component. Diagnostic logic is built into the overhead console mounted module to help the person trying to locate the problem by the most efficient means possible. Anytime a problem is suspected, a scan tool must be obtained and used to retrieve any stored fault codes in the module. If diagnostic fault codes are present in the module, record them on a piece of paper immediately before proceeding any further. Then, use these fault codes to identify the problem by verifying the fault code. Example, If the module records “TIRE PRESSURE N/A” fault, locate the diagnostic procedure for this code in the appropriate Body Diagnostic Procedures Manual and follow the flow chart until the specific problem is located and resolved. Once the problem is thought to be corrected, erase the stored fault code using the scan tool and verify correct system operation. If the tire pressure monitoring system is functioning correctly, verify that there are no other stored codes in the module and return the vehicle to service.
If the fault code could not be verified, such as not finding anything wrong when following the diagnostic flow chart in the Body Diagnostic Procedures Manual. This is a good indication that an INTERMITTENT problem may be present. You must than attempt to find the intermittent problem, such as running a tire pressure monitoring system self test. Refer to the Tires/Wheels section for more information. Always, eliminate all other potential problems before attempting to replace the module.
TESTING VOLTAGE AND GROUND SUPPLY TO OVERHEAD CONSOLE
1. Remove the overhead console from the headliner (Refer to 8 - ELECTRICAL/OVERHEAD CONSOLE - REMOVAL) Disconnect the overhead console electrical connector. Check the fused B(+) circuit in the overhead console electrical connector. If OK, go to STEP 2. If not OK, repair the open circuit or component as required. Refer to the Wiring section for detailed schematics.
2. Check the IGN RUN B(+) circuit in the overhead console electrical connector. If OK, go to STEP 3. If not OK, repair the open IGN RUN B(+) circuit as required.
3. Check the Ground circuit in the overhead console electrical connector. If OK, go to STEP 4. If not OK, repair the open ground circuit as required.
4. If the tire pressure monitoring system is not operating properly, refer to the Tires/Wheels section for more information on the tire pressure monitoring system.
NOTE: If the compass functions, but accuracy is suspect, it may be necessary to perform a variation adjustment. This procedure allows the compass unit to accommodate variations in the earth's magnetic field strength, based on geographic location. Refer to Compass Variation Adjustment in the Standard Procedures section of this group.
NOTE: If the compass reading displays dashes, and only “CAL” appears in the display, demagnetizing may be necessary to remove excessive residual magnetic fields from the vehicle. Refer to Compass Demagnetizing in the Standard Procedures section of this group.
INSTALLATION
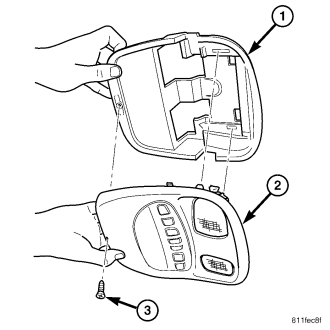
1. Position the overhead console (2) in the vehicle and connect the wire harness connectors.
2. Connect the Electronic Overhead Module (EOM), courtesy lamps and power sunroof switch electrical connectors, if equipped.
3. Grasp the sides of the overhead console (2) and push straight up evenly to engage the two snap clips at the rear of the unit.
4. Install the overhead console retaining screw (3), located in the front of console near the windshield. Torque the screw to 1 N·m (10 in. lbs.).
5. Connect the battery negative cable.
SPECIAL TOOLS
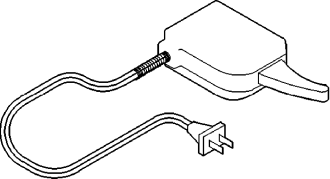
| Degaussing Tool 6029 |
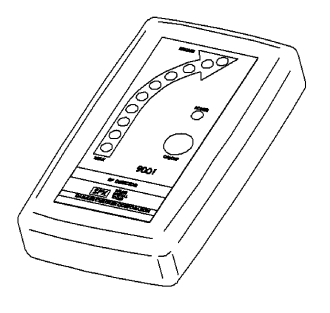
| Radio Frequency Detector 9001 |