UPPER BALL JOINT
REMOVAL
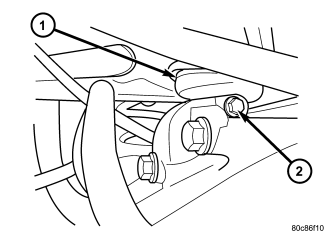
1. Raise and support the vehicle.
2. Support the rear axle with a hydraulic jack.
3. Remove the ball joint pinch bolt (2) from the top of the axle.
4. Separate the ball joint (1) arm assembly from the differential housing by prying upwards.
5. Remove the upper suspension arm from the vehicle (Refer to 2 - SUSPENSION/REAR/UPPER CONTROL ARM - REMOVAL).
6. Secure the suspension arm in a vise.
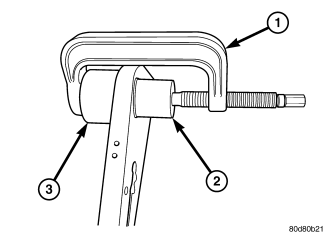
7. Install special tools C-4212F (press)(1) , 8861-3 (driver)(2) and 8861-2 (receiver)(3)
8. Press out the old ball joint.
INSTALLATION
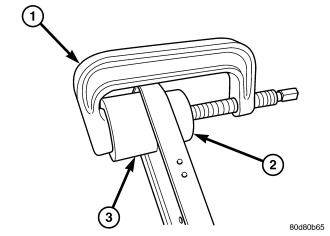
1. Install special tools C-4212F (press)(1), 8861-1 (receiver)(2) and 8861-2 (driver)(3) with the ball joint in place .
2. Press the ball joint in the upper suspension arm.
3. Remove the upper suspension arm from the vise.
4. Reinstall the upper suspension arm (Refer to 2 - SUSPENSION/REAR/UPPER CONTROL ARM - INSTALLATION).
5. Raise the rear axle with a hydraulic jack to align the ball joint (1) with the differential housing bracket.
6. Insert the ball joint (1) into the differential housing bracket.
7. Install the ball joint pinch bolt (2) and tighten to 95 N·m (70 ft. lbs.). .
8. Remove the supports and lower the vehicle.