STANDARD PROCEDURE
- CLEANING/REVERSE FLUSHING
- DRAINING COOLING SYSTEM
- COOLING - REFILLING
- COOLANT LEVEL CHECK
- COOLING SYSTEM - DRAINING
CLEANING/REVERSE FLUSHING
CAUTION: The cooling system normally operates at 97 - 110 kPa (14 -16 psi) pressure. Exceeding this pressure may damage the radiator or hoses.
Reverse flushing of the cooling system is the forcing of water through the cooling system. This is done using air pressure in the opposite direction of normal coolant flow. It is usually only necessary with very dirty systems with evidence of partial plugging.
CHEMICAL CLEANING
If visual inspection indicates the formation of sludge or scaly deposits, use a radiator cleaner, Mopar® Radiator Kleen or equivalent, before flushing. This will soften scale and other deposits and aid the flushing operation.
CAUTION: Be sure instructions on the container are followed.
REVERSE FLUSHING RADIATOR
Disconnect the radiator hoses from the radiator fittings. Attach a section of radiator hose to the radiator bottom outlet fitting and insert the flushing gun. Connect a water supply hose and air supply hose to the flushing gun.
CAUTION: The cooling system normally operates at 97 - 110 kPa (14 - 16 psi) pressure. Exceeding this pressure may damage the radiator or hoses.
Allow the radiator to fill with water. When radiator is filled, apply air in short blasts allowing radiator to refill between blasts. Continue this reverse flushing until clean water flows out through rear of radiator cooling tube passages. For more information, refer to operating instructions supplied with flushing equipment. Have radiator cleaned more extensively by a radiator repair shop.
REVERSE FLUSHING ENGINE
Drain the cooling system (Refer to 7 - COOLING - STANDARD PROCEDURE). Remove the thermostat housing and thermostat. Install the thermostat housing. Disconnect the radiator upper hose from the radiator and attach the flushing gun to the hose. Disconnect the radiator lower hose from the water pump. Attach a lead away hose to the water pump inlet fitting.
CAUTION: Be sure that the heater control valve is closed (heat off). This is done to prevent coolant flow with scale and other deposits from entering the heater core.
Connect the water supply hose and air supply hose to the flushing gun. Allow the engine to fill with water. When the engine is filled, apply air in short blasts, allowing the system to fill between air blasts. Continue until clean water flows through the lead away hose. For more information, refer to operating instructions supplied with flushing equipment.
Remove the lead away hose, flushing gun, water supply hose and air supply hose. Remove the thermostat housing (Refer to 7 - COOLING/ENGINE/ENGINE COOLANT THERMOSTAT - REMOVAL). Install the thermostat and housing with a replacement gasket (Refer to 7 - COOLING/ENGINE/ENGINE COOLANT THERMOSTAT - INSTALLATION). Connect the radiator hoses. Refill the cooling system with the correct antifreeze/water mixture (Refer to 7 - COOLING - STANDARD PROCEDURE).
DRAINING COOLING SYSTEM
WARNING: Do not remove the cylinder block drain plugs or loosen the radiator draincock with system hot and under pressure. Serious burns from coolant can occur.
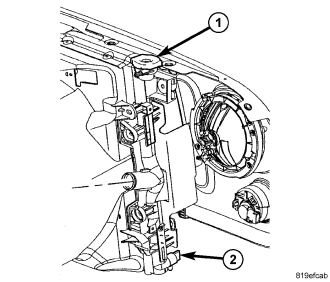
NOTE: Radiator draincock is located on the right/lower side of radiator facing to front of vehicle.
1. Remove radiator pressure cap from radiator or coolant recovery container as necessary.
2. Raise and support vehicle.
3. Attach one end of a hose to the draincock. Put the other end into a clean container. Open draincock and drain coolant from radiator.
4. If necessary, siphon coolant from coolant recovery container. (Diesel engine)
COOLING - REFILLING
1. Tighten the radiator draincock and the cylinder block drain plug(s).
2. Fill system with an antifreeze mixture (Refer to LUBRICATION & MAINTENANCE/FLUID TYPES - DESCRIPTION). Fill the radiator to the top and install the radiator cap. Add sufficient coolant to the reserve/overflow tank to raise the level to the FULL mark.
3. Operate the engine with both the radiator cap and reserve/overflow tank cap in place. After the engine has reached the normal operating temperature, shut the engine off and allow it to cool.
4. Add coolant to the reserve/overflow tank as necessary. Only add coolant when the engine is cold. Coolant level in a warm engine will be higher due to thermal expansion.
COOLANT LEVEL CHECK
NOTE: Do not remove radiator cap for routine coolant level inspections. The coolant level can be checked at coolant reserve/overflow tank.
The coolant reserve/overflow system provides a quick visual method for determining coolant level without removing radiator pressure cap. With engine idling and at normal operating temperature, observe coolant level in reserve/overflow tank. The coolant level should be between ADD and FULL marks.
COOLING SYSTEM - DRAINING
WARNING: Do not remove the cylinder block drain plugs or loosen the radiator draincock with system hot and under pressure. Serious burns from coolant can occur.
DO NOT WASTE reusable coolant. If the solution is clean, drain the coolant into a clean container for reuse.
DO NOT remove the radiator cap when draining the coolant from the reserve/overflow tank. Open the radiator draincock and when the tank is empty, remove the radiator cap. The coolant does not have to be removed from the tank unless the system is being refilled with a fresh mixture.
1. Drain the coolant from the radiator by loosening the draincock.
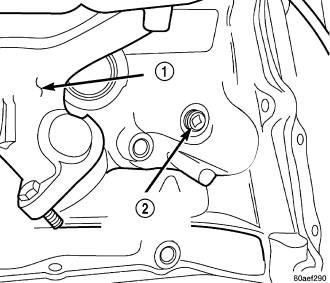
2. Drain coolant from engine block by removing drain plug at left rear side of block .