REMOVAL
LAMP
NOTE: The following procedure applies to either the front side marker lamps used on vehicles manufactured for the domestic market or to the repeater lamps used on vehicles manufactured for the export market. Although the lamps and bulbs are unique, the service procedures are the same.
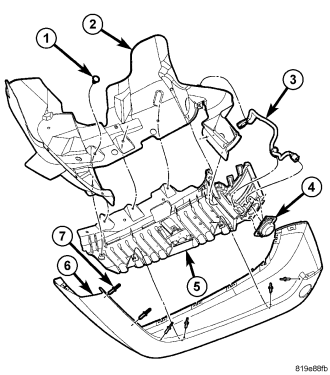
1. Disconnect and isolate the battery negative cable.
2. Raise and support the vehicle.
3. Disconnect the ends of the jumper wire harness (3) from the front side marker/repeater lamp bulb socket and from the engine wire harness.
4. Remove and disassemble the front fender flare (6), reinforcement bracket (5) and wheel liner (2) from the vehicle. Take the proper precautions to protect the fender flare from cosmetic damage during disassembly. (Refer to 23 - BODY/EXTERIOR/WHEEL OPENING FLARE MOLDING - FRONT - REMOVAL).
5. Release the two integral latch features on the back of the lamp housing (4) and unhook the integral hook feature on the lamp housing from the slot in the lamp seat of the front fender flare reinforcement bracket.
BULB
NOTE: The front side marker lamps are used only on vehicles manufactured for domestic markets, while repeater lamps are used only on vehicles manufactured for export markets. The service procedures for the bulbs of these two unique lamps are the same.
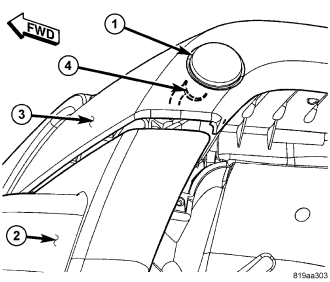
1. Disconnect and isolate the battery negative cable.
2. Reach between the front wheel flare (3) and the front tire above the front bumper (2) to access the back of the lamp (1).
3. Firmly grasp the bulb socket (4) and connector on the back of the lamp and rotate it counterclockwise about 30 degrees to unlock it.
4. Pull the socket and bulb straight out from the keyed opening in the housing.
5. Pull the base of the bulb straight out of the socket.