CUSHION/COVER-SEAT BACK - FRONT
REMOVAL
1. Before proceeding with the following repair procedure, review all warnings and cautions. (Refer to 23 - BODY/SEATS - WARNING)
2. For appropriate seat configuration illustrations, (Refer to 23 - BODY/SEATS/SEAT - FRONT - DESCRIPTION).
3. Remove the front seat, (Refer to 23 - BODY/SEATS/SEAT - FRONT - REMOVAL).
4. Remove the seat recliner easy entry levers, if equipped.
5. Position aside the seat back cover and remove the seat back assembly bolts.
6. If equipped, disconnect the electrical connectors and remove the seat back.
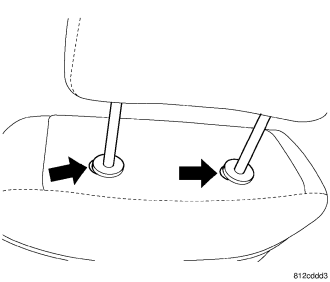
7. Push in the buttons on both headrest sleeves, pull the headrest up and remove.
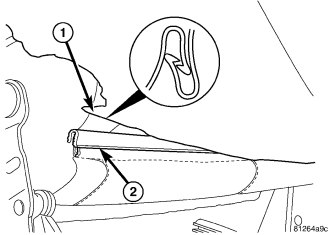
8. Separate the J-straps (1 & 2) and pull cover up over frame.
9. Unzip the cover zippers.
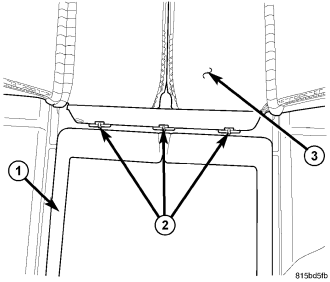
10. Cut off the hog rings (2) attaching the cover (3) to the cushion (1).
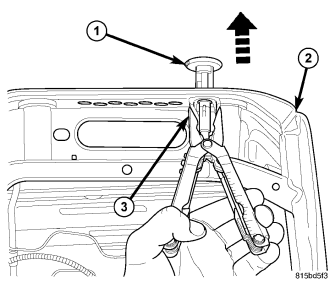
11. Squeeze the locking tab (3) and remove the headrest sleeves (1) and remove the cover.
INSTALLATION
1. Before proceeding with the following repair procedure, review all warnings and cautions. (Refer to 23 - BODY/SEATS - WARNING)
2. For appropriate seat configuration illustrations, (Refer to 23 - BODY/SEATS/SEAT - FRONT - DESCRIPTION).
3. Position the seat back cover over the seat back frame.
4. Position the seat back cushion on the frame and position the cover over the cushion.
5. Attach the seat cover (3) to the seat back cushion (1) and install new hog rings.
6. Zip the rear cover zippers and connect the J-straps (1 & 2).
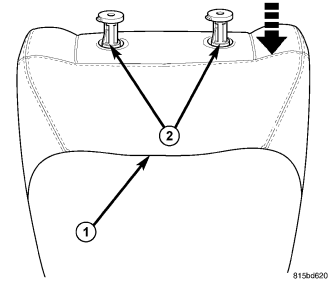
7. Position the headrest sleeves (2) and seat into the seat back (1) frame fully.
8. Position the seat back onto the seat cushion assembly and connect the electrical connectors if equipped.
9. Install the seat back assembly bolts and tighten to 47 N·m (34.5 ft. lbs.).
10. Connect the electrical connectors, if equipped.
11. Install the front seat, (Refer to 23 - BODY/SEATS/SEAT - FRONT - INSTALLATION)