SPEAKER
- DESCRIPTION
- OPERATION
- TWEETER
- INSTRUMENT PANEL - DRIVERS SIDE
- INSTRUMENT PANEL – PASSENGER SIDE
- SOUND BAR
- SUBWOOFER
- TWEETER
- INSTRUMENT PANEL - DRIVERS SIDE
- INSTRUMENT PANEL – PASSENGER SIDE
- SOUND BAR
- SUBWOOFER
DESCRIPTION
DESCRIPTION
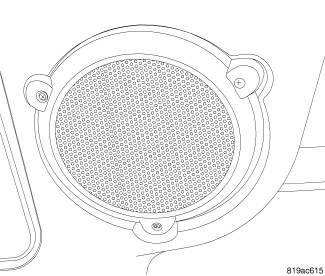
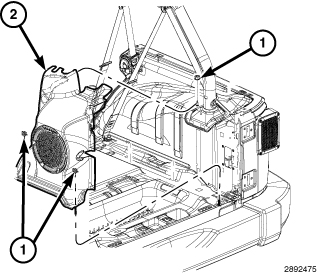
The standard equipment speaker system includes four full-range speakers. The two front speakers are mounted behind a removable bezel located on each outboard end of the lower instrument panel. With the premium speaker system, the standard front speakers are replace with an enclosure assembly that includes a 4 inch speaker and a 1 inch tweeter. The two rear speakers are mounted behind a grille located on each outboard end of the sport bar, above the rear seating area of the vehicle.
OPERATION
OPERATION
Two wires connected to each speaker, one feed circuit (+) and one return circuit (–), allow the audio output signal electrical current to flow through the speaker voice coil.
TWEETER
TWEETER
Special Tools: Click to display a list of tools used in this procedure
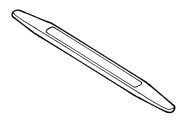
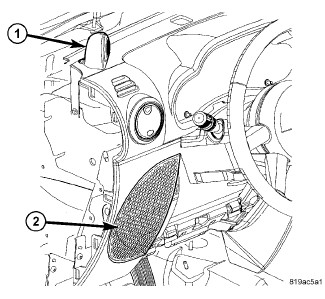 |
- Disconnect the battery negative cable.
- Using trim stick C-4755 or equivalent, gently remove the tweeter.
-
Disconnect the electrical connector.
INSTRUMENT PANEL - DRIVERS SIDE
INSTRUMENT PANEL - DRIVERS SIDE
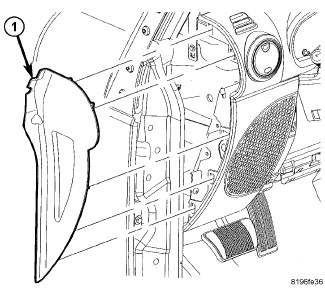 |
- Disconnect the negative battery cable.
-
Remove the instrument panel end cap (1).
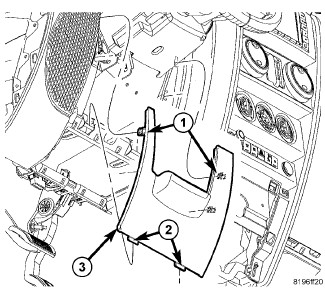
-
Remove the steering column opening cover (Refer to 23 - Body/Instrument Panel/COVER, Steering Column Opening - Removal)
.
-
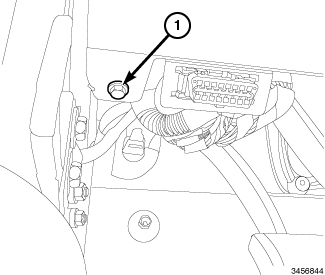
Remove the driver side lower instrument panel retainer (1) next to the DLC connector.
-
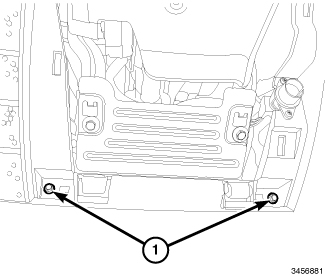
Remove the instrument panel cover steering column opening cover retainers (1).
-
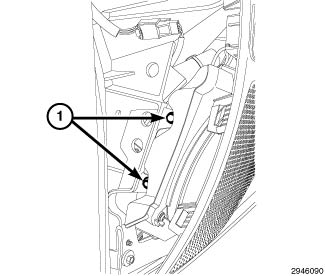
Remove the speaker mounting fasteners (1).
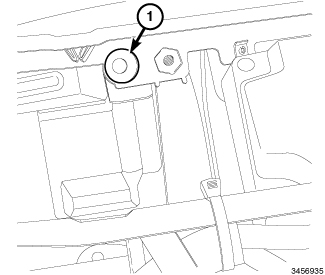
- Remove the driver side lower speaker mounting retainer (1).
-
Disconnect the speaker electrical connector.
-
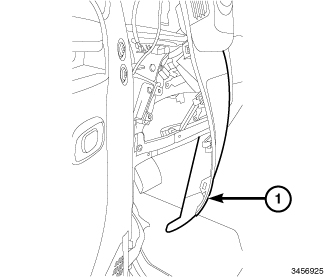
Remove the speaker by carefully pulling the left side of the instrument panel (1) outward until there is sufficient room to remove the speaker through the end cap area.
INSTRUMENT PANEL – PASSENGER SIDE
INSTRUMENT PANEL – PASSENGER SIDE
- Disconnect the battery negative cable.
- Remove the glove box (Refer to 23 - Body/Instrument Panel/GLOVE BOX, Instrument Panel/Removal) .
- Remove the instrument panel end cap.
- Remove the two speaker fasteners through end cap opening.
- Remove the speaker fastener through glove box opening.
- Disconnect the speaker electrical connector.
- Remove the speaker through the glove box opening.
SOUND BAR
SOUND BAR
 |
SUBWOOFER
SUBWOOFER
 |
TWEETER
TWEETER
|
INSTRUMENT PANEL - DRIVERS SIDE
INSTRUMENT PANEL - DRIVERS SIDE
|
-
Install the speaker by carefully pulling the left side of the instrument panel (1) outward until there is sufficient room to install the speaker through the end cap area.
- Connect the speaker electrical connector.
-
Install the driver side lower speaker mounting retainer (1).
- Install the speaker mounting fasteners (1).
-
Connect the electrical connector.
-
Install the driver side lower instrument panel retainer (1) next to the DLC connector.
-
Install the instrument panel cover steering column opening cover retainers (1).
-
Install the reinforcement plate and steering column opening cover (Refer to 23 - Body/Instrument Panel/COVER, Steering Column Opening - Installation)
.
- Install the instrument panel end cap (1).
-
Connect the negative battery cable.
INSTRUMENT PANEL – PASSENGER SIDE
INSTRUMENT PANEL – PASSENGER SIDE
- Install the speaker through the glove box opening.
- Connect the electrical connector.
- Install the speaker fastener through the glove box opening and securely tighten.
- Install the two fasteners through the end cap opening and securely tighten.
- Install the instrument panel end cap.
- Install the glove box (Refer to 23 - Body/Instrument Panel/GLOVE BOX, Instrument Panel/Installation) .
- Connect the negative battery cable.
SOUND BAR
SOUND BAR
|
SUBWOOFER
SUBWOOFER
|