LATCH, Door
ADJUSTMENTS
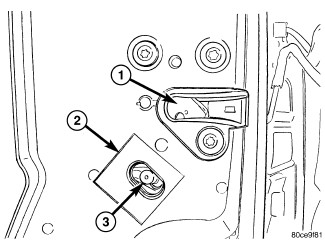 |
- Locate the access hole in the door to adjust the door latch (1) and remove the mylar tape (2).
- Loosen latch adjusting screw (3) threw access slot in door shut face (1/2 to 1 full turn).
- Operate the door handles several times to reduce any possible linkage binding and tighten the adjustment screw to 3 N·m (30 in. lbs.).
-
Operate the door handles again to verify proper operation and reinstall the mylar tape.
REMOVAL
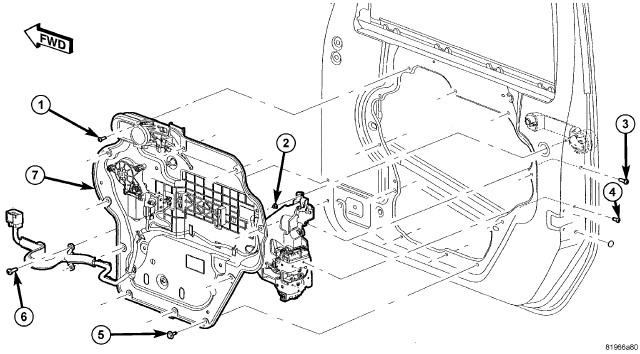 |
-
Remove the carrier plate. (Refer to 23 - Body/Door - Front/PLATE, Carrier - Removal)
.
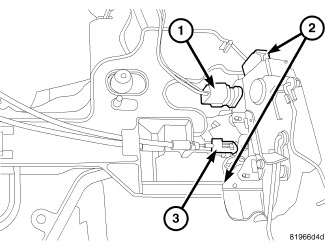
NOTE: Front door shown, rear door similar.
- Disconnect the actuator rods.
- Disconnect the electrical connector (1).
- Disconnect the latch cables (3).
-
Slide the latch off the latch bracket tabs (2) and remove the latch.
INSTALLATION
|
| NOTE: |
Front door latch shown, rear door similar. |
- Install the latch onto the latch bracket tabs (2) and seat fully.
- Connect the electrical connector (1).
- Connect the latch cables (3).
-
Connect the actuator rods.
- Install the carrier plate. (Refer to 23 - Body/Door - Front/PLATE, Carrier - Installation) .
-
Adjust the front door latch. (Refer to 23 - Body/Door - Front/LATCH, Door - Adjustments)
.