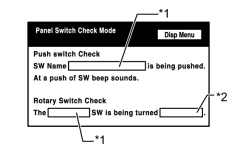
- Name of the operated switch is displayed
| Last Modified: 11-27-2007 | 1.6 D | |
| Service Category: Audio/Visual/Telematics | Section: Navigation/Multi Info Display | |
| Model Year: 2008 | Model: LX570 | Doc ID: RM000003A3N002X |
| Title: NAVIGATION / MULTI INFO DISPLAY: NAVIGATION SYSTEM: OPERATION CHECK (2008 LX570) | ||
OPERATION CHECK
1. Check system normal condition
(a) If the cause of a symptom is any of the following, the corresponding symptom is normal, it is not a malfunction.
|
Symptom |
Answer |
|---|---|
|
A longer route than expected is chosen. |
Depending on the road conditions, the navigation ECU may determine that a longer route is quicker. |
|
Even when distance priority is high, the shortest route is not shown. |
Some paths may not be advised due to safety concerns. |
|
When the vehicle is put into motion immediately after the engine starts, the navigation system deviates from the actual position. |
If the vehicle starts before the navigation system activates, the system may not react. |
|
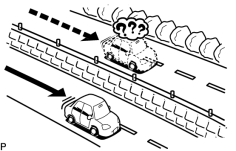
When driving on certain types of roads, especially new roads, the vehicle position deviates from the actual position. |
When the vehicle is driving on new roads not available on the map disc, the system attempts to match it to another nearby road, causing the position mark to deviate. |
|
(b) The following symptoms are not a malfunction, but are caused by errors inherent in the GPS, gyro sensor, speed sensor, and navigation ECU. (1) The current position mark may be displayed on a nearby parallel road. (2) Immediately after a fork in the road, the current vehicle position mark may be displayed on the wrong road. (3) When the vehicle turns right or left at an intersection, the current vehicle position mark may be displayed on a nearby parallel road. (4) When the vehicle is carried, such as on a ferry, and the vehicle itself is not running, the current vehicle position mark may be displayed in the position where the vehicle was until a measurement can be performed by GPS. (5) When the vehicle is driven on a steep hill, the current vehicle position mark may deviate from the correct position. (6) When the vehicle makes a continuous turn of 360°, 720°, 1080°, etc., the current vehicle position mark may deviate from the correct position. (7) When the vehicle moves erratically, such as constant lane changes, the current vehicle position mark may deviate from the correct position. (8) When the engine switch is turned on (ACC) or on (IG) on a turntable while parking, the current vehicle position mark may not point in the correct direction. The same will occur when the vehicle starts to move. (9) When the vehicle is driven on a snowy road or a mountain path with tire chains installed or using a spare tire, the current vehicle position mark may deviate from the correct position. (10) When a tire is changed, the current vehicle position mark may deviate from the correct position. HINT:
|
2. Check Display Check mode
HINT:
- This mode checks the color display on the multi-display.
- Illustrations may differ from the actual vehicle depending on the device settings and options. Therefore, some detailed areas may not be exactly the same as on the actual vehicle.
(a) Enter diagnostic mode
 .
.
|
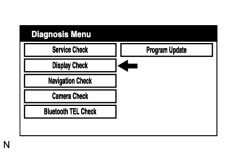
(b) Select "Display Check" from the "Diagnosis MENU" screen. |
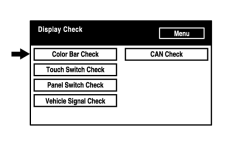
(c) Color Bar Check
|
(1) Select "Color Bar Check" from the "Display Check" screen. |
|
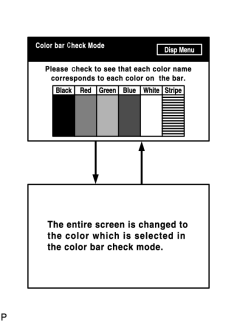
(2) Select a color bar from the "Color Bar Check Mode" screen. |
(3) Check the display color.
HINT:
- The entire screen turns to the color or stripe selected.
- Touch the display to return to the "Color Bar Check Mode" screen.
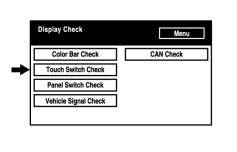
(d) Touch Switch Check
|
(1) Select "Touch Switch Check" from the "Display Check" screen. |
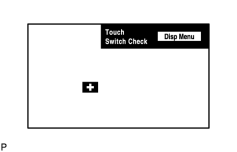
(2) Touch the display anywhere in the open area to perform the check when the "Touch Switch Check" screen is displayed.
HINT:
A "+" mark is displayed where the display is touched.
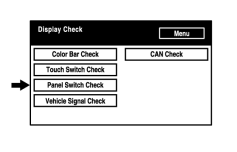
(e) Panel Switch Check
|
(1) Select "Panel Switch Check" from the "Display Check" screen. |
|
(2) Operate each switch and check that the switch name and condition are correctly displayed.
|
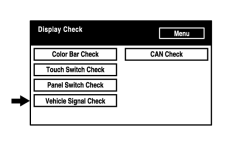
(f) Vehicle Signal Check
|
(1) Select "Vehicle Signal Check" from the "Display Check" screen. |
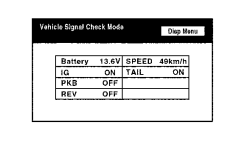
|
(2) When the "Vehicle Signal Check Mode" screen is displayed, check all the vehicle signal conditions. HINT:
|
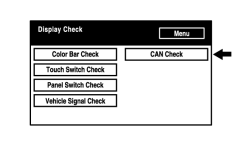
(g) CAN Check
|
(1) Select "CAN Check" from the "Display Check" screen. |
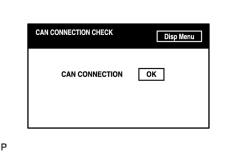
|
(2) Check the CAN CONNECTION CHECK result.
|
3. Check Navigation Check
HINT:
- This mode displays GPS satellite information.
- Illustrations may differ from the actual vehicle depending on the device settings and options. Therefore, some detailed areas may not be exactly the same as on the actual vehicle.
(a) Enter Diagnostic Mode
.
(b) Navigation Check
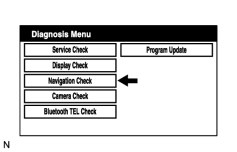
|
(1) Select "Navigation Check" from the "Diagnosis MENU" screen. |
(c) GPS Information
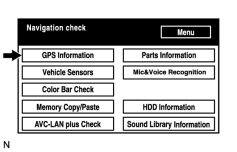
|
(1) Select "GPS Information" from the "Navigation Check" screen. |
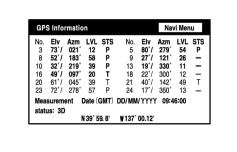
|
(2) When GPS information is displayed, check the GPS conditions. HINT:
|
(d) Vehicle Sensors
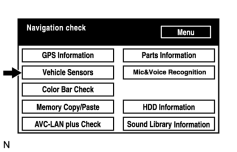
|
(1) Select "Vehicle Sensors" from the "Navigation Check" screen. |
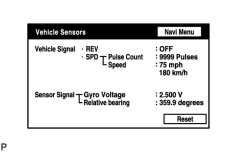
|
(2) Check all the signals and sensors when vehicle signal information is displayed. HINT:
|
(e) Color Bar Check
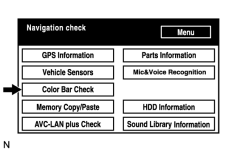
|
(1) Select "Color Bar Check" from the "Navigation Check" screen. |
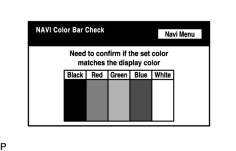
|
(2) Check each color of the color bar when the "NAVI Color Bar Check" screen is displayed. HINT:
|
|
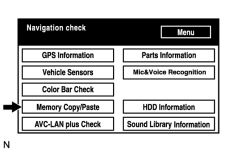
(f) Memory Copy/Paste (1) Select "Memory Copy/Paste" from the "Navigation check" screen. (2) HDD memory can be copied or pasted. |
(g) AVC-LAN plus Check
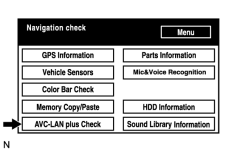
|
(1) Select "AVC-LAN plus Check" from the "Navigation check" screen. |
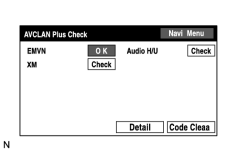
|
(2) Check the AVC-LAN plus check result. HINT:
|
(h) Parts Information
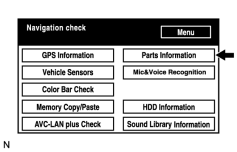
|
(1) Select "Parts Information" from the "Navigation check" screen. |
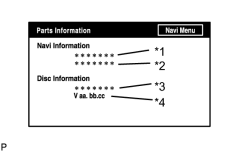
|
(2) Check the navigation and disc information when the "Parts Information" screen is displayed.
|
(i) Mic&Voice Recognition Check
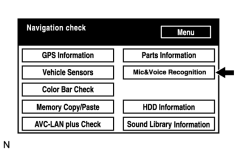
|
(1) Select "Mic&Voice Recognition Check" on the "Navigation Check" screen to display the "Mic&Voice Recognition Check" screen. |
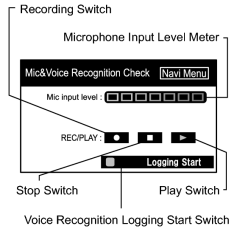
|
(2) When a voice is input into the microphone, check that the microphone input level meter changes according to the input voice. HINT:
|
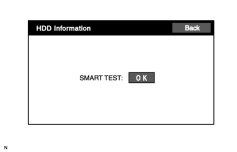
(j) HDD Information
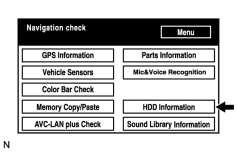
|
(1) Select "HDD Information" from the "Navigation check" screen. |
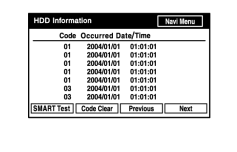
|
(2) Check for DTCs. HINT:
|
|
(3) Check the HDD by selecting "SMART Test" from the "HDD Information" screen. HINT:
|
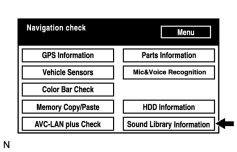
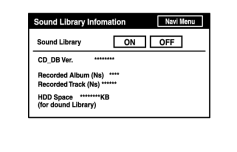
(k) Sound Library Information
|
(1) Select "Sound Library Information" from the "Navigation check" screen. |
|
(2) Check the sound library data. HINT:
|
4. Check "Bluetooth" TEL Check
HINT:
Illustrations may differ from the actual vehicle depending on the device settings and options. Therefore, some detailed areas may not be exactly the same as on the actual vehicle.
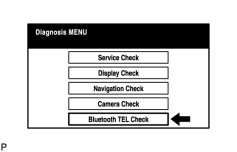
(a) Enter diagnostic mode
.
|
(b) Select ""Bluetooth" TEL Check" from the "Diagnosis MENU" screen. |
(c) "Bluetooth" Check
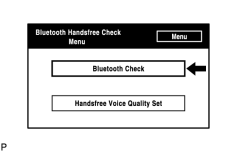
|
(1) Select ""Bluetooth" Check" from the ""Bluetooth" Handsfree Check Menu" screen. |
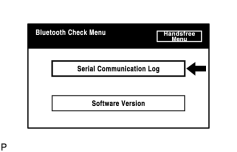
|
(2) Select "Serial Communication Log" from the ""Bluetooth" Check Menu" screen.
|
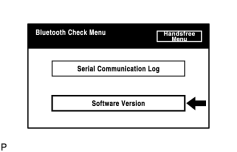
|
(3) Select "Software Version" from the ""Bluetooth" Check Menu" screen.
HINT:
This function is controlled by the display and navigation module display. |
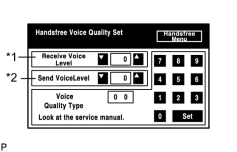
(d) Handsfree Voice Quality Set
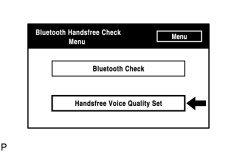
|
(1) Select "Handsfree Voice Quality Set" from the ""Bluetooth" Handsfree Check Menu" screen. |
|
(2) Check the handsfree voice level.
HINT:
This function is controlled by the display and navigation module display. NOTICE:
"Voice Quality Type" should not be changed. |

|

|